
Most apps require data updates through the internet. Once again, the http package has you covered. On this blog, we’ll use the http package to update data via the internet. Create a custom Dart object from the response. Get the data from the internet, use user input to update the existing title, and lastly, display the response on the screen. All of which are important for how to update data on the internet in Flutter. Let’s get started!
Additionally, you can also read my other blog posts from the past few days, which are titled How To Send Data On Flutter, How To Authenticate HTTP In Flutter, and Delete Data Using HTTP On Flutter.
Prerequisites
Firstly, To install the http package, add it to the pubspec.yaml file’s dependencies section. The current version of the http package can be found at pub.dev.
import 'package:http/http.dart' as http;dependencies:
http: <latest_version>Update Data On The Internet
Of course, the focal point of this blog was on how to update data on the internet in Flutter, for which the code will be given below. More explanation below.
Future<http.Response> updateAlbum(String title) {
  return http.put(
    Uri.parse('https://jsonplaceholder.typicode.com/albums/1'),
    headers: <String, String>{
      'Content-Type': 'application/json; charset=UTF-8',
    },
    body: jsonEncode(<String, String>{
      'title': title,
    }),
  );
}
The http.put() method returns a Future with a Response in it. A Future object indicates a prospective value or error that will be available in the future at some point. The title argument is passed to the updateAlbum() method, which is sent to the server to update the album.
Update Data On The Internet In Flutter Utilization
To demonstrate, such operation can be utilize on an app project like this code below where it updates data via the internet using Flutter, but there’s more you can do about like the code below it not only it updates data on the internet but also parse that data and then ask for user input then finally display it.
import 'dart:async';
import 'dart:convert';
import 'package:flutter/material.dart';
import 'package:http/http.dart' as http;
Future<Album> fetchAlbum() async {
final response = await http.get(
Uri.parse('https://jsonplaceholder.typicode.com/albums/1'),
);
if (response.statusCode == 200) {
// If the server did return a 200 OK response,
// then parse the JSON.
return Album.fromJson(jsonDecode(response.body));
} else {
// If the server did not return a 200 OK response,
// then throw an exception.
throw Exception('Failed to load album');
}
}
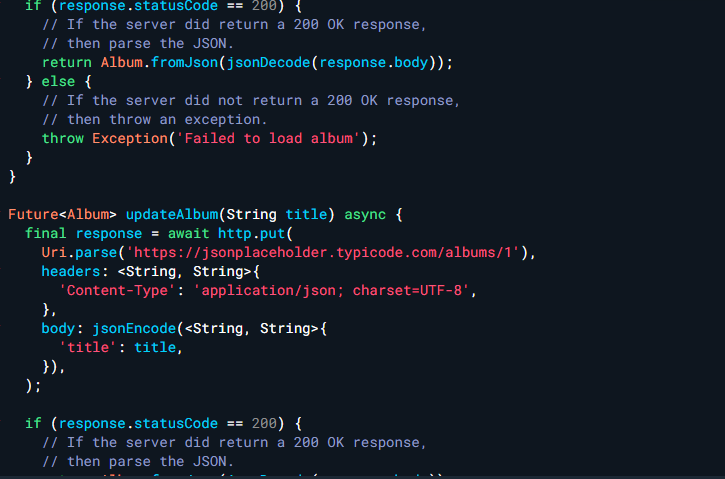
Future<Album> updateAlbum(String title) async {
final response = await http.put(
Uri.parse('https://jsonplaceholder.typicode.com/albums/1'),
headers: <String, String>{
'Content-Type': 'application/json; charset=UTF-8',
},
body: jsonEncode(<String, String>{
'title': title,
}),
);
if (response.statusCode == 200) {
// If the server did return a 200 OK response,
// then parse the JSON.
return Album.fromJson(jsonDecode(response.body));
} else {
// If the server did not return a 200 OK response,
// then throw an exception.
throw Exception('Failed to update album.');
}
}
class Album {
final int id;
final String title;
const Album({required this.id, required this.title});
factory Album.fromJson(Map<String, dynamic> json) {
return Album(
id: json['id'],
title: json['title'],
);
}
}
void main() {
runApp(const MyApp());
}
class MyApp extends StatefulWidget {
const MyApp({super.key});
@override
State<MyApp> createState() {
return _MyAppState();
}
}
class _MyAppState extends State<MyApp> {
final TextEditingController _controller = TextEditingController();
late Future<Album> _futureAlbum;
@override
void initState() {
super.initState();
_futureAlbum = fetchAlbum();
}
@override
Widget build(BuildContext context) {
return MaterialApp(
title: 'Update Data Example',
theme: ThemeData(
primarySwatch: Colors.blue,
),
home: Scaffold(
appBar: AppBar(
title: const Text('Update Data Example'),
),
body: Container(
alignment: Alignment.center,
padding: const EdgeInsets.all(8.0),
child: FutureBuilder<Album>(
future: _futureAlbum,
builder: (context, snapshot) {
if (snapshot.connectionState == ConnectionState.done) {
if (snapshot.hasData) {
return Column(
mainAxisAlignment: MainAxisAlignment.center,
children: <Widget>[
Text(snapshot.data!.title),
TextField(
controller: _controller,
decoration: const InputDecoration(
hintText: 'Enter Title',
),
),
ElevatedButton(
onPressed: () {
setState(() {
_futureAlbum = updateAlbum(_controller.text);
});
},
child: const Text('Update Data'),
),
],
);
} else if (snapshot.hasError) {
return Text('${snapshot.error}');
}
}
return const CircularProgressIndicator();
},
),
),
),
);
}
}Conclusion
In conclusion, On this blog, we used the http package to update data via the internet. Create a custom Dart object from the response. Get the data from the internet, use user input to update the existing title, and lastly, display the response on the screen. which are demonstrated on the code above, such operation can be utilize on an app project like similar to it. If you found this utilization outdated on the future, you could always check the official documentation. Thank you for reading once again if you found this useful please share.