In this blog, we will show the interface of the mirth connect;

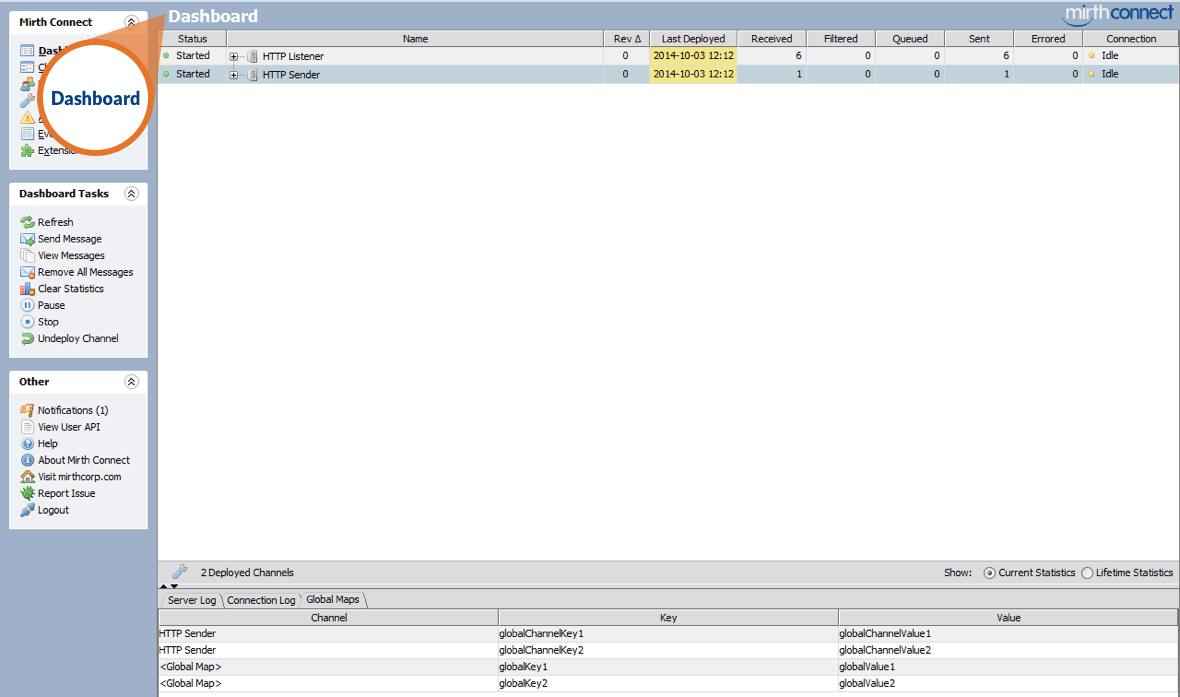
Logging into Mirth would take you to Mirth Connect Administrator, which has three sections:
A. Dashboard in the center
The dashboard shows the following “Channels” :
- Currently deployed.
- Channels status.
- Channel name.
- Last deployed Channel.
- Number of Messages Received – Filtered, Queued, Sent, Errors.
B. Navigation menu on the left
C. Log panel at the bottom
Channels
When the user creates a new Channel or edits an existing Channel, the Edit Channel page is displayed;
- Summary
- Source
- Destination
- Scripts
Each message can have one source and one or more destinations.
Summary
It includes general information about the Channel, such as name and description.

There have 4 sections in Summary;
a. Channel properties
They define the basic properties of Channel like Name,ID, Data types (It allows user to define incoming data type, and options to choose from HL7, ASC (X12), XML, Delimited text etc. data types.)
b. Message storage & pruning
It defines how a message should be stored or when it should get purged. To store the messages, Mirth allows you to choose from 5 different levels:
- Disabled (no message storing)
- Meta data (only stores meta data if any)
- Raw (stores raw & meta data)
- Production (stores raw, encoded, sent messages, response, & mapping)
- Development (stores everything)
c. Channel tags & metadata
It lets you add a tag for the Channel and define meta data that you want to save in Channel.
d. Channel description
To add a description for the Channel.
Source
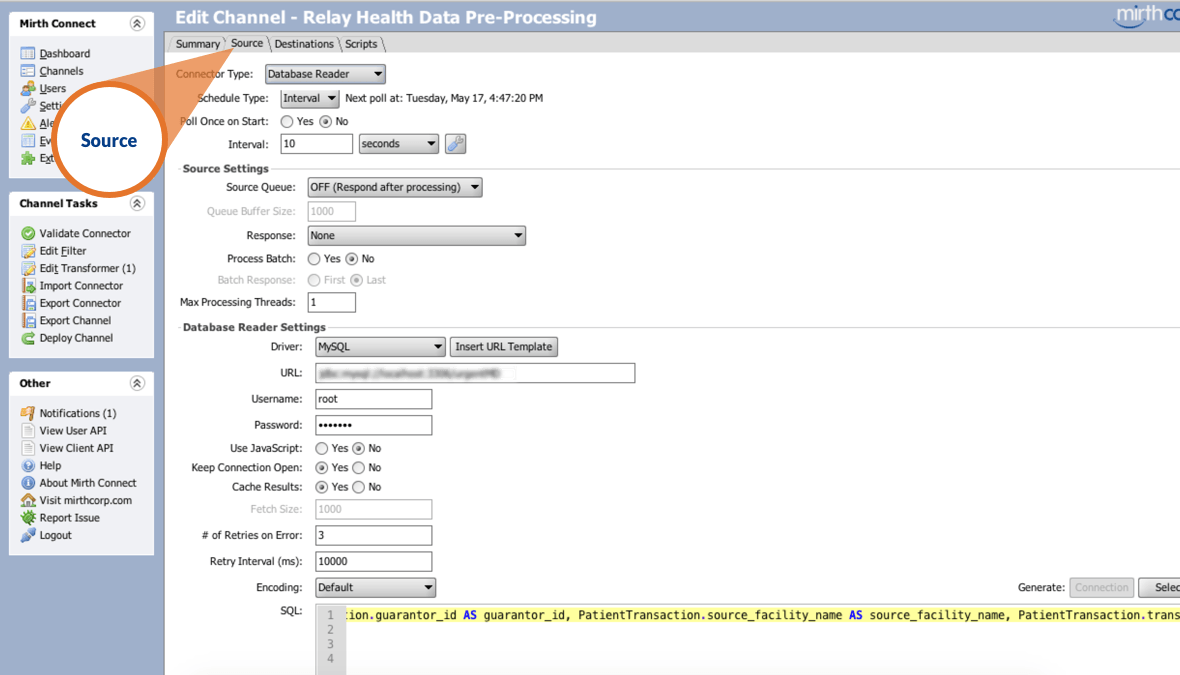
The “Source” let you define how Channel receives the data. For example, here we will show Database reader as selected connector type, in the image given below we have set up “Database Reader” as the Source for the Channel.

On selecting Database reader as Source it lets you decide settings from three options ;
a. Poll settings
It decide interval when you want Mirth to run a query to Database to get the data. You can also set a particular time or run a Cron job for this as well.
b. Source settings
It allows you to set source queue, you can get a response before processing or after processing, you can also set no. of threads of processing which will run to process data.
c. Database reader settings
The DB reader settings lets a user decide what kind of DB it is – MySQL, Oracle, PostgreSQL, SQLite etc. You can also set if you want to save cache results or not, or can keep the connection open as well. Under settings, you can choose no. of retries in case of error.
Destination
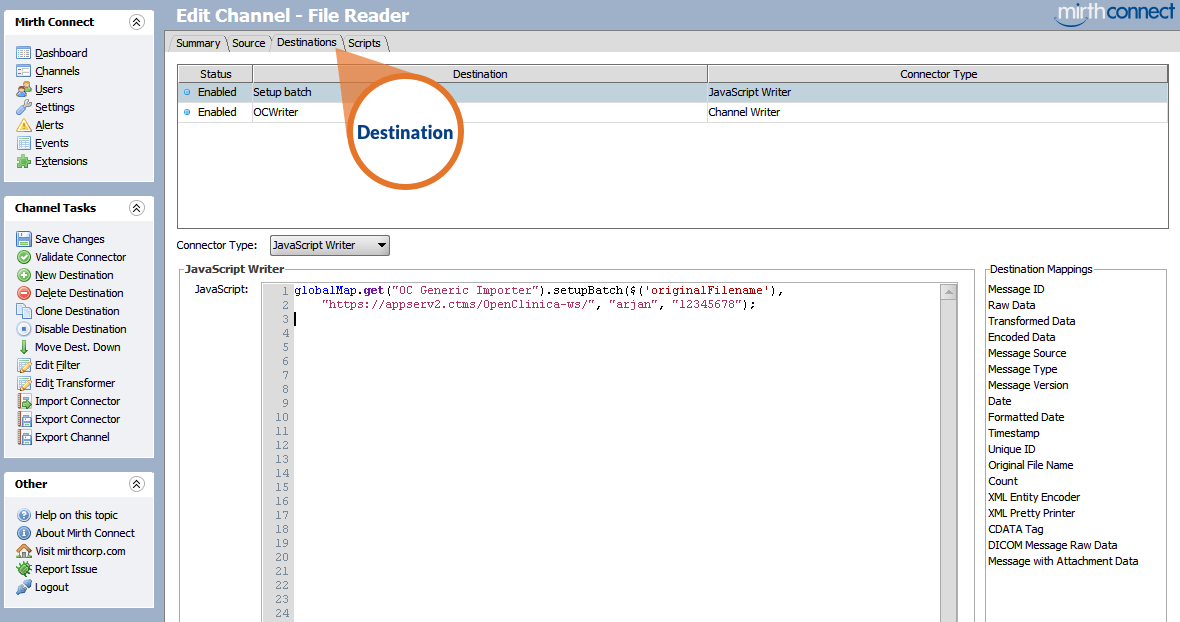
The “Destination” is pretty much similar to Source. Here we define the destination of the message. One of the main differences between Source & Destination is that there could be multiple destinations for a Channel.

The top bar of the Destination tab shows:
- Status
- Destination ID
- Connector type
- Chain of a Channel
The Destination has similarities to Source tab, it lets you chose Connector type, and further edit the settings of selected Connector type.
Filters
Source & Destination tab under Channels have an option of Filters on left side panel. Filter lets you determine if the message should be accepted or rejected.
Transformers
This also comes under both Source & Destination, it is on left side and clicking on it will take user to Edit Transformer screen. Transformers are rules that changes or re-arranges data in source message to create destination message. Transformer basically transforms the data in the way you want it to be transmitted.
Scripts
Last tab under Channel is for Scripts, there are four types of Scripts which is mentioned below, each used for a separate reason;
a. Deploy
This script is executed each time engine is started, it is mainly used to construct and initialize common objects that needs to persist while Mirth is running .
b. Shutdown
This script is executed each time engine is stopped, it is used to clean up anything created by Deploy script.
c. Preprocessor
This script is executed every time a message is received immediately before the message is normalized to XML.
d. Postprocessor
This script is executed immediately after a message is sent, it contains channel specific variables.
So, these are the basic key elements of the Mirth Connect interface.
But with Mirth being a big system, it is not easy to place an in depth analysis of all Mirth Connect elements at once. We have tried to cover all the details of the “Channel” in this part of the series. More posts about the rest of the Mirth elements will make their way to you soon!
