
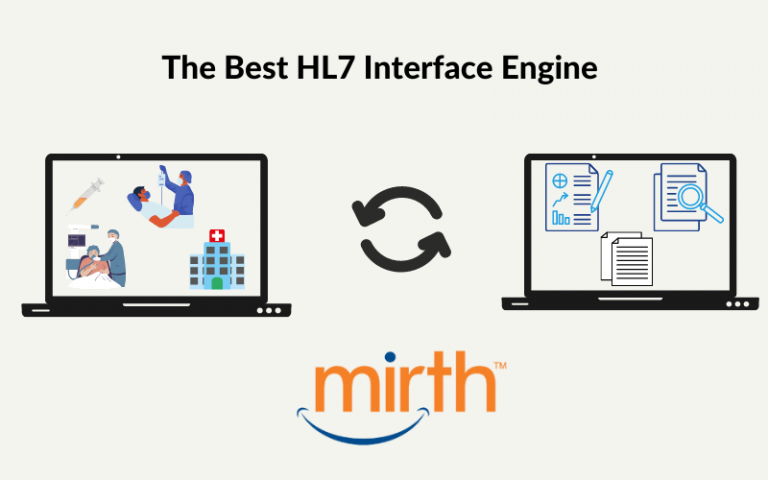
Introduction
Mirth Connect is a powerful integration engine that is widely used in healthcare organizations. One of its key features is the ability to interact with a database and form data in various formats. In this blog post, we will discuss how to set up Mirth Connect to interact with a database using XAMPP and form data in HL7 format.
Procedure:
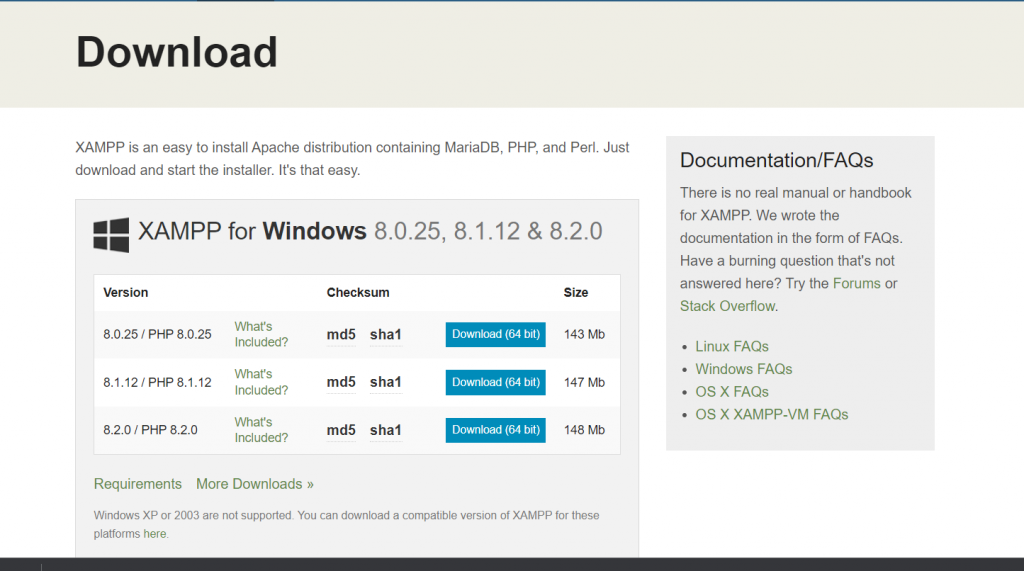
Install Xampp
- XAMPP is a popular web server solution that comes with Apache, PHP, and MySQL. It provides an easy way to set up a web server environment on your local machine. To get started, download and install XAMPP on your computer. You can download it on the link: https://www.apachefriends.org/download.html
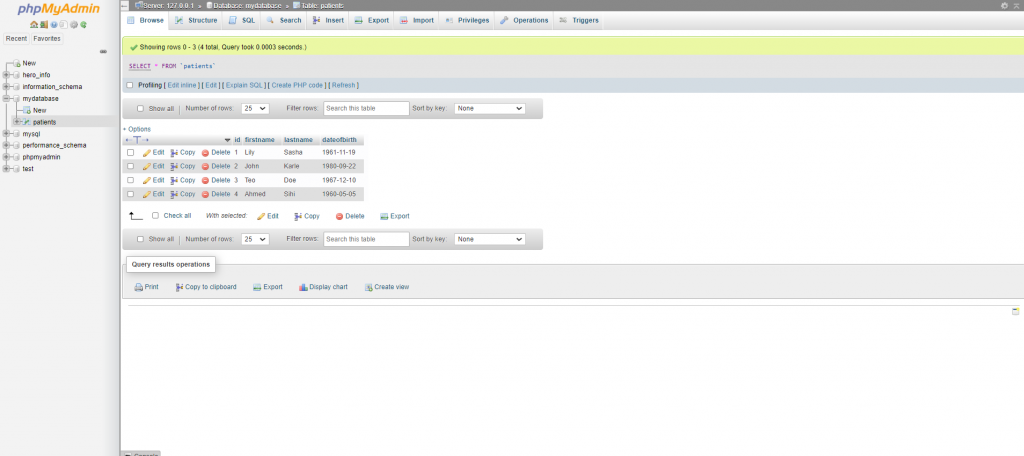
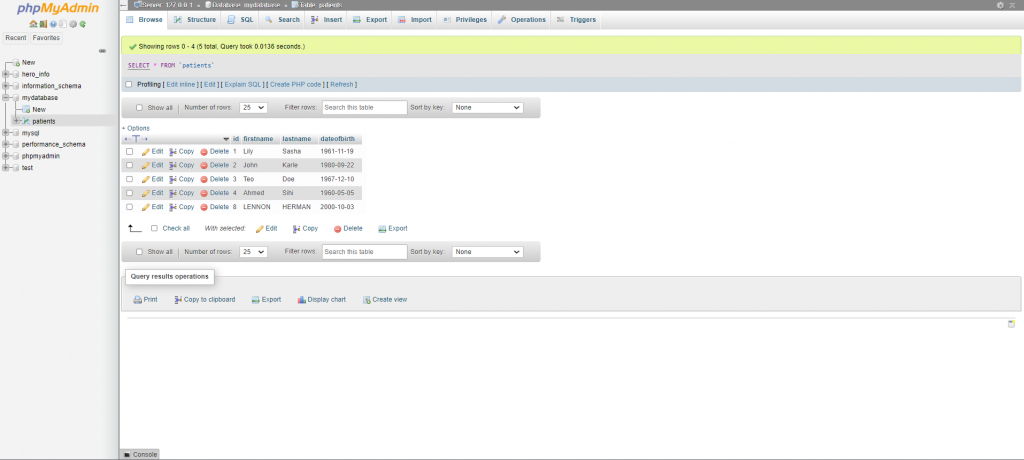
Create a MySQL Database
- Once you have installed XAMPP, you can create a MySQL database for Mirth Connect. Open the XAMPP control panel and start the Apache and MySQL services. Then, open your web browser and go to “http://localhost/phpmyadmin/“. From there, you can create a new database for Mirth Connect.
Install the JDBC Driver
- Mirth Connect supports any database that supports JDBC (Java Database Connectivity). You will need to install the appropriate JDBC driver for the database you want to connect to. In this case, we will be using MySQL, so you will need to download the MySQL JDBC driver.
- Once you have downloaded the driver, copy it to the “lib/custom” directory in your Mirth Connect installation directory.

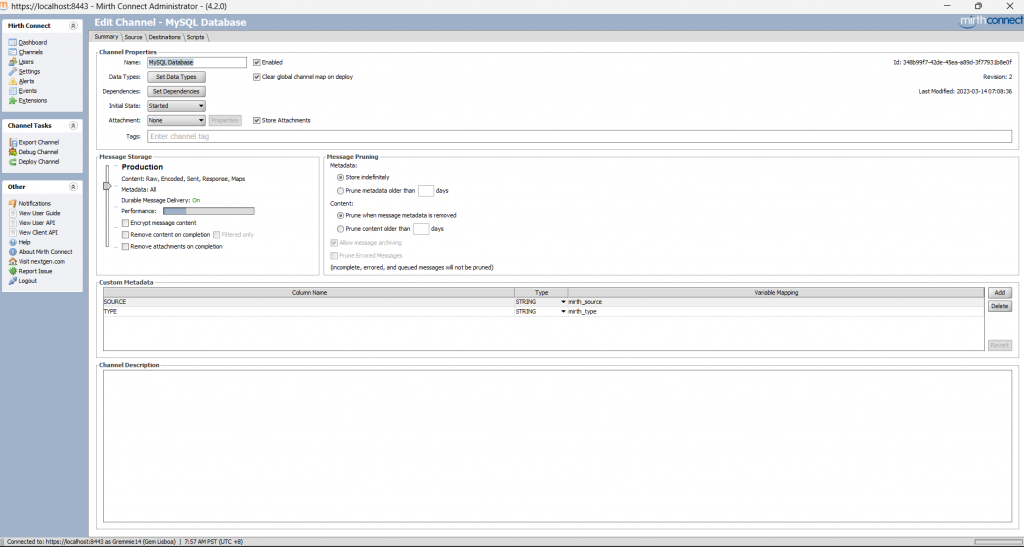
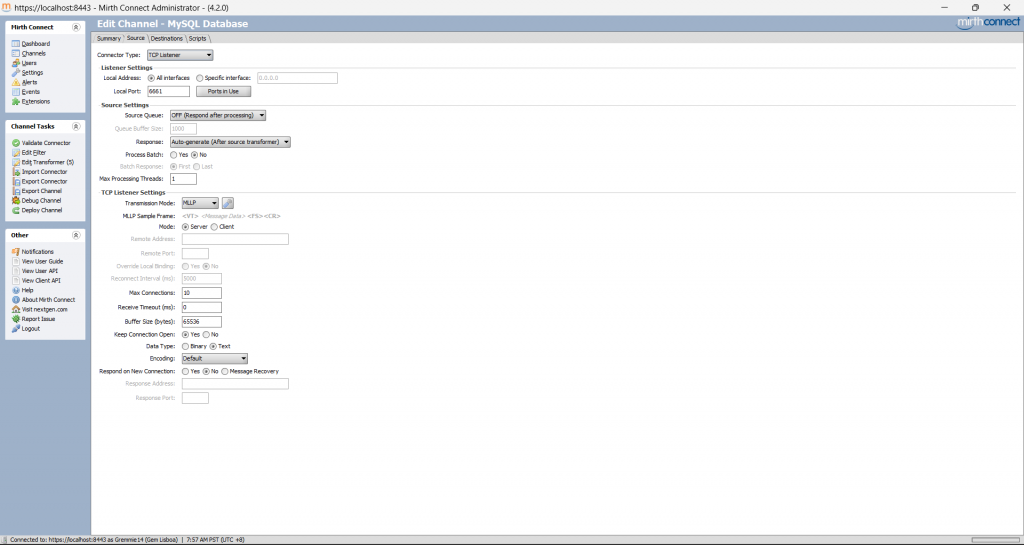
Create a Database Connection
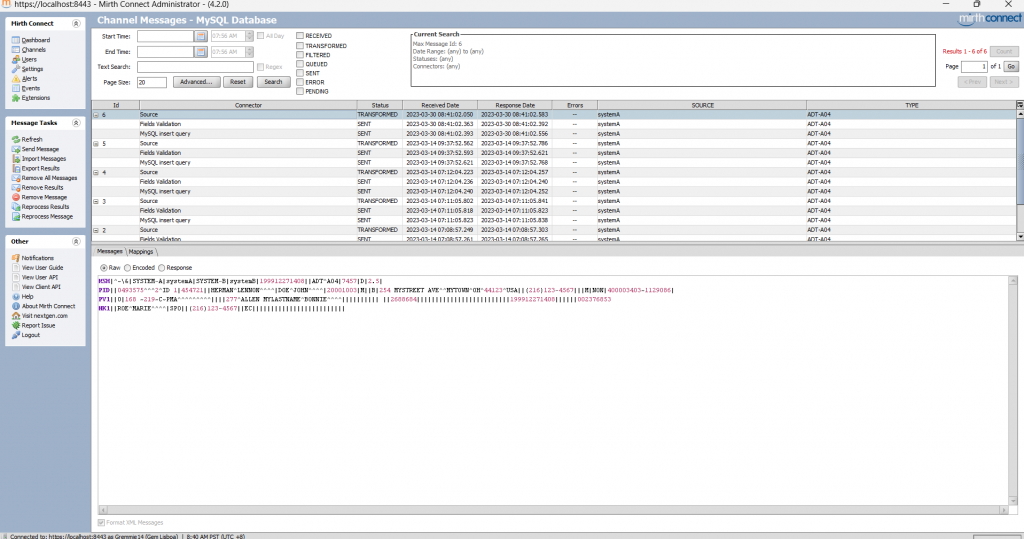
- To create a database connection in Mirth Connect, go to the “Channels” tab and click on the “New” button to create a new channel. In the channel editor, go to the “Source” tab and select “Database Reader” from the dropdown menu.
- In the “Database Reader” settings, you will need to enter the database connection details, including the JDBC driver class, database URL, username, and password. For the database URL, use “jdbc:mysql://localhost:3306/your_database_name” where “your_database_name” is the name of the database you created in Step 2.
- You can also specify the SQL query that Mirth Connect will use to retrieve data from the database.
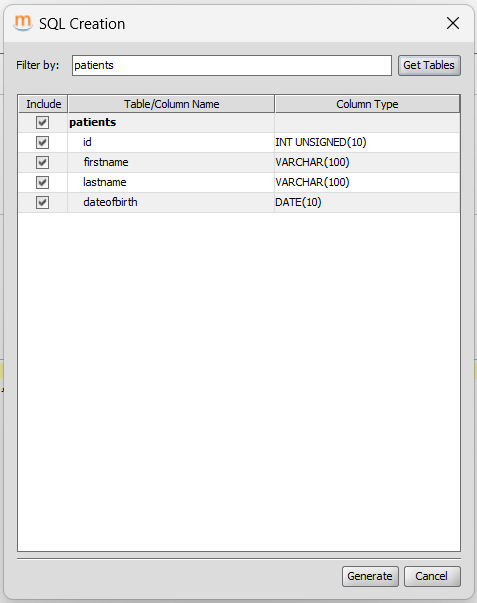
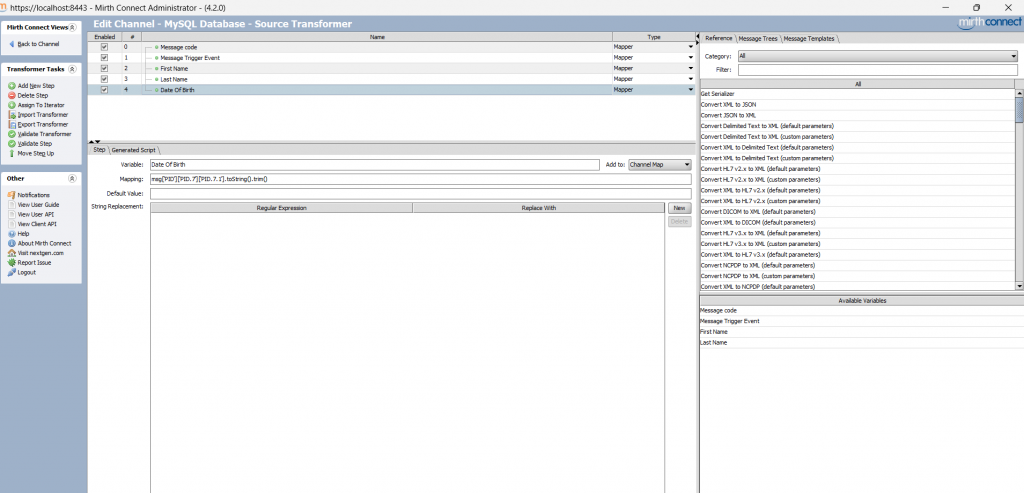
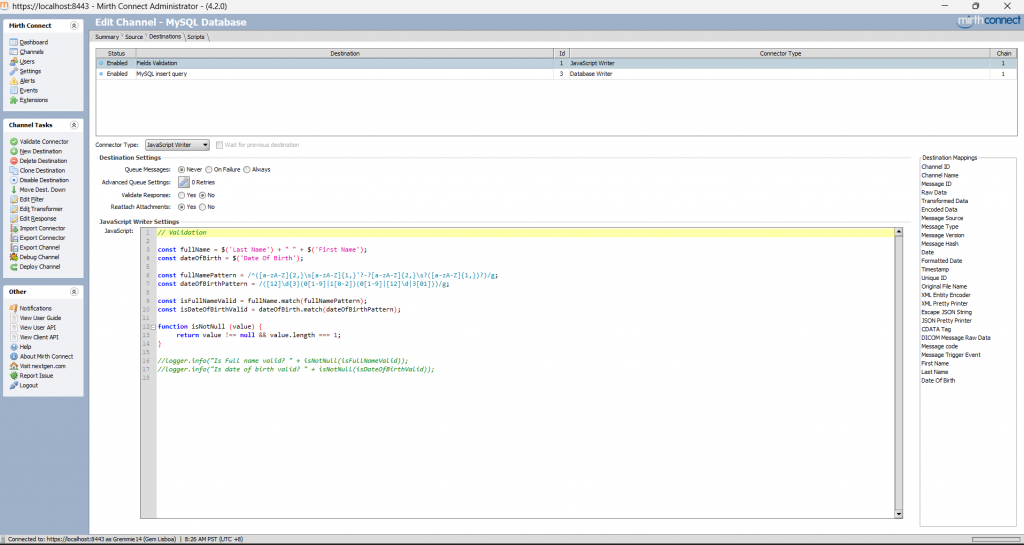
Map Database Columns to HL7 Message Segments
- Next, you will need to map the database columns to the HL7 message segments. This is done in the “Mappings” tab of the channel editor. You can drag and drop the database columns onto the appropriate HL7 message segments to create the mapping.
Create a Database Writer Connector
- To send data from Mirth Connect to a database, you will need to create a “Database Writer” connector. Go to the “Destinations” tab in the channel editor and select “Database Writer” from the dropdown menu.
- In the “Database Writer” settings, you will need to enter the database connection details, including the JDBC driver class, database URL, username, and password. For the database URL, use “jdbc:mysql://localhost:3306/your_database_name” where “your_database_name” is the name of the database you created in Step 2.

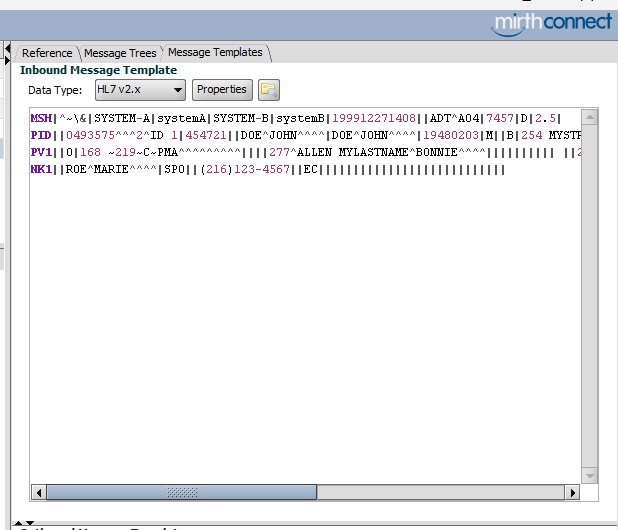
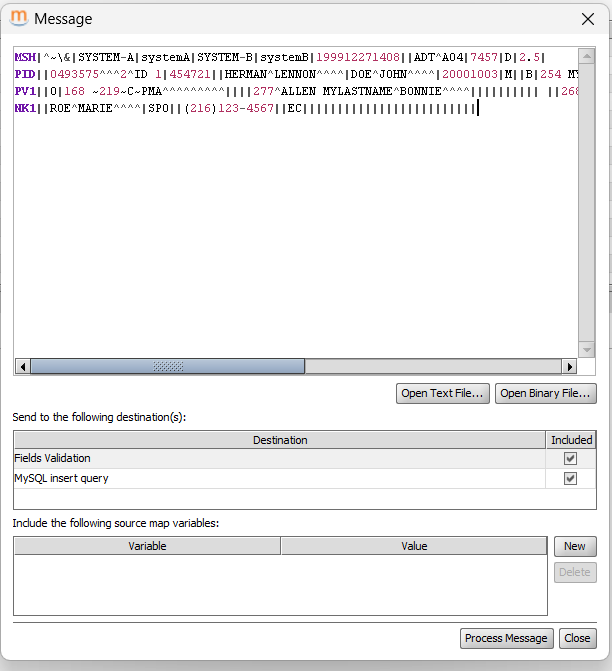
Form Data in HL7 Format
- Mirth Connect supports several data formats, including HL7, XML, and JSON. To form data in HL7 format, you can use the “JavaScript Transformer” connector.
- The “JavaScript Transformer” connector allows you to write custom JavaScript code to transform data from one format to another. This can be very useful when integrating data from different systems that use different data formats.
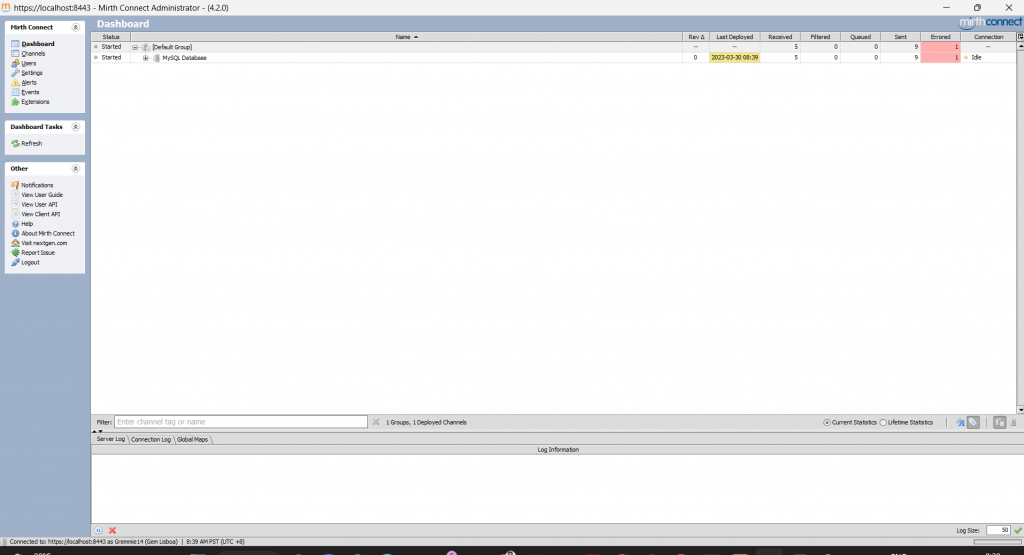
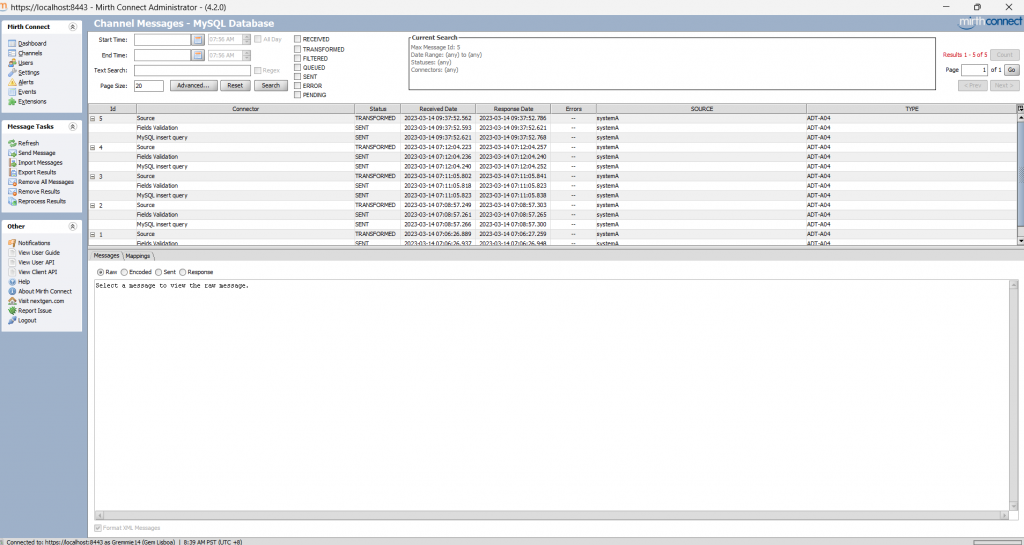
Save and Deploy the Channel
- Go to the Dashboard and Send the HL7 Code from Mirth Connect to XAMPP MySQL
Conclusion
Mirth Connect is a powerful integration engine that can interact with databases and form data in various formats. By following the steps outlined in this blog post, you can set up Mirth Connect to interact with a database and form data in HL7 format. This can be very useful in healthcare organizations where HL7 is a common data format.