In this article I am going to utilize the setState function to change a button’s properties like color, text and icon on my Flutter App.
You can read what’s a setState here: https://www.nucleiotechnologies.com/what-is-setstate-in-flutter/
The App
First your app should be a StatefulWidget before using setState function. In my case my app is already a StatefulWidget.
import 'package:flutter/material.dart';

void main() {
  runApp(const MyApp());
}

class MyApp extends StatefulWidget {
  const MyApp({Key? key}) : super(key: key);

  @override
  State<MyApp> createState() => _MyAppState();
}

class _MyAppState extends State<MyApp> {
  int currentIndex = 0;

  @override
  Widget build(BuildContext context) {
    return MaterialApp(
      debugShowCheckedModeBanner: false,
      home: Scaffold(
        appBar: AppBar(
          title: const Text("My First App"),
          backgroundColor: const Color(0xFFfb8b04),
        ),
        body: ButtonChange(),
        bottomNavigationBar: BottomNavigationBar(
          items: const [
            BottomNavigationBarItem(
              label: "Home",
              icon: Icon(Icons.home),
            ),
            BottomNavigationBarItem(
              label: "Settings",
              icon: Icon(Icons.settings),
            )
          ],
          currentIndex: currentIndex,
          onTap: (int index) {
            setState(() {
              currentIndex = index;
            });
          },
        ),
      ),
    );
  }
}

class ButtonChange extends StatefulWidget {
  const ButtonChange({Key? key}) : super(key: key);

  @override
  State<ButtonChange> createState() => _ButtonChangeState();
}

class _ButtonChangeState extends State<ButtonChange> {
  Color btnColor = Colors.red; // my button default color
  Text btnText = Text('Click Me'); // my button default text
  Icon btnIcon = Icon( // my button default icon
    Icons.android,
    color: Colors.green,
    size: 24.0,
  );

  @override
  Widget build(BuildContext context) {
    return Center(
      child: ElevatedButton.icon( // we will change properties on this button widget
        style: ElevatedButton.styleFrom(
          primary: btnColor, // assigned my variable color
          minimumSize: const Size(200, 50),
        ),
        onPressed: () {
          // will code setState here later
        },
        label: btnText, // assigned my variable text
        icon: btnIcon, // assigned my variable icon
      ),
    );
  }
}
Let’s just focus on my ElevatedButton widget. As you can see in the code above, with comments, my app is already set up to make changes in our button using the setState function. I am going to use the setState on the onPressed argument’s function that is already set up.
Implementing The setState
On the onPressed argument let’s write this code to change the properties using setState:
onPressed: () {
          setState(() {
            btnColor = Colors.green;
            btnText = Text('Click Success');
            btnIcon = Icon(
              Icons.check,
              color: Colors.white,
              size: 24.0,
            );
          });
        }
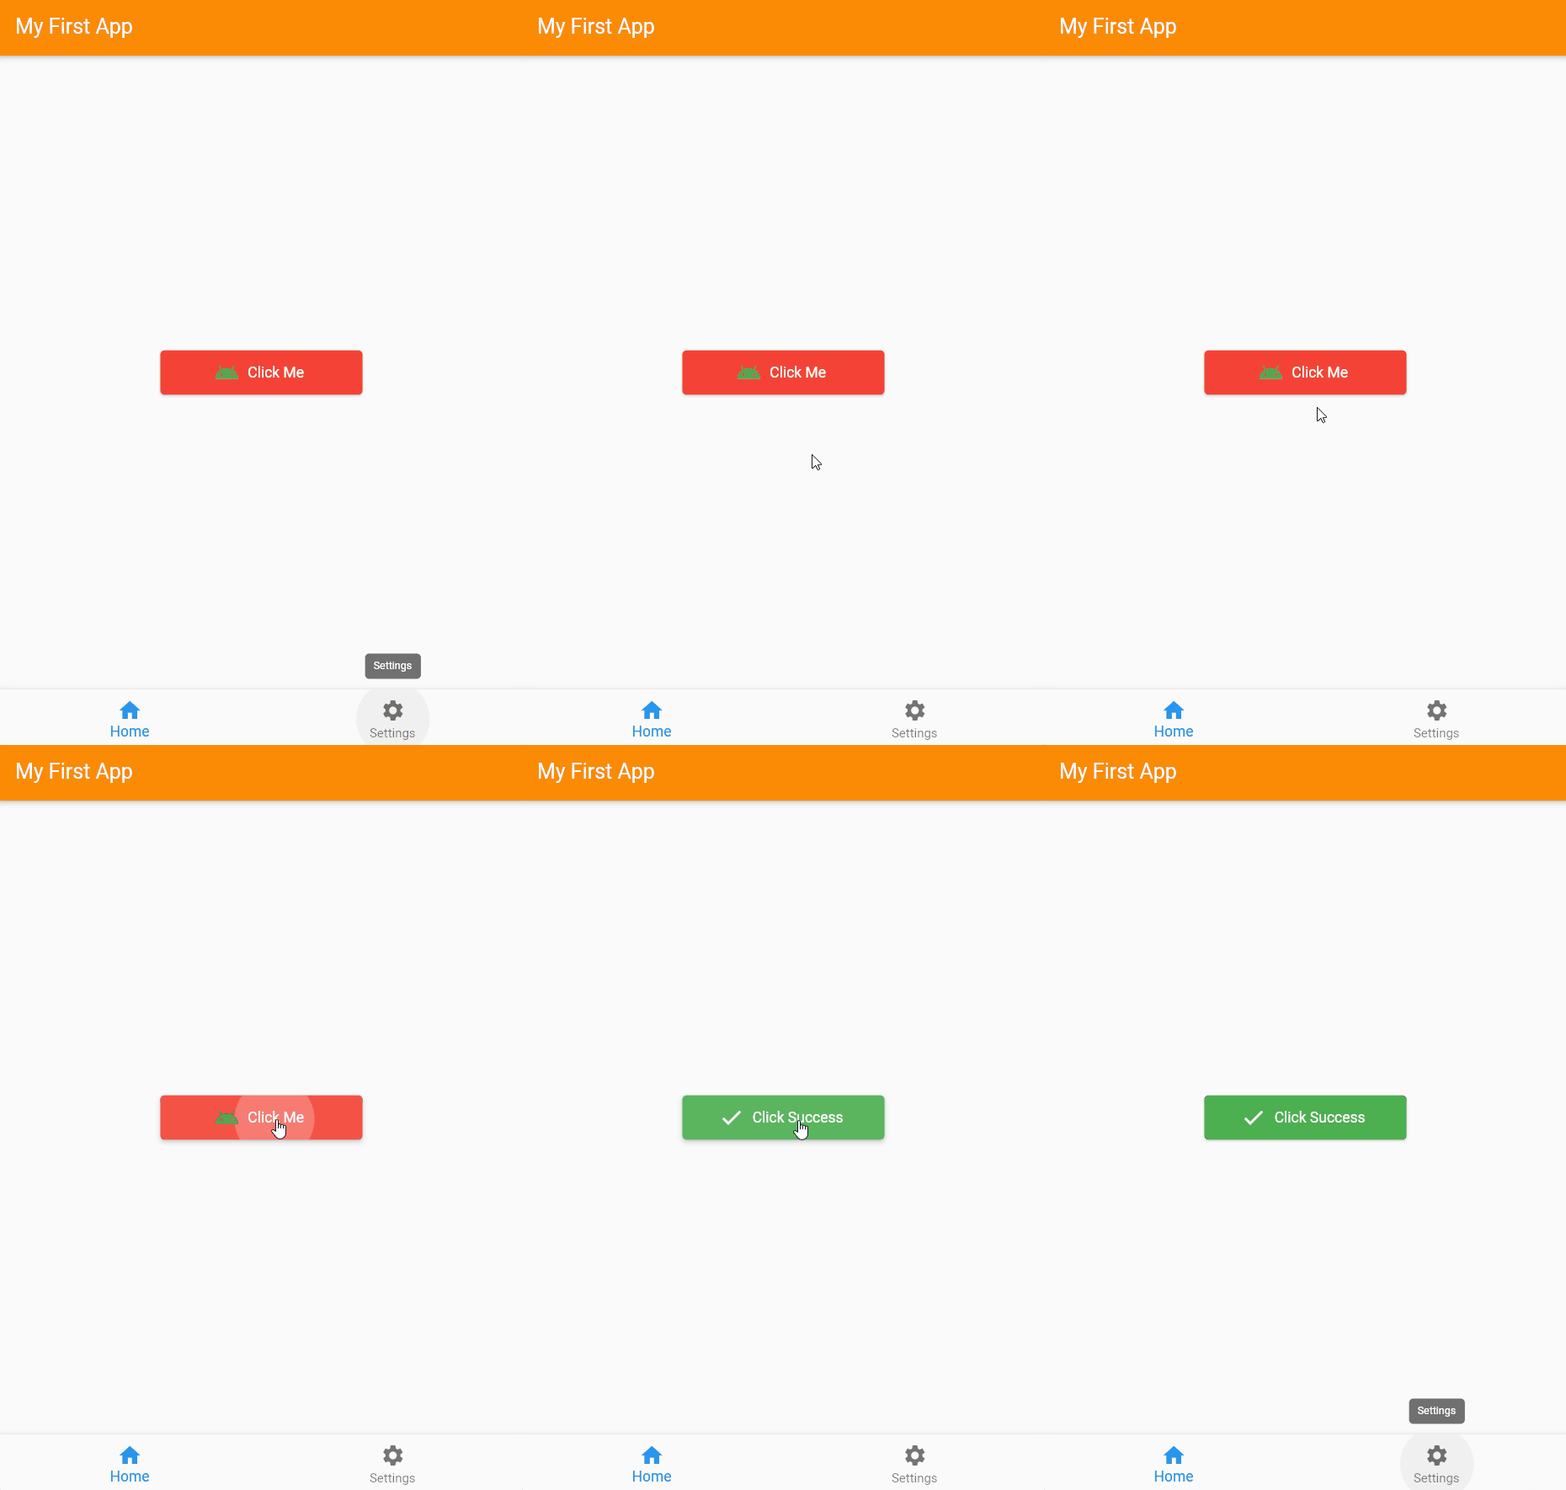
That code will set our ElevatedButton widget properties with green color, a new text ‘Click Success’ and a new check icon colored white when the button is clicked.
The Result

Yay! Check out the result of the setState. It works nicely and looks nice too thanks to MaterialApp.
Conclusion
I’ve discussed how to use setState on a basic action like altering the color, text, and icon of a button in my recent flutter project.
Use setState in your Flutter mobile app; you’ll need it on your Flutter journey. Stay connected by following me on my Flutter journey!
