
When it comes to taking a screenshot, there should be no difficult parts. However, you may find it difficult to fit all of the relevant information and will be forced to combine separate screenshots using a photo editor.
The good news is that you can avoid this annoyance by installing a free Chrome extension.
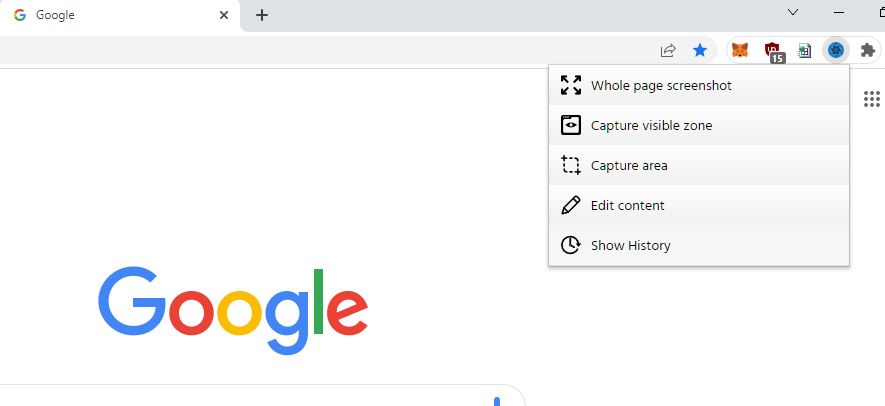
Take a Whole Page Screenshot:
- Download ScreenCapture Extension for Chrome
- All you have to do to access the extension’s menu is click its icon. Select Whole page screenshot if you need to take a screenshot of the entire page. ScreenCapture will scroll through the entire page and open a new tab with the screenshot in it.
- ScreenCapture allows you to edit screenshots without having to open another app or website. Using the extension, you can add text, arrows, and other elements. When you’re done editing, you can save it as a PDF, PNG, or copy it to your clipboard.
- Select Capture area if you require more control over the screenshot. By resizing the box, you can modify the captured area. To capture a scrolling screenshot, click and hold the lower part of the box while scrolling the page with your mouse. Simply press Esc to cancel taking a screenshot.
- Open the extension’s menu and select Show History to view your screenshots. You can view, download, or delete your screenshots from there.
References:
https://www.makeuseof.com/how-to-full-page-screenshot-chrome-firefox/