
Step 1: Pre-Req: Install Java JDK
Make sure you have JDK 1.8 installed on your system as shown below.
# java -version
openjdk version "1.8.0_102"
OpenJDK Runtime Environment (build 1.8.0_102-b14)
OpenJDK 64-Bit Server VM (build 25.102-b14, mixed mode)
If you don’t have JDK installed, use yum to install it as shown below:
yum -y install java-1.8.0-openjdkYou should see the following JDK related packages installed on your system:
# rpm -qa | grep -i jdk
java-1.8.0-openjdk-headless-1.8.0.102-1.b14.el7_2.x86_64
java-1.8.0-openjdk-1.8.0.102-1.b14.el7_2.x86_64
java-1.8.0-openjdk-devel-1.8.0.102-1.b14.el7_2.x86_64
Step 2: Install MySQL/MariaDB
Install MySQL / MariaDB server as shown below. For this, you should install the following two mariadb packages.
yum install mariadb

yum install mariadb-server
Note: If you are using a older version of Linux distro, where mariadb-server package is not available in the yum repository, then install the mysql-server package as shown below.
yum install mysql-serverOnce MariaDB is installed, you’ll see the following packages on your system:
# rpm -qa | grep -i maria
mariadb-5.5.50-1.el7_2.x86_64
mariadb-server-5.5.50-1.el7_2.x86_64
mariadb-libs-5.5.50-1.el7_2.x86_64
Once mariadb is installed, start it and make sure it is running properly.
systemctl start mariadb

systemctl status mariadb
You also may want to run the following to setup some security settings for your MySQL/MariaDB installation. This will also assign a root password for your database.
/usr/bin/mysql_secure_installationStep 3: Create MySQL database for MirthConnect
Let us create a database called “nucleiotechnologies”, which will be used by the mirthconnect installation.
For this, use the mysql command with mysql’s root username and password as shown below.
# mysql -u root -pMySQLRootPwd
MariaDB [(none)]> create database nucleiotechnologies;
Once the database is created, create a user called “nucleiotechnologies”, and assign a password for this. This account will be used in the mirthconnect configuration to talk to the database.
MariaDB [(none)]> grant all on nucleiotechnologies.* to 'nucleiotechnologies'@'localhost' identified by 'DBSecretPwd!' with grant option;

MariaDB [(none)]> flush privileges;
At this stage, you’ll not see any mirthconnnect related tables in this database. But, once you’ve installed mirthconnect, you’ll see multiple tables here.
# mysql -u root -pMySQLRootPwd
MariaDB [(none)]> use sysadmin;
Database changed
MariaDB [sysadmin]> show tables;
Empty set (0.00 sec)
Step 4: Download and Install Mirth Connect
Download mirthconnect from https://www.nextgen.com/products-and-services/mirth-connect-downloads
For this tutorial, we’ll be using the tar.gz format of the mirthconnect install.
First, get the download link for the tar.gz, and use wget command to it to your server as shown below.
cd ~
wget http://downloads.mirthcorp.com/connect/3.12.0.b2650/mirthconnect-3.12.0.b2650-unix.tar.gz
Once it is downloaded, untar it as shown below.
tar xvfz mirthconnect-3.4.2.8129.b167-unix.tar.gzBy default, this will create the “Mirth Connect” directory under your current directory.
To manage this better, move this to the /opt directory, and also remove the “space” in the name, and make it all lowercase, which is easier to manage in Linux environment.
In this example, we’ll rename “Mirth Connect” to “mirthconnect”, and at the same time move it to /opt directory as shown below.
mv Mirth\ Connect/ /opt/mirthconnectStep 5: Modify MirthConnect Config Files
The main mirthconnect properties file is mirth.properties located under /opt/mirthconnect/conf directory.
vi /opt/mirthconnect/conf/mirth.propertiesIn this file, modify the following parameters:
http.port = 8080
https.port = 8443
database = mysql
database.url = jdbc:mysql://localhost:3306/nucleiotechnologies
database.username = nucleiotechnologies
database.password = DBSecretPwd!
In the above:
- http.port – 8080 is the default mirthconnect HTTP port. You can change this value to match your environment.
- https.port – 8443 is the default mirthconnect HTTP port. You can change this value to match your environment.
- database – By default this will say derby. Change this value to mysql as shown above.
- database.url – Since we are using MySQL database, set this database.url to the value shown above. By default this will point to the default derby database. Change this value. Make sure at the end of the url, it has the mysql database name that you created earlier. If you are copy/pasting this value from the configuration file comment lines, it will have mirthdb here. You should change this to your databasename.
- database.username – Set this to the mysql user that we created earlier.
- database.password – Set this value to the corresponding password for your mysql username.
Step 6: Start MirthConnect
Now, start the mirthconnect as a service using mcservice command.
# /opt/mirthconnect/mcservice start
Starting mcservice

# /opt/mirthconnect/mcservice status
mcservice is running.
Step 7: Add Mirthconnect to Systemd
If you are running CentOS 7 (or RedHat), then you may want to add mirthconnect to the systemd startup.
For this, create the following mirthconnect.service file
# vi /usr/lib/systemd/system/mirthconnect.service
[Unit]
Description=MirthConnect
After=network.target

[Service]
Type=forking

User=root
Group=root
ExecStart=/opt/mirthconnect/mcservice start
ExecStop=/opt/mirthconnect/mcservice stop
ExecRestart=/opt/mirthconnect/mcservice	restart

TimeoutSec=60

[Install]
WantedBy=multi-user.target
Note: If you’ve installed mirthconnect as a different user other than root, then change the User and Group in the above file accordingly.
After that you can use systemctl to start and stop mirthconnect as shown below.
systemctl start mirthconnect

systemctl stop mirthconnect
To make it start automatically when the server is rebooted, enable this systemd server for startup as shown below.
systemctl enable mirthconnectStep 8: Login to MirthConnect Administrator
You can use either the following HTTP or HTTPS url:
- http://{your-ip-address}:8080
- https://{your-ip-address}:8443
The Mirth Connect UI will have the following two options:
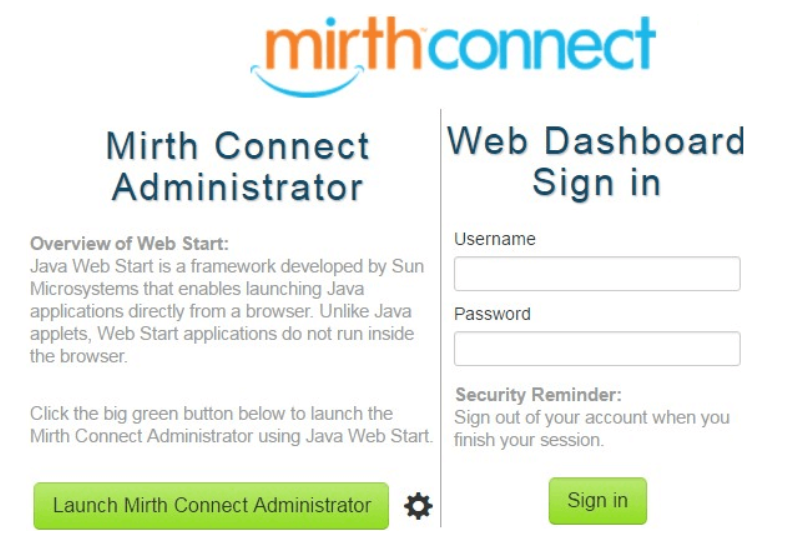
- MirthConnect Administartor – This will launch the administrator UI using java webstart.
- Web Dashboard Sign in – If you launched the URL with http, this will display “Access Secure Site” button. Click on that to just use mirthconnect from the browser. If you use the HTTPS url, this will show the username and password textbox here.
The default mirthconnect username and password is admin/admin.
Source: https://www.thegeekstuff.com/2017/01/mirthconnect-install-linux/