Howdy, today I am going to cover how to implement a tab in your flutter app. I am going to expand my project from the last blog post I made. This time, I’m just going to add a new tab for future blogs and fill it with content. Let’s get started!
On this blog I am going to use the Tab in Material Design.
Material Design Tab
Tabs organize and facilitate navigation between related and, at the same level of hierarchy, groupings of material. Furthermore, there are two types of tabs. “fixed tabs” and “scrollable tabs”. We are going to use “fixed tabs” on this blog. On the contrary, fixed tabs show all tabs on one screen, each with a fixed width. The width of each tab is calculated by dividing the number of tabs by the width of the screen. They do not scroll to expose more tabs; the displayed tab set is the only one available.
You can check out the docs here: https://material.io/components/tabs/flutter#fixed-tabs
Application
For instance, here’s the source code of my project. I am going to implement Material Tabs in it.
import 'dart:convert';

import 'package:flutter/cupertino.dart';
import 'package:flutter/material.dart';
import 'package:http/http.dart';

void main() {
  runApp(const MyApp());
}

class MyApp extends StatefulWidget {
  const MyApp({Key? key}) : super(key: key);

  @override
  State<MyApp> createState() => _MyAppState();
}

class _MyAppState extends State<MyApp> {
  // This widget is the root of your application.
  @override
  Widget build(BuildContext context) {
    return MaterialApp(
      debugShowCheckedModeBanner: false,
      title: 'Flutter Demo',
      theme: ThemeData(
        primarySwatch: Colors.red,
      ),
      home: const HomePage(),
    );
  }
}

class HomePage extends StatefulWidget {
  const HomePage({Key? key}) : super(key: key);

  @override
  State<HomePage> createState() => _HomePageState();
}

class _HomePageState extends State<HomePage> {
  @override
  Widget build(BuildContext context) {
    return Scaffold(
      appBar: AppBar(
        backgroundColor: Colors.amber,
        title: Text('Todo'),
      ),
      body: TodoList(),
    );
  }
}

class TodoList extends StatefulWidget {
  const TodoList({Key? key}) : super(key: key);

  @override
  State<TodoList> createState() => _TodoListState();
}

class _TodoListState extends State<TodoList> {
  List<dynamic> data = <dynamic>[];
  bool valid = true;
  void getData() async {
    try{
      Response response = await get(
      Uri.parse('https://jsonplaceholder.typicode.com/todos'),
    );

    data = jsonDecode(response.body);
    }catch (e) {
      setState(() {
        valid = false;
      });
    }

    // print(data); // will print a list of datasets
  }

  @override
  Widget build(BuildContext context) {
    getData();
    return Visibility(
      child: Center(
        child: ListView.builder(
            itemCount: data.length, // assign length of the data here
            itemBuilder: (context, index) {
              // returns a Card widget
              return Card(
                child: ListTile(
                  leading: Text(
                    data[index]['id'].toString(), // assigned data's id here
                    style: TextStyle(fontSize: 15, fontWeight: FontWeight.bold),
                  ),
                  title: Text(
                    data[index]['title'], // assigned data's title here
                  ),
                  trailing: CupertinoSwitch(
                    value: data[index]
                        ['completed'], // assigned data's completed status here
                    onChanged: (bool status) {},
                    activeColor: Colors.amber,
                  ),
                ),
              );
            }),
      ),
      replacement: const SizedBox(
        height: 50,
        child: Center(
          child: Text(
                      "Cannot load data",
                      style: TextStyle(fontSize: 15, fontWeight: FontWeight.bold),
                    ),
        ),
      ),
      visible: valid,
    );
  }
}
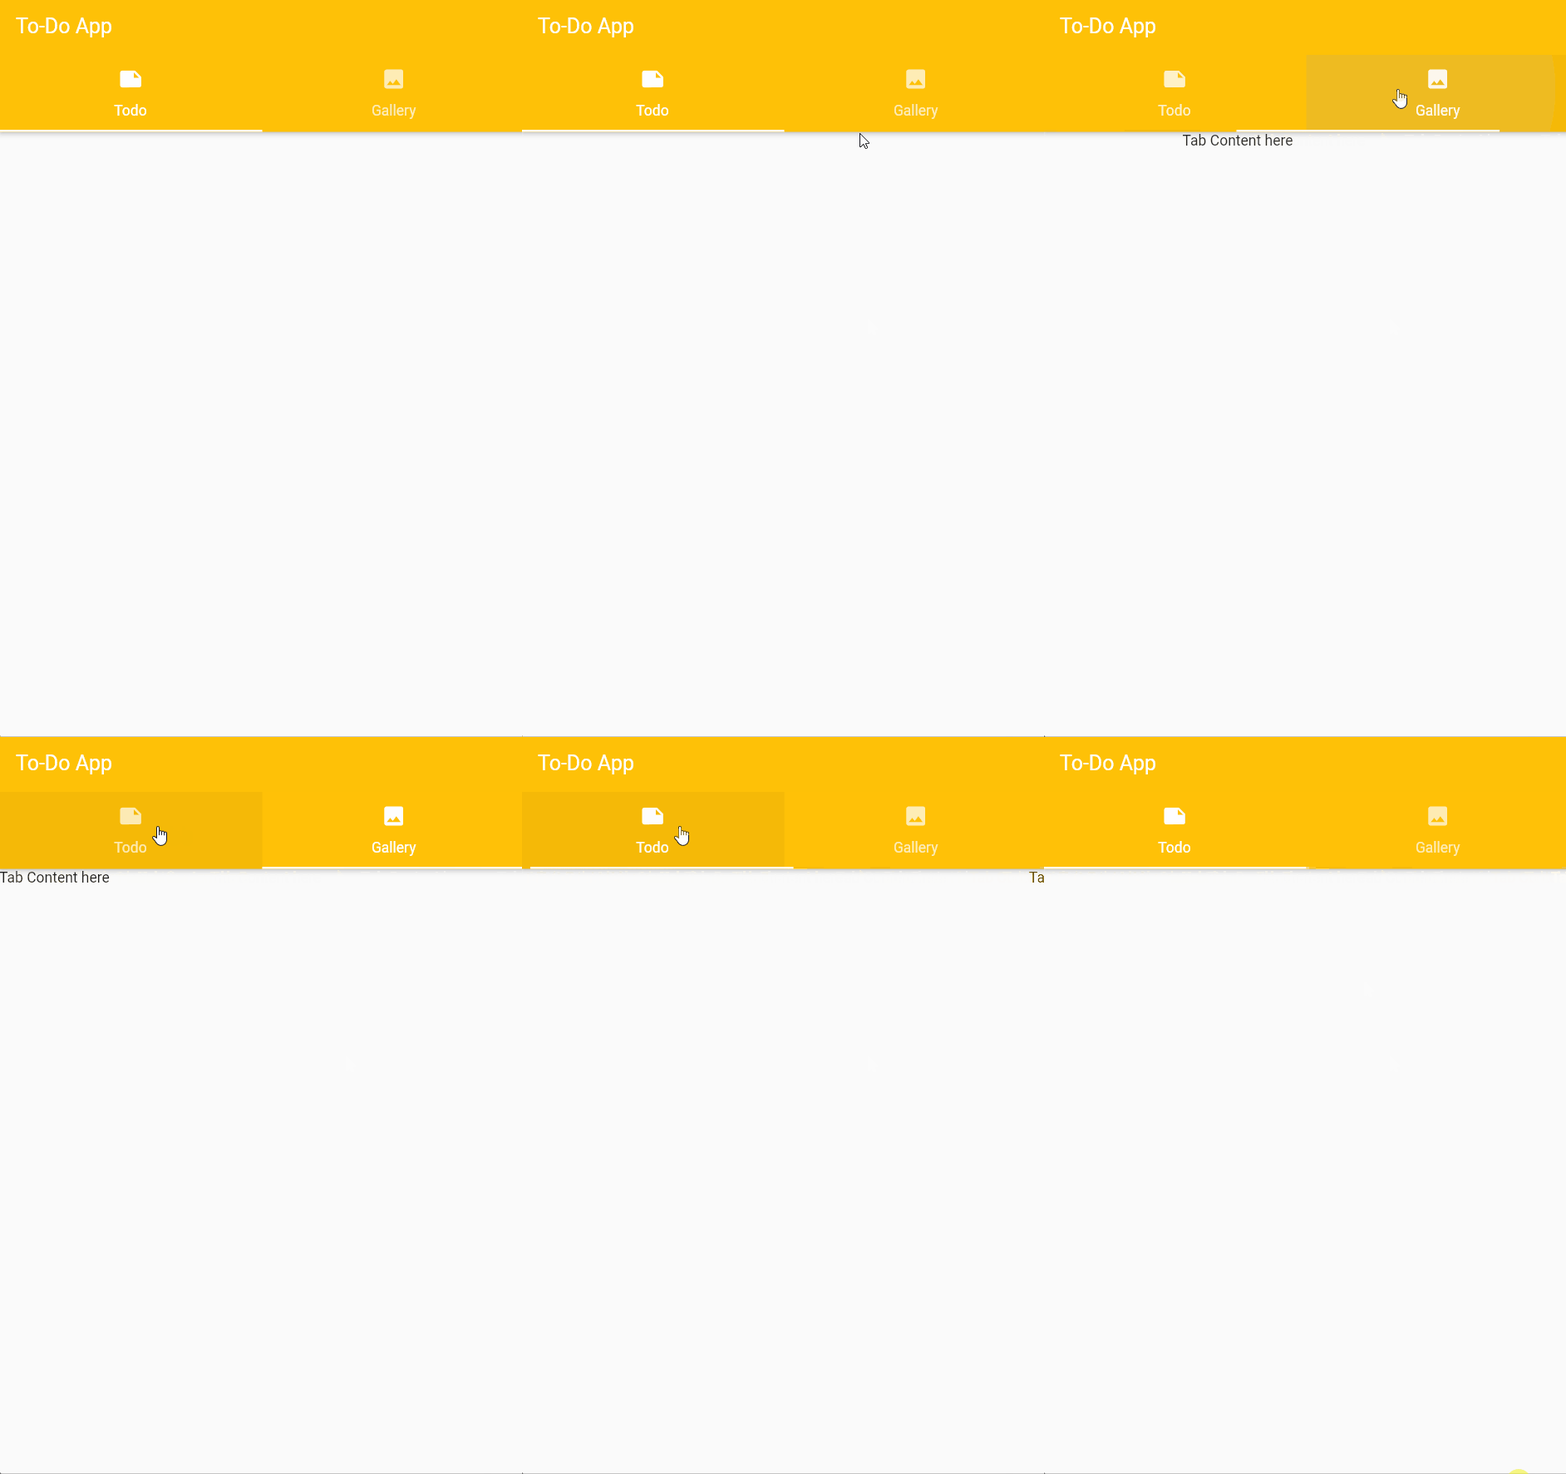
In the first place I am going to wrap the HomePage widget of my app with “DefaultTabController” widget and define the number of tabs I want to make in the app by assigning 2 in the length argument. As a result, I have to make a widget called “TabBar” in the bottom argument of my “HomePage” widget with Tab widget assigned in the “tabs” argument. Furthermore, in the body argument of the “HomePage” widget I also have to wrap the contents in “TabBarView” widget.
Check the full application code below:
import 'dart:convert';

import 'package:flutter/cupertino.dart';
import 'package:flutter/material.dart';
import 'package:http/http.dart';

void main() {
  runApp(const MyApp());
}

class MyApp extends StatefulWidget {
  const MyApp({Key? key}) : super(key: key);

  @override
  State<MyApp> createState() => _MyAppState();
}

class _MyAppState extends State<MyApp> {
  // This widget is the root of your application.
  @override
  Widget build(BuildContext context) {
    return MaterialApp(
      debugShowCheckedModeBanner: false,
      title: 'Flutter Demo',
      theme: ThemeData(
        primarySwatch: Colors.red,
      ),
      home: DefaultTabController(length: 2, child: HomePage()),
    );
  }
}

class HomePage extends StatefulWidget {
  const HomePage({Key? key}) : super(key: key);

  @override
  State<HomePage> createState() => _HomePageState();
}

class _HomePageState extends State<HomePage> {
  @override
  Widget build(BuildContext context) {
    return Scaffold(
      appBar: AppBar(
        backgroundColor: Colors.amber,
        title: const Text('To-Do App'),
        bottom: const TabBar(indicatorColor: Colors.white, tabs: [
          Tab(
            text: 'Todo',
            icon: Icon(Icons.note),
          ),
          Tab(
            text: 'Gallery',
            icon: Icon(Icons.image),
          ),
        ]),
      ),
      body: TabBarView(children: [
        const TodoList(),
        Text('Tab Content here'),
      ]),
    );
  }
}

class TodoList extends StatefulWidget {
  const TodoList({Key? key}) : super(key: key);

  @override
  State<TodoList> createState() => _TodoListState();
}

class _TodoListState extends State<TodoList> {
  List<dynamic> data = <dynamic>[];
  bool valid = true;
  void getData() async {
    try {
      Response response = await get(
        Uri.parse('https://jsonplaceholder.typicode.com/todos'),
      );

      data = jsonDecode(response.body);
    } catch (e) {
      setState(() {
        valid = false;
      });
    }

    //  print(data); // will print a list of datasets
  }

  @override
  Widget build(BuildContext context) {
    getData();
    return Visibility(
      child: Center(
        child: ListView.builder(
            itemCount: data.length, // assign length of the data here
            itemBuilder: (context, index) {
              // returns a Card widget
              return Card(
                child: ListTile(
                  leading: Text(
                    data[index]['id'].toString(), // assigned data's id here
                    style: TextStyle(fontSize: 15, fontWeight: FontWeight.bold),
                  ),
                  title: Text(
                    data[index]['title'], // assigned data's title here
                  ),
                  trailing: CupertinoSwitch(
                    value: data[index]
                        ['completed'], // assigned data's completed status here
                    onChanged: (bool status) {},
                    activeColor: Colors.amber,
                  ),
                ),
              );
            }),
      ),
      replacement: const SizedBox(
        height: 50,
        child: Center(
          child: Text(
            "Cannot load data",
            style: TextStyle(fontSize: 15, fontWeight: FontWeight.bold),
          ),
        ),
      ),
      visible: valid,
    );
  }
}
Conclusion
To conclude, we’ve covered how to add tabs in your Flutter app using Material Design’s tab widget in doing so we had to implement a widget called “DefaultTabController”, “TabBar”, and “TabBarView” to make it work. Thank you for reading.
