
Introduction
In the world of healthcare, HL7 (Health Level 7) is the de facto standard for exchanging data between disparate healthcare systems. Mirth Connect is a powerful open-source healthcare integration engine that can be used to build HL7 interfaces. In this blog post, we will explore how to create a TCO Listener for HL7 parsing using Mirth Connect.
Procedure:
Install Mirth Connect
- To get started, you will need to download and install Mirth Connect on your system. Mirth Connect is available for windows, Linux and Mac OS X. You can download the latest version from the Mirth website.
Create a new channel
- Once you have installed Mirth Connect, you will need to create a new channel to handle incoming HL7 messages. To do this, open the Mirth Connect Administrator and click on the “Channels” tab. Then click on the “Create New Channel” button to create a new channel.
Configure the TCP listener
- Next, you will need to configure the TCP listener. In the “Source” tab of the channel, select “TCP Listener” from the “Connector Type” drop-down list. This will enable Mirth Connect to listen for incoming TCP connections.
- Then, configure the port number and any other relevant settings. For example, you may want to specify a specific IP address to bind the listener to or enable SSL encryption.
Parse the HL7 message
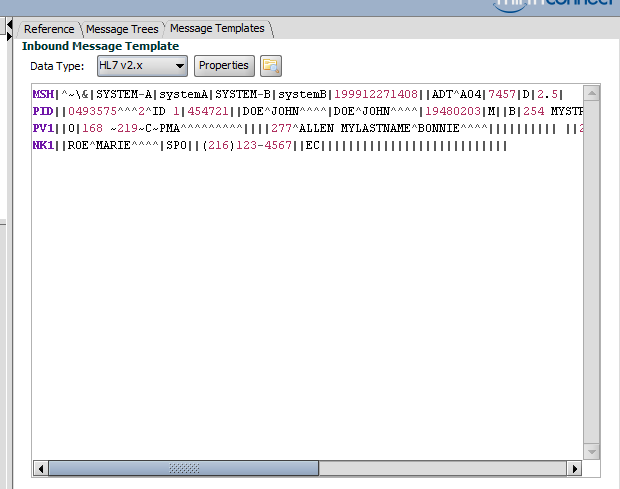
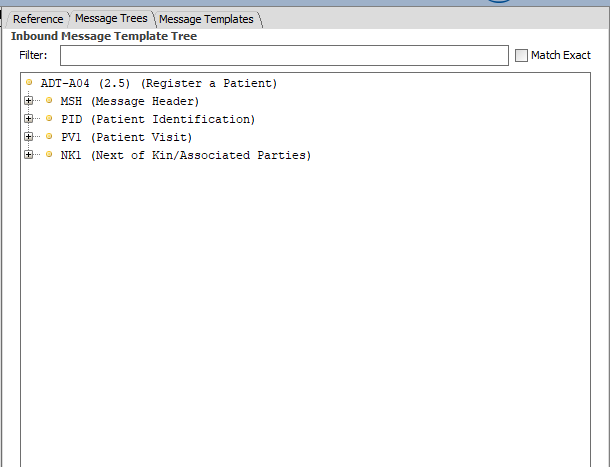
- Once the TCP listener is configured, you will need to parse the incoming HL7 message and structure.
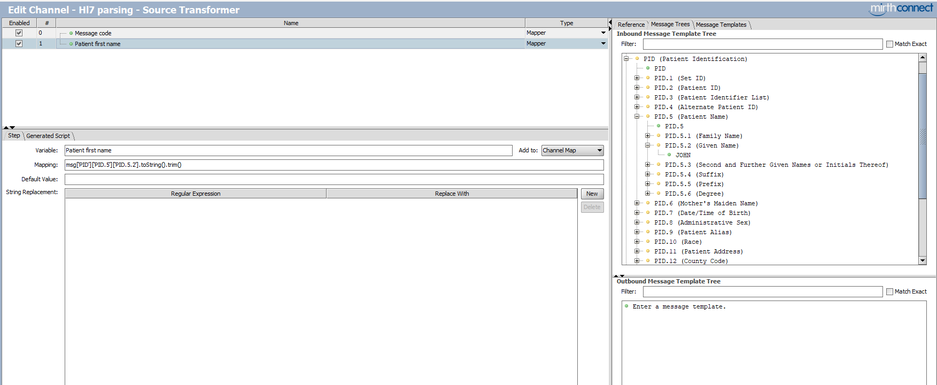
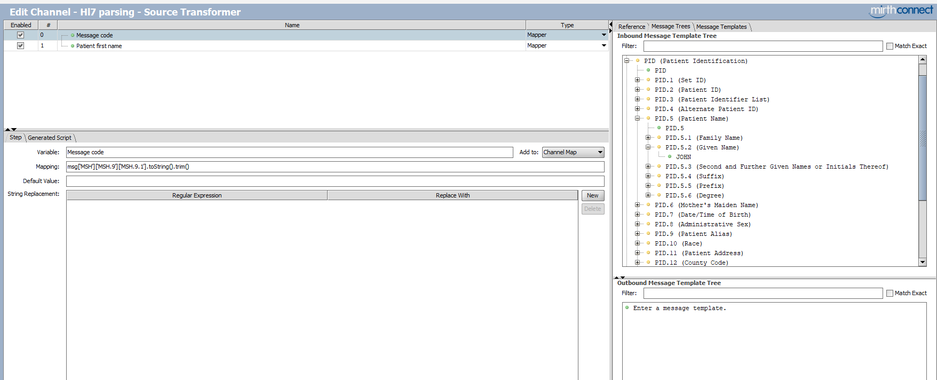
- In Source Transformer, Add New Step for Generated Script of Message Code and Patient First Name.
- Then, Click the ADT of the Message Code in Message Type of Message Header and Drag to mapping of the Message Code.
- Followed by clicking JOHN in Given Name of Patient Name in Patient Identification and Drag also to mapping of the Patient First Name.
- Set .trim() from the mapping integers.
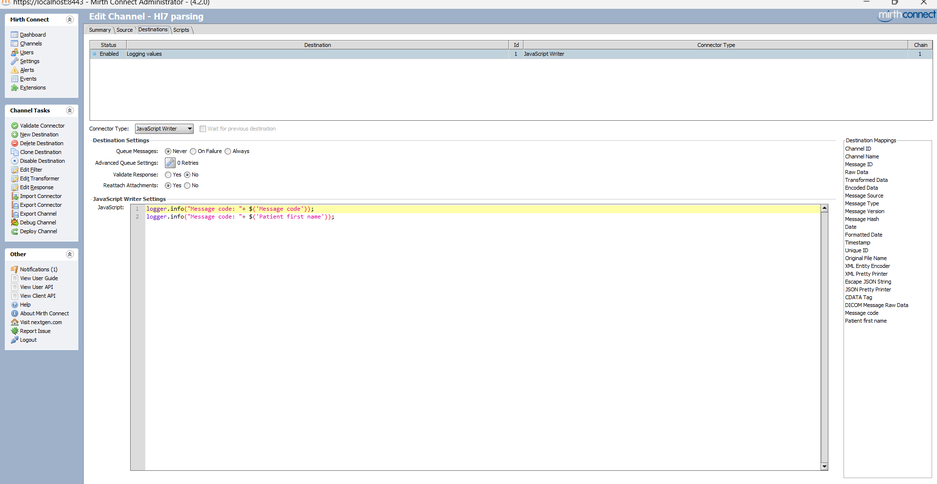
- Go Back to the Destinations and you will see the 2 sets of destination mappings in the transformer.
- Set connector type into Javascript and set it according to the needs of the message code and the patient’s first name.
- Rename the Destination Status to “Logging Values
Save the channel and start it
- Finally, save the channel and start it. To do this, click on the “Save” button and then click on the “Deploy Channel” button. Once the channel is deployed, click on the “Start Channel” button to start listening for incoming HL7 messages.
- Click the Hl7 Parsing Channel and Click Send Message and Copy the Hl7 Message. If you want to change it, its up to you.
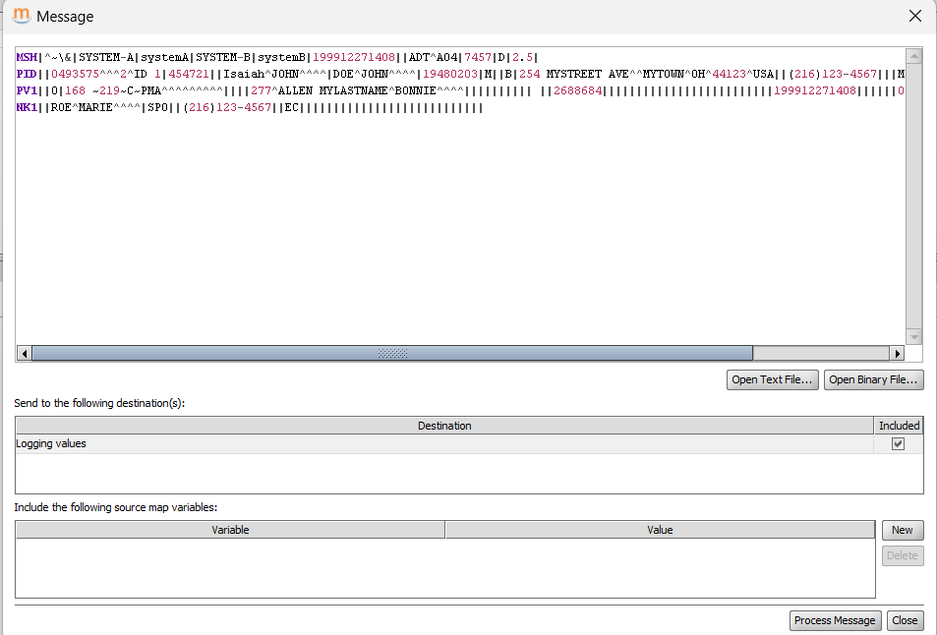
- Click Proceed Message then Click Refresh and Click Search.
- You will see that the Data Has been Transformed and Sent it. Also, You will see the response and received data with particular details
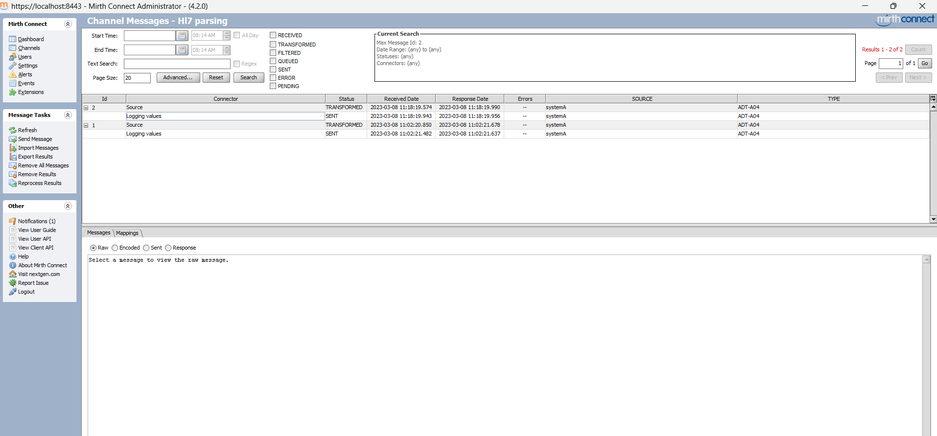
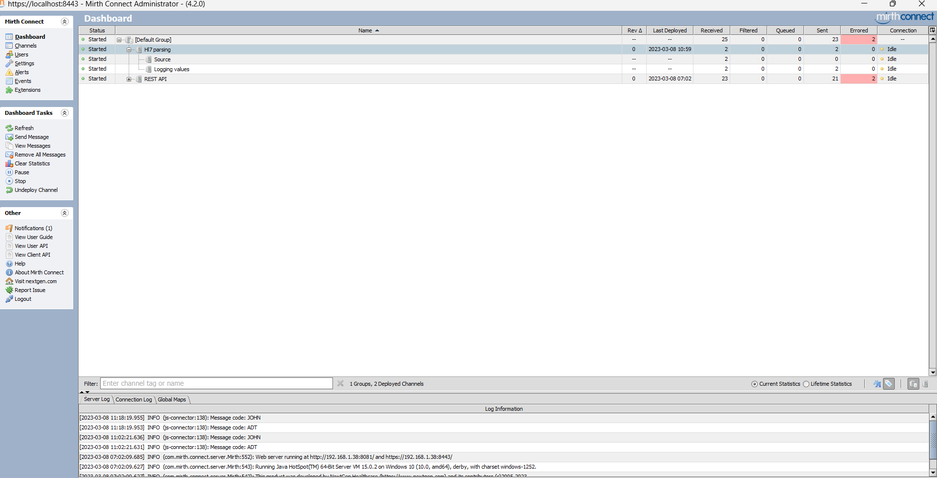
- You will see on the Dashboard that the Message Code and Patient First Name is Already Appeared in the Status.
Note: HL7 provides a framework that helps govern how electronic health information is retrieved, shared, exchanged and integrated. The standards define how patient information is structured, packaged and communicated between disparate parties and also sets the data types, structure, and language needed for seamless integration between electronic health systems.
Conclusion
In this blog post, we have explored how to create a TCP listener for HL7 parsing using Mirth Connect. By following these steps, you can quickly and easily build powerful HL7 interfaces to integrate disparate healthcare systems. Mirth Connect is a powerful tool for healthcare integration, and with a little bit of configuration and coding, you can build robust HL7 interfaces to meet your organization’s needs