
On the previous blog, we learned how to create your very first app in Android Studio with Java. Today I am going to teach you how to add elements inside an XML file in Android Studio. Let’s start.
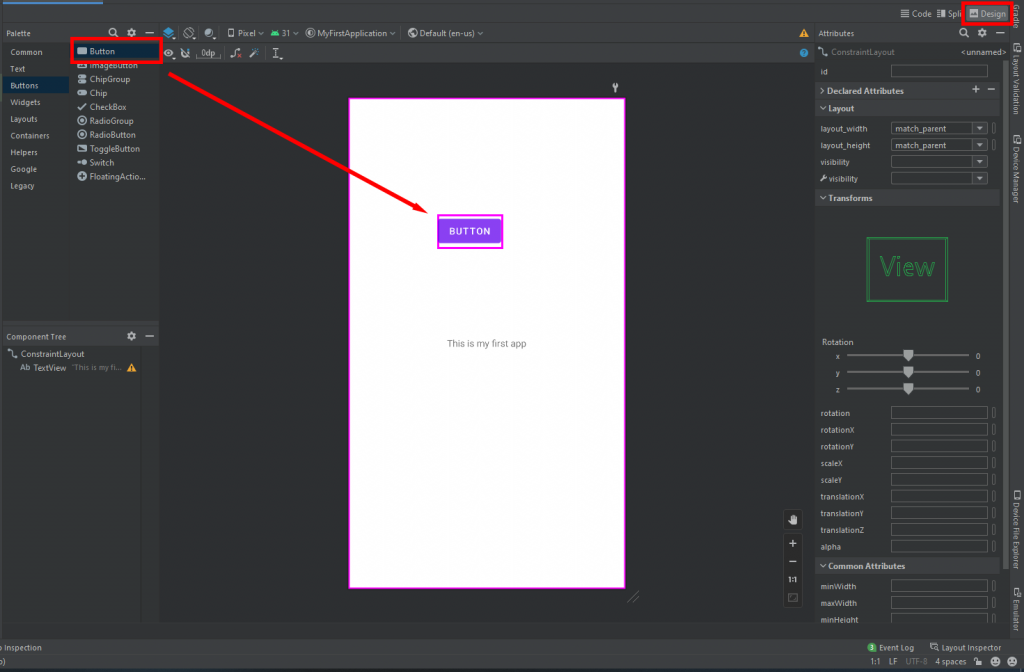
There are two ways on adding elements in the XML file, the first one is by drag and drop and the second one is by coding. I am going to show first how to use the drag and drop, see the image below.
Drag and Drop
Firstly, click on the design button on the top right corner. After that, the list of elements will be shown on the left side corner. Lastly, hold and drag the element you want to to the XML file. See the image below.
Coding
Now that you have learned how to drag and drop, I will teach you now on how to add elements by coding.
First, click on the split button on the top right corner. After that, you will see the codes of the xml file. In the image below, you can see that I coded another button named “coded button”. I also changed the name of the first button to dragged button.
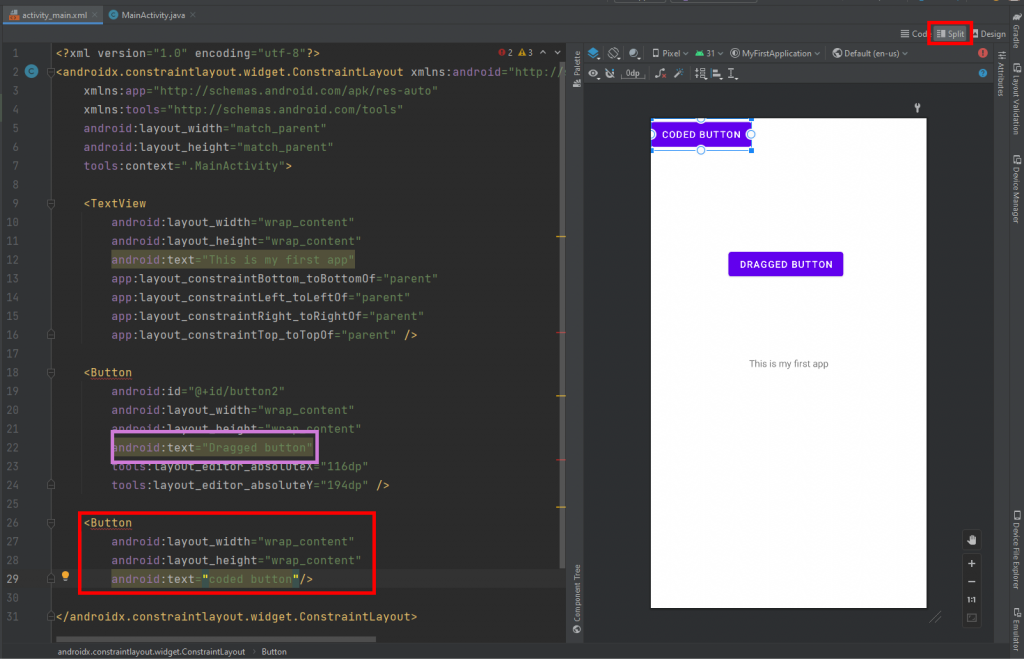
Whenever you are coding make sure to type < first before the name of the element and close it with />, and make sure that the element is always on capital letter. I hope this helped, thank you!