
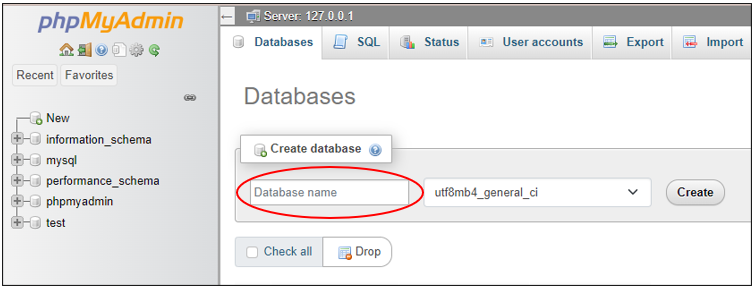
STEP 1: Go to phpMyAdmin, click Databases in the top menu, and create a database.
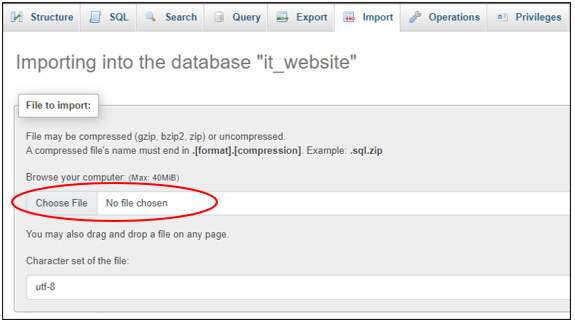
STEP 2: Click the database that you have created, then click on the Import button located at the top center.

STEP 3: Under File to Import, click Choose file and select the database file you want to import. This is an .sql or .zip-file.
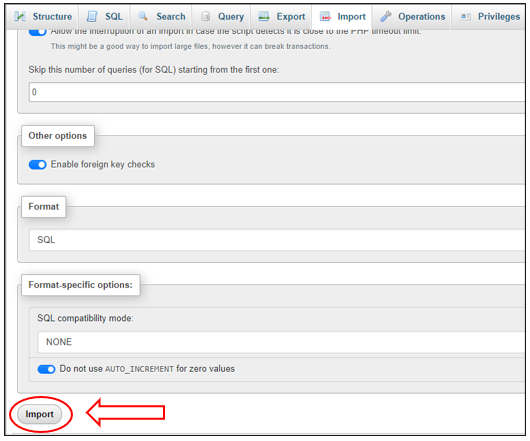
STEP 4: After selecting the file, scroll down and click Import.
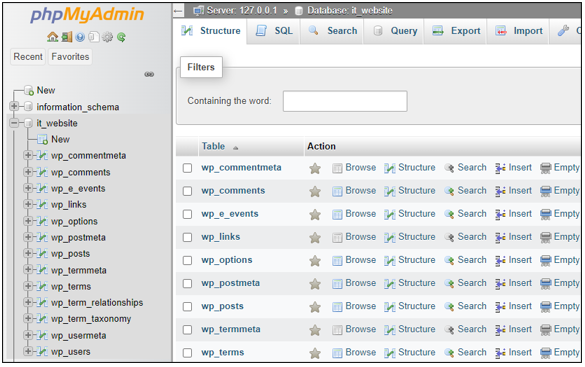
STEP 5: When the database has been imported successfully, a message confirming the import appears on your screen. You should be able to see the tables in the column to the left side of phpMyAdmin.
All Done!
Congratulations! You now know how to import databases into phpMyAdmin.