
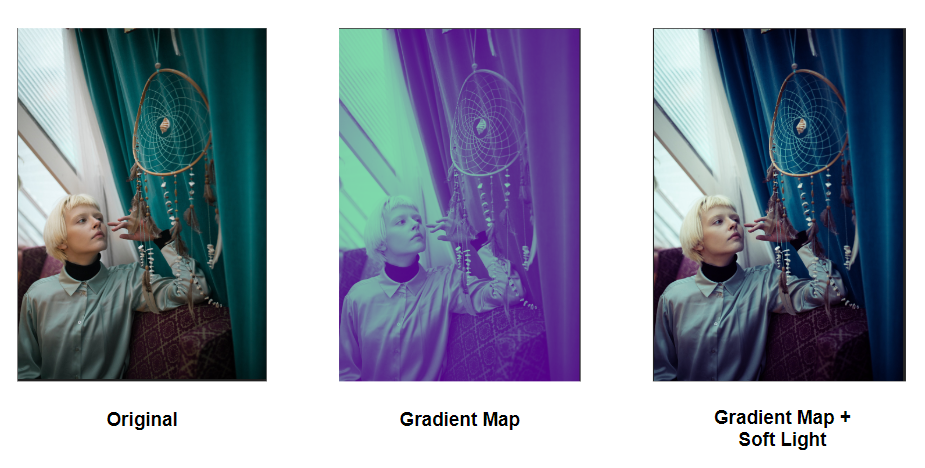
In this demo I will be showing you an easy way to create a custom look on your image. This effect uses only one adjustment layer but it makes a unique look on your image. This can be used to create your signature look to your photos.
I will be using an image from Pexels by KoolShooters.
How to Create Two Tone Effect
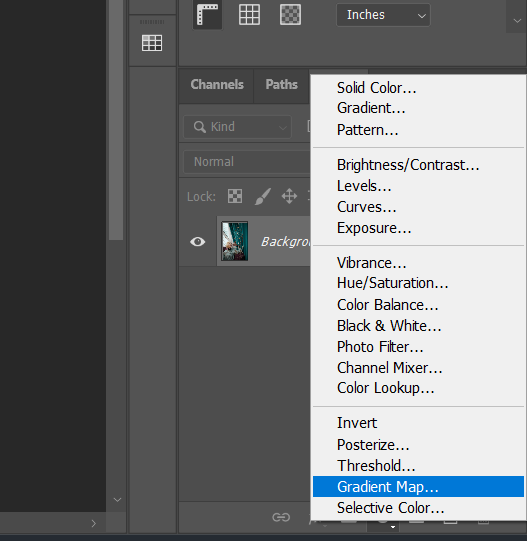
First import the image, then create a Gradient Map adjustment layer.
On the gradient window, customize the colors of the gradient depending on the colors you want to use. Adjust the mid point of the gradient depending on your liking.
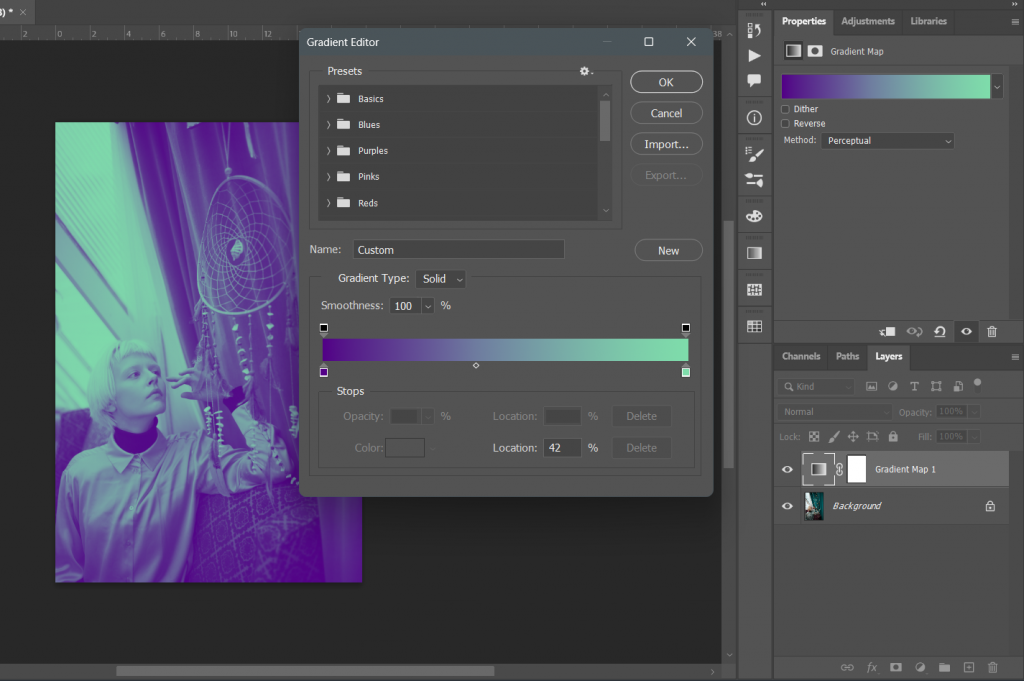
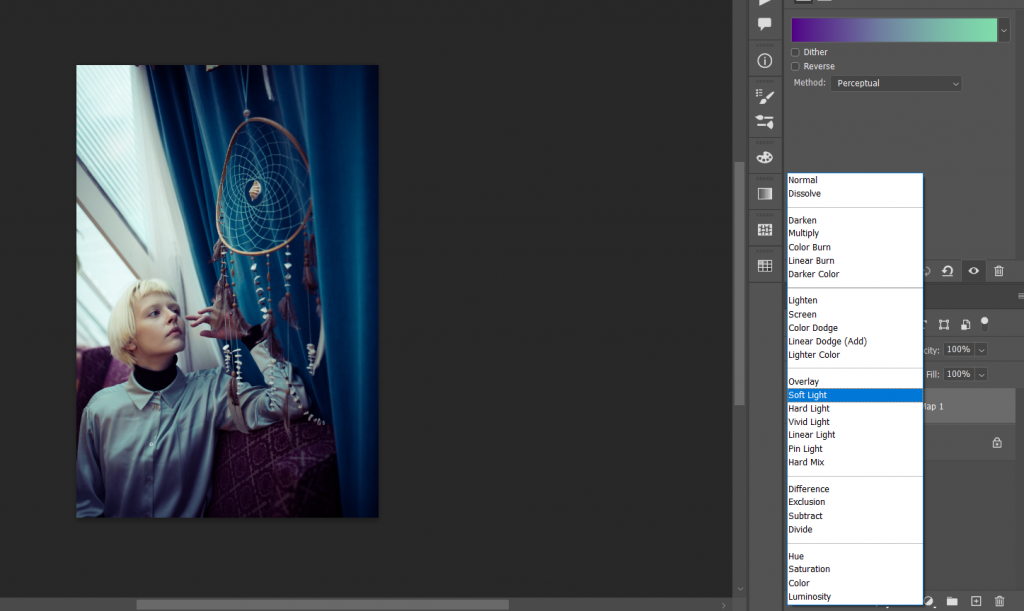
Once satisfied with the look of the gradient hit OK. To finish the look change the blend mode of the adjustment layer to soft light.
The Result:

Conclusion
Great job! You have now created your signature look using two tone effect in photoshop. Incorporate this to your future projects to have a your unique stamp and stand out. Remember to keep learning and stay creative.