

If your USB transfer speed is exceedingly poor, you may become very frustrated if you need to transfer huge files. Then there’s the subject of how to transfer things from PC to flash drive or from USB drive to PC faster. Actually, it is simple to accelerate USB transfer.
USB Transfer Speed Slow
USB drives are frequently used on computers to transmit things such as images, movies, and documents. When sending a big amount of data, transmission speed is critical.
However, you may get irritated at times due to the poor USB transmission speed. Nobody likes to wait dozens of minutes for data transfer, especially if the data is urgent or critical.
Why is the speed of my USB transmission slowing? You may inquire. This is mostly due to modifications made to your computer or USB stick, such as formatting the USB drive, updating to Windows 10 from Windows 7 or 8, and so on.
To transfer data between your PC and flash drive more quickly, you must accelerate USB transfer. How can I speed up USB transfers? Get the methods from the next section right now.
How to Improve Slow USB Transfer Speed?
Method 1: Update USB Drivers
How can this method be used to improve sluggish USB transfer speeds? Take the following steps:
Step 1: In Windows, press the Win + X keys to open the Start menu and select Device Manager.
Step 2: Expand Disk drives, right-click the USB device, and select Update driver.

Step 3: Automatically search for updated driver software.
After that, try transferring files to see whether the problem has been resolved.
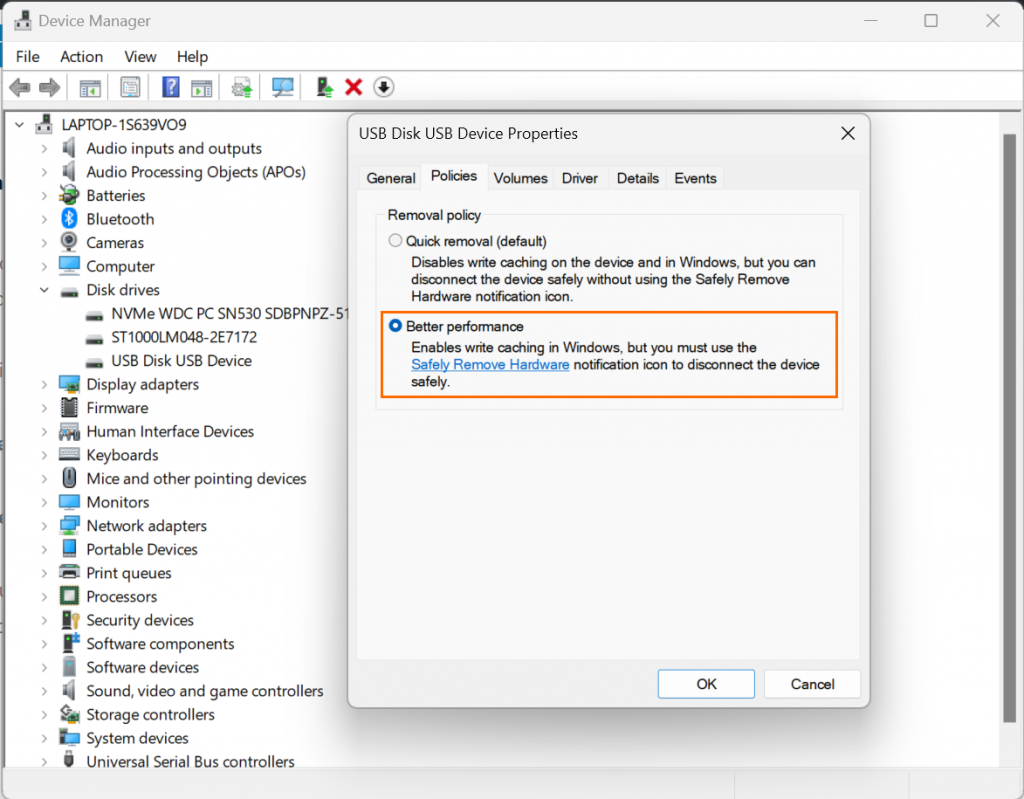
Method 2: Adjust the USB Drive’s Performance Setting
For USB drives, Windows uses the Quick removal data transfer policy by default. This might disable the device’s write caching, slowing down the transfer speed. However, you may safely remove the device without activating the notification icon – Safely Remove Hardware.
You may disable this function and change the policy to Better Performance to speed up USB transfers in Windows. Take the following steps:
Step 1: After expanding Disk drives in the Device Manager interface, locate your USB device and right-click it to select Properties.
Step 2: Navigate to the Policies tab, choose Better performance, and enable device write caching.
Method 3: Change File System
The File System may have an impact on the performance of a USB device. The FAT32 file system is installed by default on the USB device. However, depending on the circumstances, you can format it to NTFS or exFAT. On general, NTFS is quicker and more efficient for file transfers in Windows 10/8/7, whereas exFAT is better for Mac.
Method 4: Upgrade to USB 3.0
If your USB drive has a 2.0 interface, the USB transfer speed may be poor. To increase the speed of USB transfers, update to USB 3.0, which is 10 times quicker than USB 2.0. Simply connect the disk to a USB 3.0 port on Windows 10/8/7 to transfer data.
Method 5: Connect the USB Drive to the Rear Port (Only for Desktop)
There are several ports on a desktop, including front and back ports. When transferring data between the desktop and the drive, you usually attach your USB flash drive to one of the front ports.
You may connect the flash drive to one rear port to make USB transfers faster since it is soldered on the motherboard and operates off the Intel chipset, which provides a higher speed than a front port. Furthermore, the power supply in the rear post is more stable.