
Introduction
Every time we are doing a documentation on a certain project, we must have only the specific part to be documented. However using the Prnt Scrn button will not help you because it takes the whole screen to be screenshot also by pressing the Windows + Alt + Prnt Scrn would take much time. Snipping tool is a helpful tool because it allows you to screenshot only of a certain part of your documentation in many different. In this blog, I will show you how to activate it and give some examples.
Step 1: Go to Windows and type Settings.

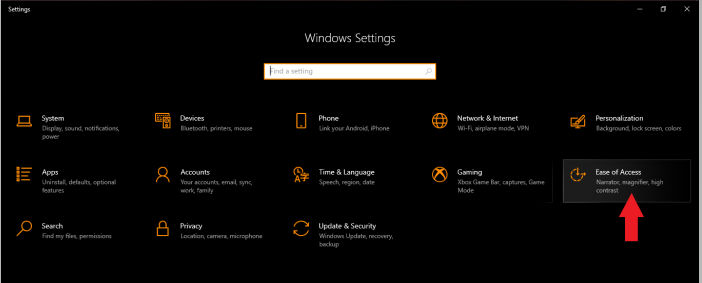
Step 2. Click Ease of access.
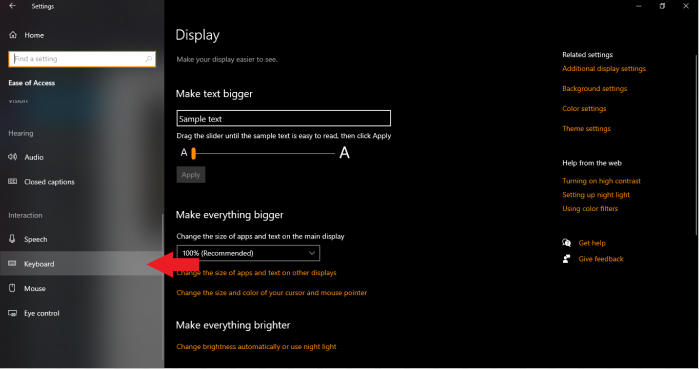
Step 3: Scroll down and Click Keyboard.
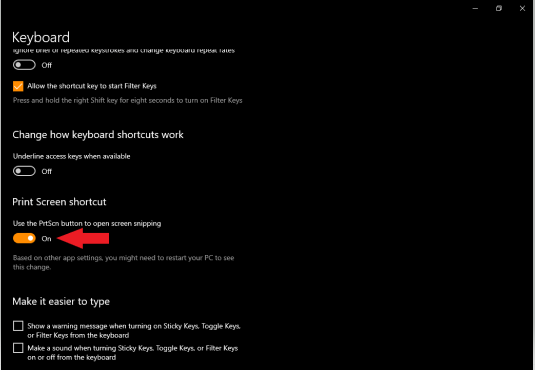
Step 4: Scroll down and you will see the Print Screen Shortcut, turn it on and you are ready to go.
Step 5. Press Prnt Scrn button and here are the available options.
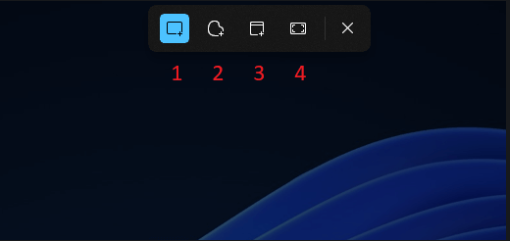
- Rectangular Snip: Drag and select a rectangular-shaped portion of the screen as a screenshot.
- Freeform Snip: Select a custom shape as a screenshot. The area around the custom shape (in the rectangular image) will be black when you paste it.
- Window Snip: Choose a window and capture just that active window as a screenshot.
- Full-screen Snip: Similar to pressing the Print Screen key by itself, this option captures a screenshot of your entire screen.
Conclusion
With the help of the Print Screen shortcut, you are now able to screenshot with ease and any portion depending on what you want to screenshot. This will help you especially when you are in rush for documentation, the readers also will easily understand the given screenshot and etc. Hope this tutorial helps you in your daily works.