
MSI Afterburner and RivaTuner
Monitoring your CPU and GPU usage while gaming or running a benchmark is something we all want to do on occasion. Knowing how hard your computer is working is never a bad thing, whether you’re trying to find a bottleneck or you’re just curious.
We’ll be using MSI’s Afterburner and Rivatuner Statistics Server in this guide (RTSS). This combination of programs is generally the quickest and easiest way to get an overlay up and running, and they are fantastic tools. If you want something more professional, check out VSS Monitoring’s article on hardware monitoring tools.
How to Setup and Use MSI Afterburner and RivaTuner
- Download MSI Afterburner. It’s without a doubt the best GPU tuning utility available, and it also comes with Rivatuner Statistics Server (RTSS), which we’ll need for the OSD. You can use Afterburner not only for the OSD, but also to change things like GPU clocks and GPU fan speeds.
- After downloading Afterburner, you must run the installer. When installing Afterburner, you’ll be prompted to “Choose Components.” Make sure both MSI Afterburner and Rivatuner Statistics Server are checked before proceeding.
- After the installation is complete, launch both MSI Afterburner and RTSS. Make sure you turn off any other GPU tuning software you may be using while Afterburner is running.
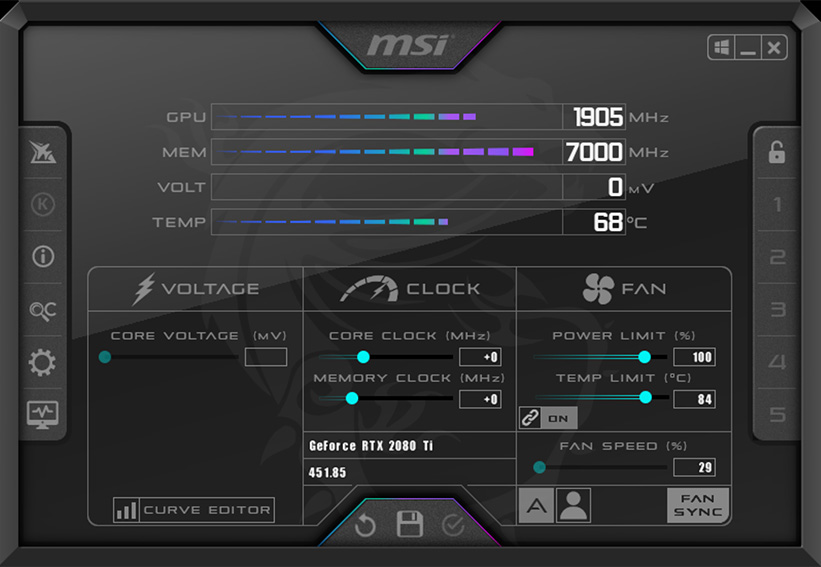
- Configure the OSD settings. To begin, launch Afterburner and select the Settings icon (the small cog to the right of Fan Speed (percent)). Navigate to Monitoring in the Settings window – it’s the third option in the top tabs.
- When you’re in Monitoring, you’ll notice a plethora of different settings and options. The section of this page that we’re most interested in is “Active hardware monitoring graphs.” This is where you’ll enable (or disable) the statistics you want to see on your OSD.
- You can either go through 1-by-1 and tick/untick “Show in On-Screen Display” to add/remove graphs from your OSD. Alternatively, you could select multiple items and add/remove them with a single click. You can do this in two ways: hold Ctrl and select multiple graphs individually, or hold Shift and select them as a group from the first click to the next. Then, just like when adding a single item, check the box next to “Show in On-Screen Display.”
- If you want to add multiple grayed-out (unticked in the graph list) items, use Ctrl+click on the checkmark to activate/deactivate everything you’ve selected.
- After you’ve finished adding everything you need, go to “On-Screen Display” (top tabs again, 4th option) and create a custom hotkey for the “Toggle On-Screen Display” option.
- Configure Rivatuner Statistics Server. This section is fairly straightforward because there isn’t much to it. There are numerous options available, but the most important thing to do is ensure that “Show On-Screen Display” and “On-Screen Display Support” are both set to On – they should be by default.
- Aside from that, you can change how your OSD appears in RTSS. You can alter the overall zoom, colors, which corner it appears in, and even the font. If you really wanted to, you could also create custom profiles for each application (or needed to).
- There is nothing you must change in RTSS for your OSD to work as long as the two previously mentioned settings are set to “On.” Once you’ve got your settings just right, you can turn off RTSS.
- Launch a game and put your On-Screen Display to the test. For your OSD to work, both RTSS and Afterburner must be running.

References:
How to easily monitor CPU and GPU usage when gaming
https://storage-asset.msi.com/event/2020/vga/AfterburnerNew/image/afbr.jpg
https://i.ytimg.com/vi/fdxnOUT7Pnc/maxresdefault.jpg