
Discord is a platform for voice-over IP, instant messaging, and digital distribution. Users communicate in private chats or as part of “servers” with voice calls, video calls, text messaging, media, and files.
Discord has consistently demonstrated over the last five years that it is the best instant messaging platform for not only gamers, but also anyone looking to message, video chat, or stream with friends online. Discord bots are one of the reasons for this. Bots can help you with everything from automating mundane tasks to starting to play music across your server, and we’ll show you how to make a Discord bot in this tutorial.
What is a “Discord Bot”?
Discord bots are artificial intelligence-powered tools that can assist you in automating tasks on your Discord server. They make it much easier to create a truly engaged community and can be used to moderate your server, welcome new members, or even ban people who are causing problems for everyone else. Apart from moderation features, Discord bots allow you and your users to add games, music, memes, and other entertaining, engaging, and fun content.
Creating a Bot Account
We must first create a Discord Bot account in order to work with the library and the Discord API in general.
The process of creating a Bot account is fairly simple.
- Check to see if you’re logged in to the Discord server.
- Go to the application’s page.
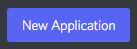
- Select “New Application” from the drop-down menu.
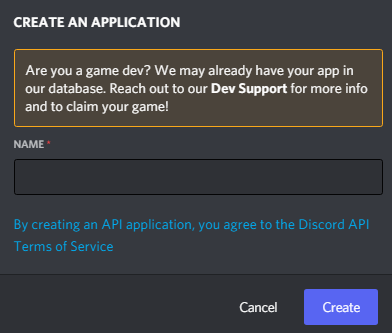
- Give the app a name and then click “Create.”
- By going to the “Bot” tab and clicking “Add Bot,” you can create a Bot User.
- “Yes, go ahead and do it!” clicks the button.

- If you want others to invite your bot, make sure Public Bot is checked.
- Unless you’re developing a service that requires it, make sure that Require OAuth2 Code Grant is unchecked. Leave it unchecked if you’re unsure.
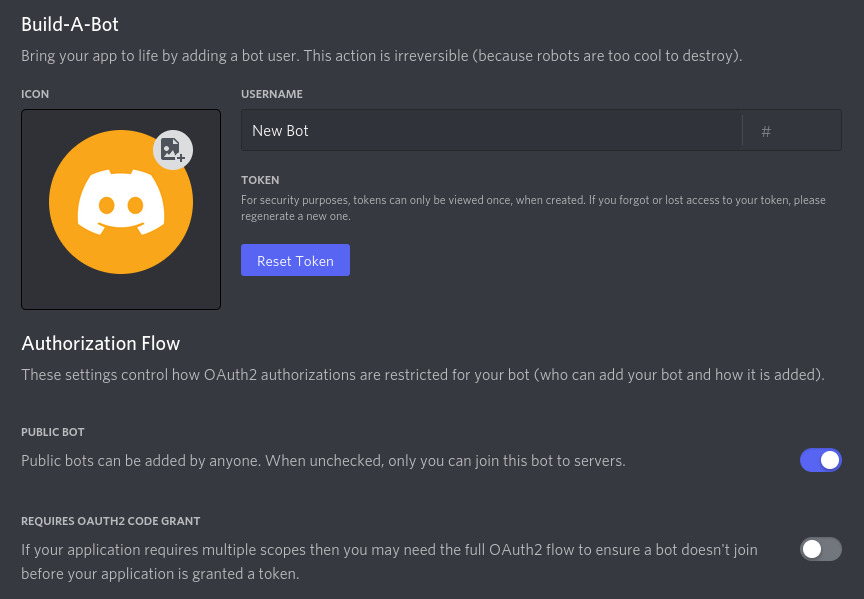
- Using the “Copy” button, copy the token.