
A cross-platform web server that is open-source and free is called XAMPP. The acronym XAMPP stands for Cross-Platform, Apache HTTP Server, MariaDB (Database), PHP, and Perl. Programmers can write and test their code on a local web server using the well-known cross-platform web server XAMPP. It was made by Apache Friends, and anyone can edit or change the native source code. Now let’s proceed to the process of installation.
Download and Install XAMPP
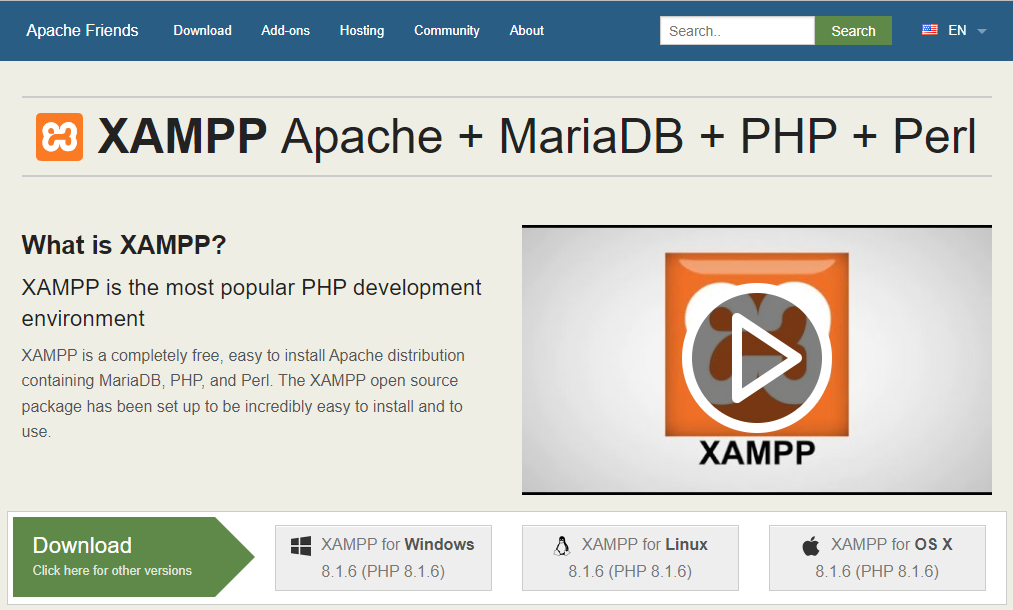
Visit XAMPP Installers and Downloads for Apache Friends to access the official XAMPP download page and complete the installation process. Since we are talking about How to install XAMPP on Windows 10, we will select the Windows option as shown below. You will see XAMPP ready to download for cross-platforms like Windows, Linux, and Mac OS X.
Run the Installer to Install XAMPP
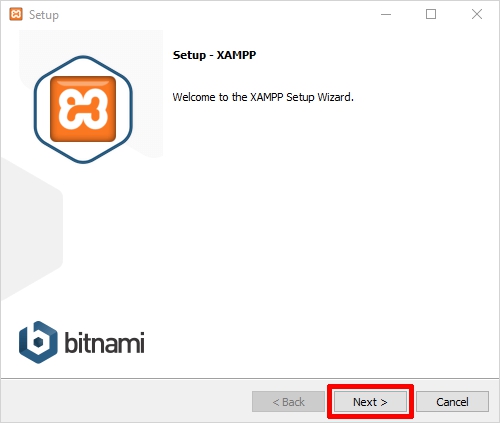
- XAMPP Setup Wizard
After you click on the downloaded file, the XAMPP setup wizard will appear. Now click on the ‘Next’ Button to proceed.
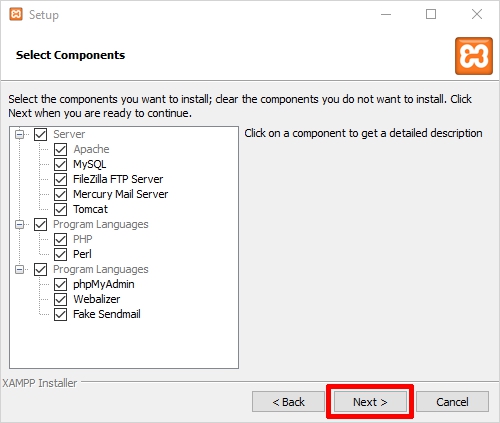
- Select Components
Next, select the components you want to install otherwise leave them unselected. These will be set up automatically and are the options required to start the program. Click “Next “to continue.
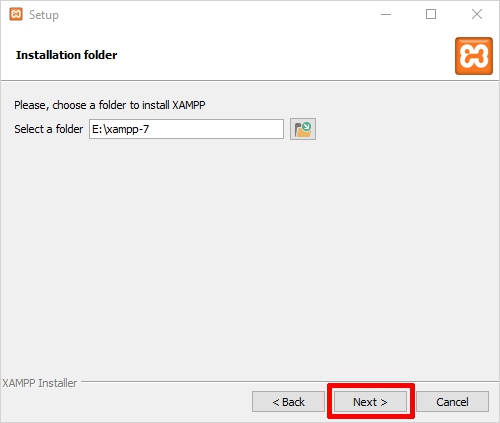
- Select Installation Folder
The folder where you want to install XAMPP must now be selected. You can select the default location or any other location of your choosing, then select the “Next” button to proceed.
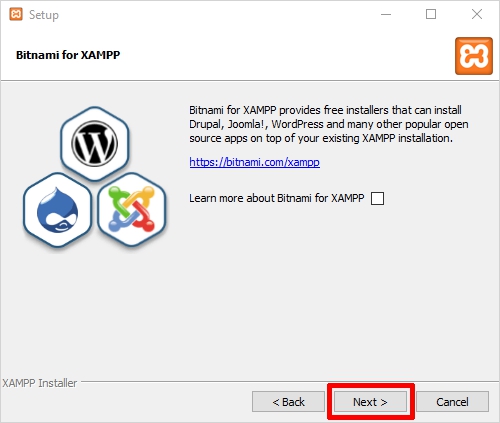
- Bitnami for XAMPP
A window displaying details about Bitnami will now appear. To proceed, just press the “Next” button. You can check the box labeled “Learn more about Bitnami for XAMPP” if you want to know more about Bitnami, though.
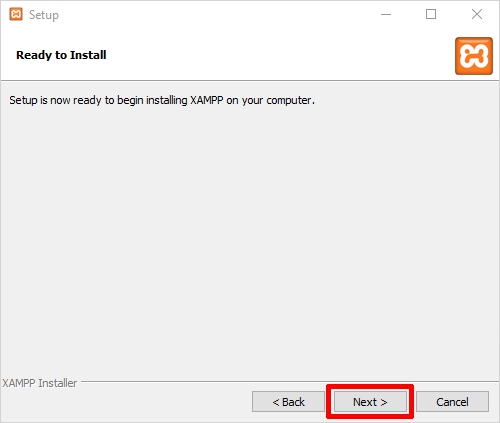
- Ready to Install XAMPP
As shown below, a new window will now appear with the text “Setup is now ready to begin installing XAMPP on your computer.” To move forward, simply click the “Next” button.
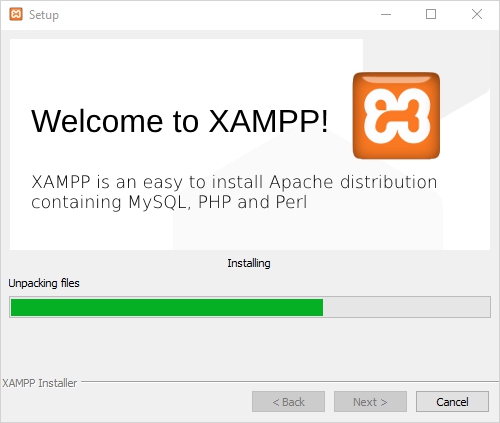
- Welcome to XAMPP Wizard
Now, wait for the installation to be completed.
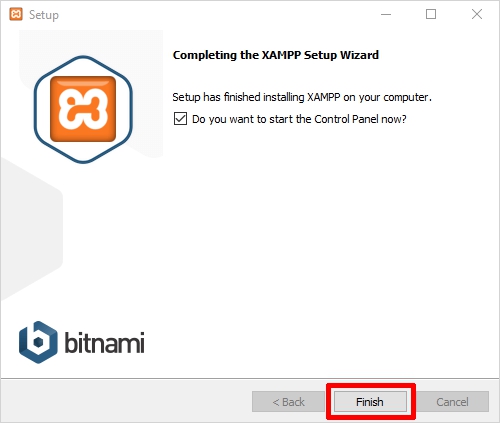
- XAMPP Installation Complete
Once the installation is completed, you will be asked whether you would like to start the control panel now or not, displaying the message “Do you want to start the control panel now?” Verify the box and click on the ‘Finish’ button and see if the XAMPP is working fine.
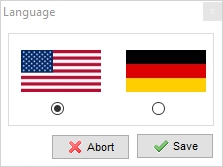
Select your XAMPP Install Language
Choose your preferred language. After that click on the ‘Save’ button to confirm your selected language. As of now, I am choosing the English language.
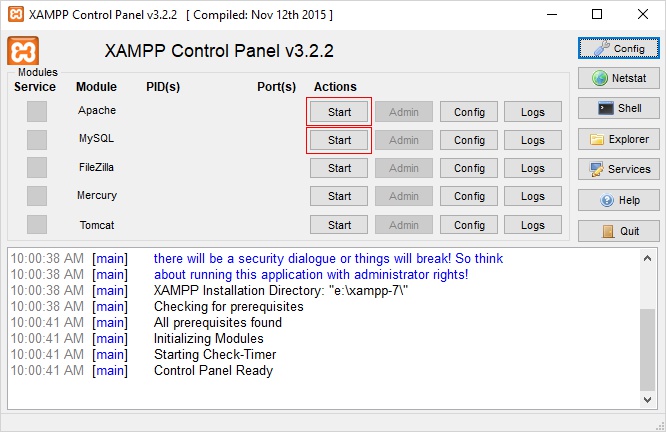
XAMPP is now Installed onWindows, run it
The control panel would open without a problem if the XAMPP installation process as a whole proceeded smoothly. Now select Apache and MySQL by clicking on the respective “Start” buttons.
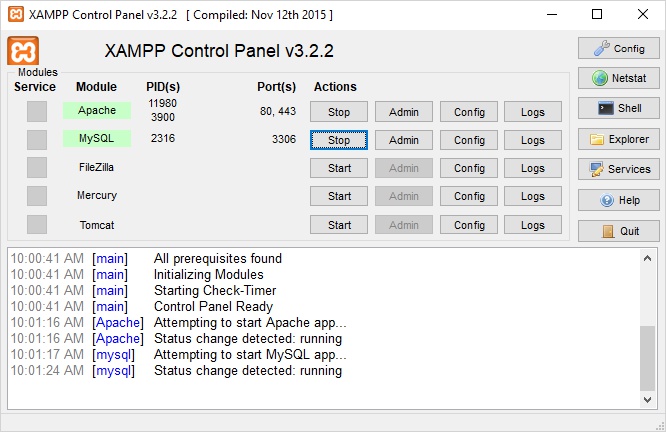
Now you’re done! You have successfully installed XAMPP on Windows 10 or say you have successfully installed XAMPP locally. Once you start the modules, you should see their status turn green. Whereas, on the right side, you can see the process ID number and port numbers every module is using. You’re good to go now.
Reference
Singla, D. (2020, April 15). Everything you need to know about how to install xampp on windows 10. TemplateToaster Blog. Retrieved August 24, 2022, from https://blog.templatetoaster.com/install-xampp-on-windows/