
If you’re using a Windows device, you may adjust your default port settings in XAMPP by following these four steps.
Step 1: From the XAMPP Control Panel, go to Configuration Settings.
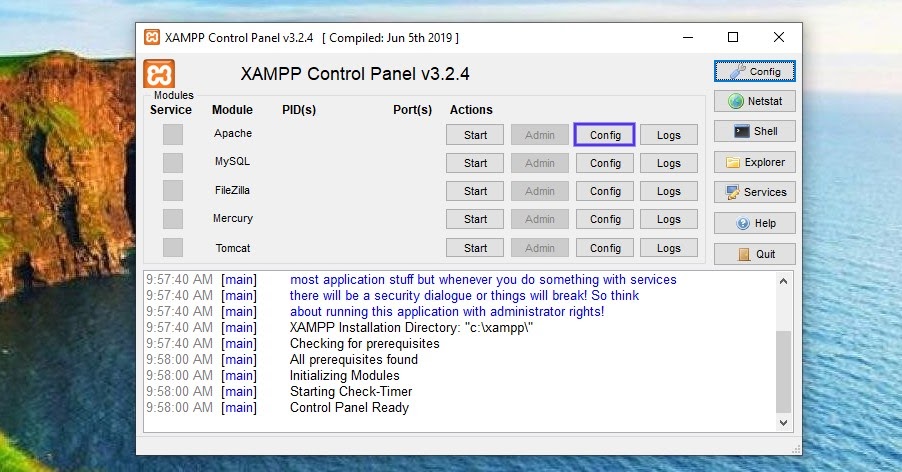
Of course, the first step is to start XAMPP. The XAMPP control panel will appear. You may adjust the server stack’s configuration parameters from here.
We’ll concentrate on those settings because this problem is connected to Apache. Click the Config button in the “Apache” row of choices.
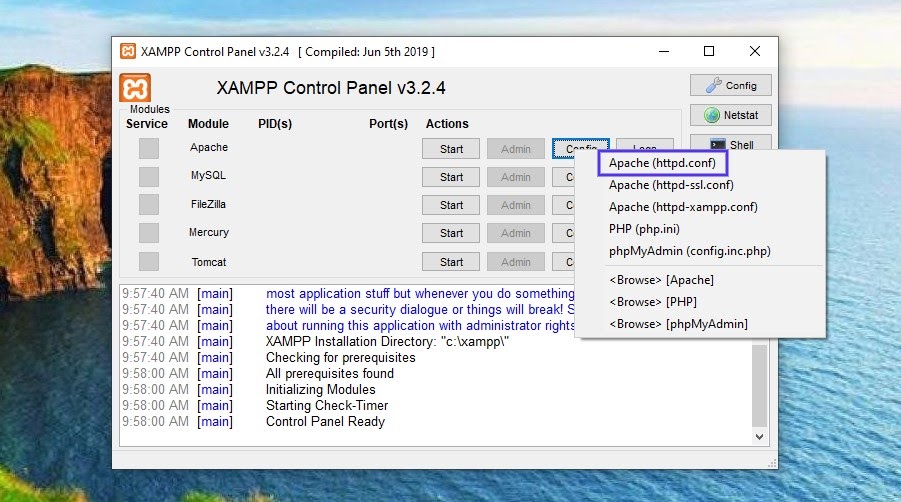
This will bring up a file drop-down menu. Starting with httpd.conf, we’ll be altering two of these files.
Step 2: Modify the httpd.conf file’s default port settings.
Select Apache from the Files menu (httpd.conf). The file will open in your computer’s default text editor once you’ve done that:
There are three settings in this file that you need edit. To begin, press Ctrl + F and then type “80” into the search box:
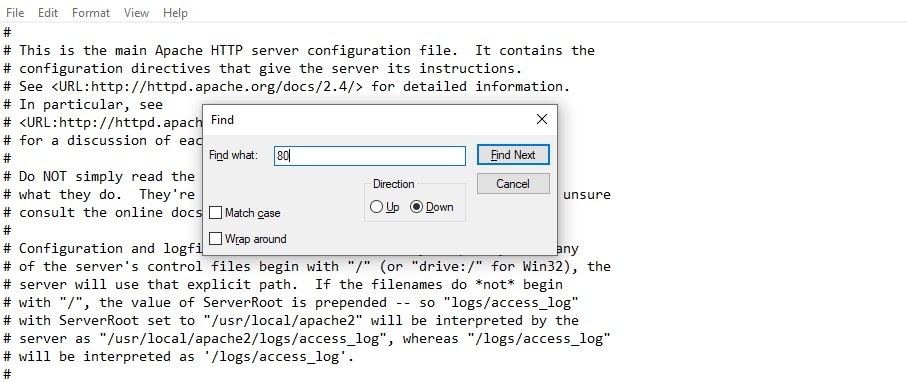
This will show you every occurrence of the number 80 in the file. Change the value of “Port 80” to “Port 8080.” After you’ve adjusted the port setting, look for “Listen 80” and change it to “Listen 8080.”
Finally, look for “servername localhost:80” in your search results. Modify it to “servername localhost:8080” once you’ve found it. Save and close the file when you’re finished.
Step 3: In the http-ssl.conf file, update the Default Port Settings.
It’s now time to move on to the next file. You may do so by going back to the XAMPP control panel and selecting Config under the Apache settings. Open the Apache (http-ssl.conf) file this time.
Press Ctrl + F to open the file in your text editor, then type 443 in the search area. Find “Listen 443” and change it to “Listen 4433.”
Then look for the next incidence of “443” in the file. “VirtualHost _default :443>” should be used instead. You may now modify it to “VirtualHost _default :4433>” after you’ve found it. Remember to save and shut the file when you’re finished.
Step 4: Restart Apache
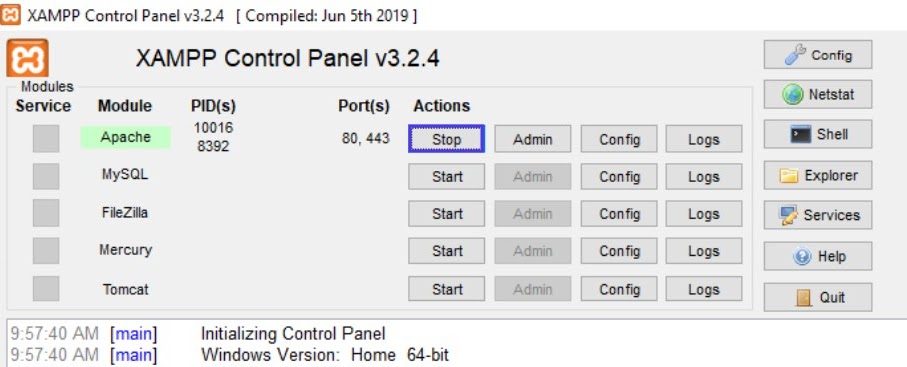
The final step is to stop Apache once you’ve adjusted the settings in both files. This is done by selecting the Stop button from the same Apache row. To complete the restart procedure, click the Start button after Apache has been halted.
That concludes our discussion. Your port numbers will be changed, and Apache should now function normally.