
In this blog, we will be integrating firebase to android studio and visual studio code in windows. When it comes to databases firebase is known to be one of the best backend devices which provides databases, cloud storages, authentication, and other services provided by google. This blog will show you the step-by-step procedures in order for you to integrate the firebase to your android studio and visual studio code
PART 1: FIREBASE
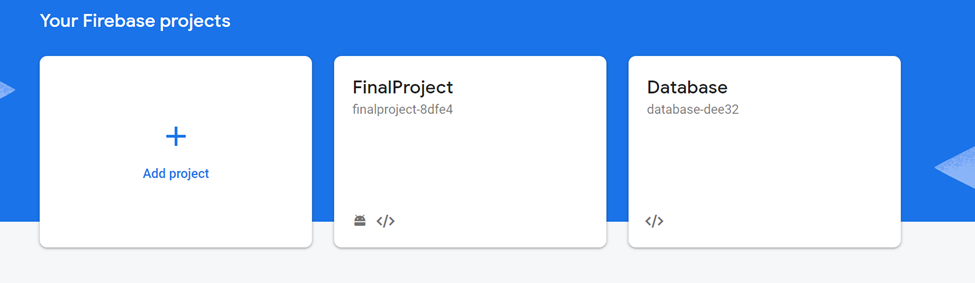
Go to Firebase -> Create an Account -> Go to Console
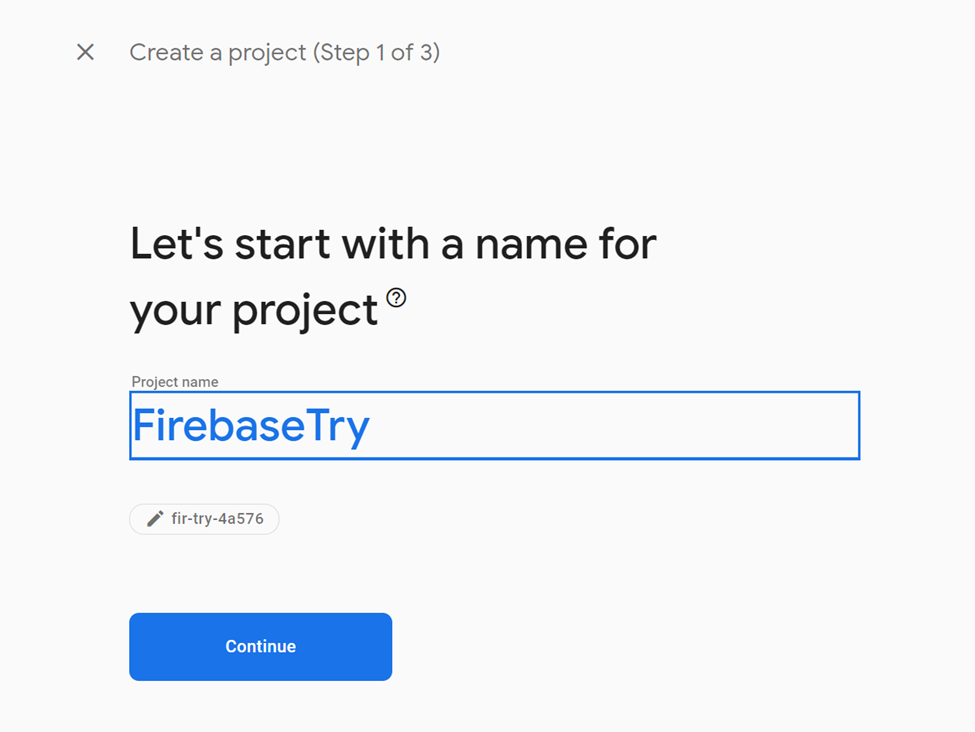
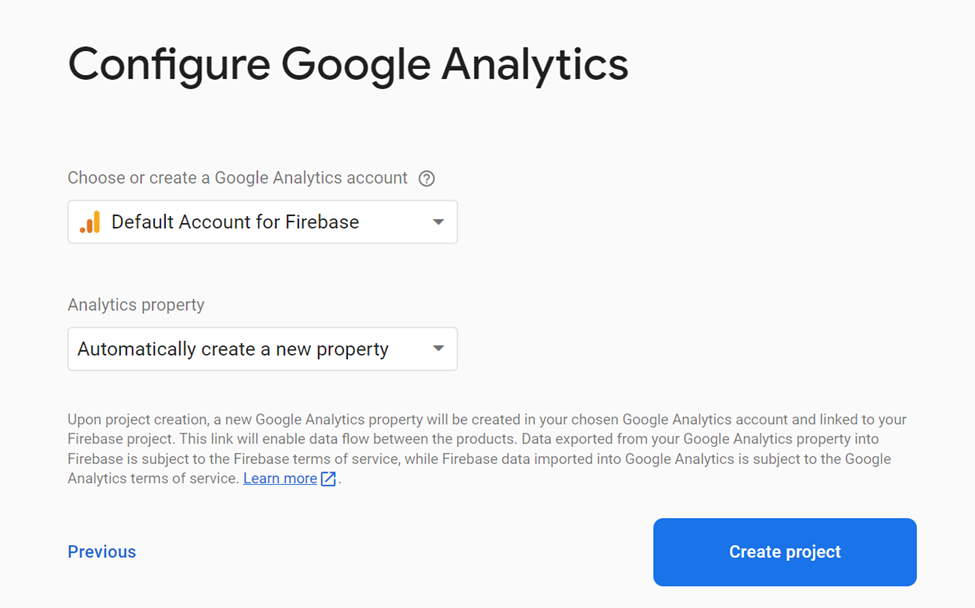
After Clicking Add project it will be redirected you to the next page with 3 steps which includes the naming of the project and the configurations of the google analytics
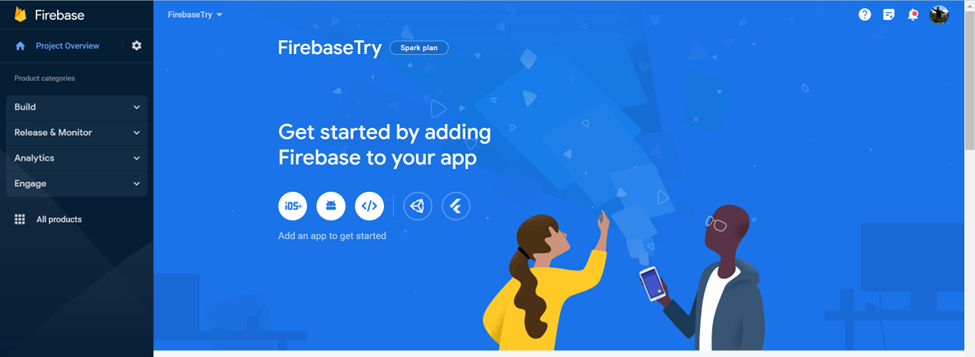
After creating the project the user will be redirected to the firebase dashboard
PART 2: Connecting to Visual Studio Code (Web)
At the project overview there there are three buttons (ios, android, and web) -> Click the web icon (2 steps procedure)
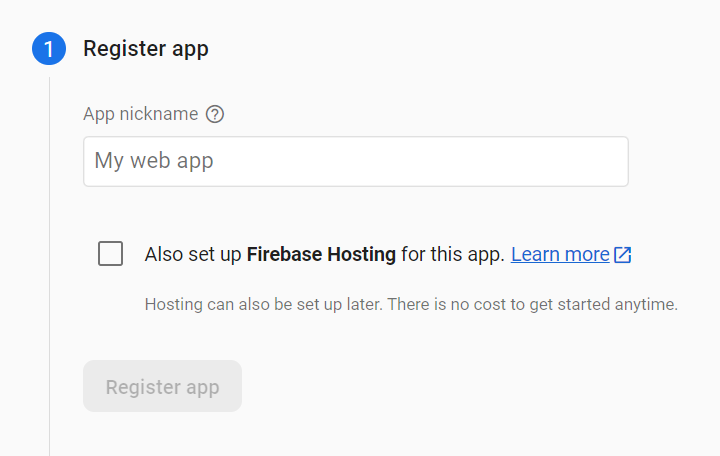
First Step (Registering the App):
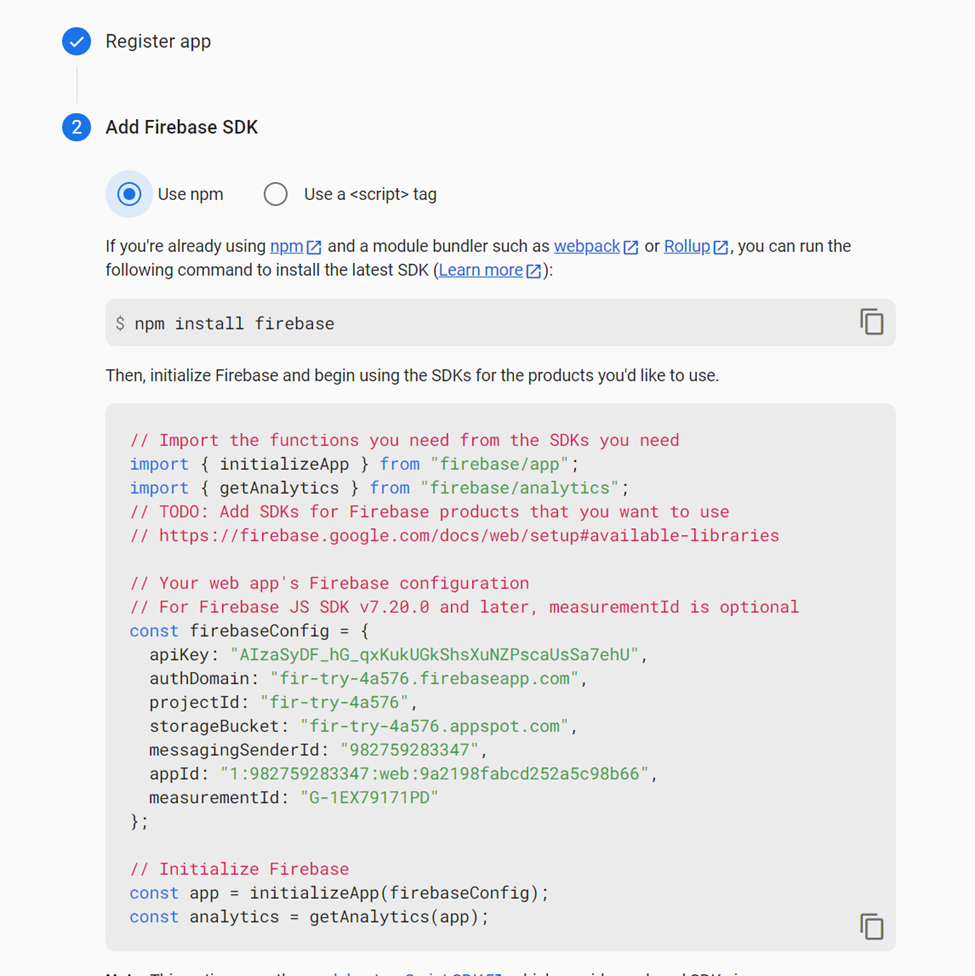
Second Step (Adding of Firebase SDK):
Note: Firebase SDK allows your program to access the firebase libraries and services
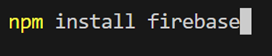
In this step you need to open your Visual Studio Code:
Go to Terminal -> New Terminal (ctrl + shift + `) and enter “npm install firebase“
After installing the firebase in your visual studio code you then copy the Firebase SDK on the second step

Note: Each datas from the FirebaseConfig is different from each other so it is required to copy what is written on the firebase website
After doing these steps you can now access and use your Firebase on your Visual Studio Code.
PART 3: Connecting to Android Studio (Android)
At the project overview there there are three buttons (ios, android, and web) -> Click the android icon (3 steps procedure)
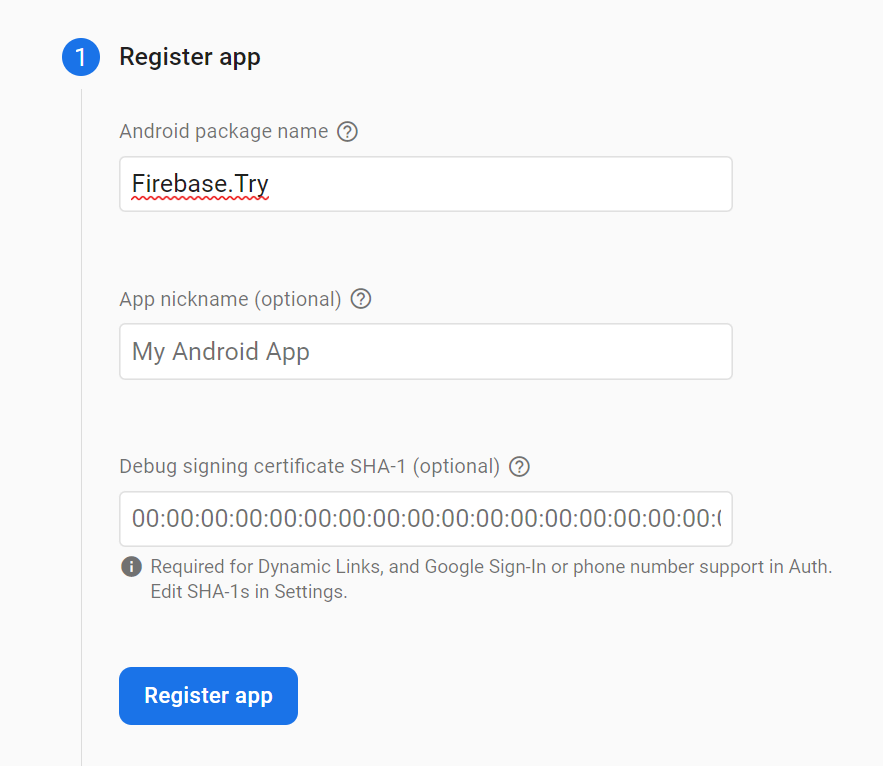
Step 1 (App Registration):
Step 2 (Downloading and Adding Configuration File):
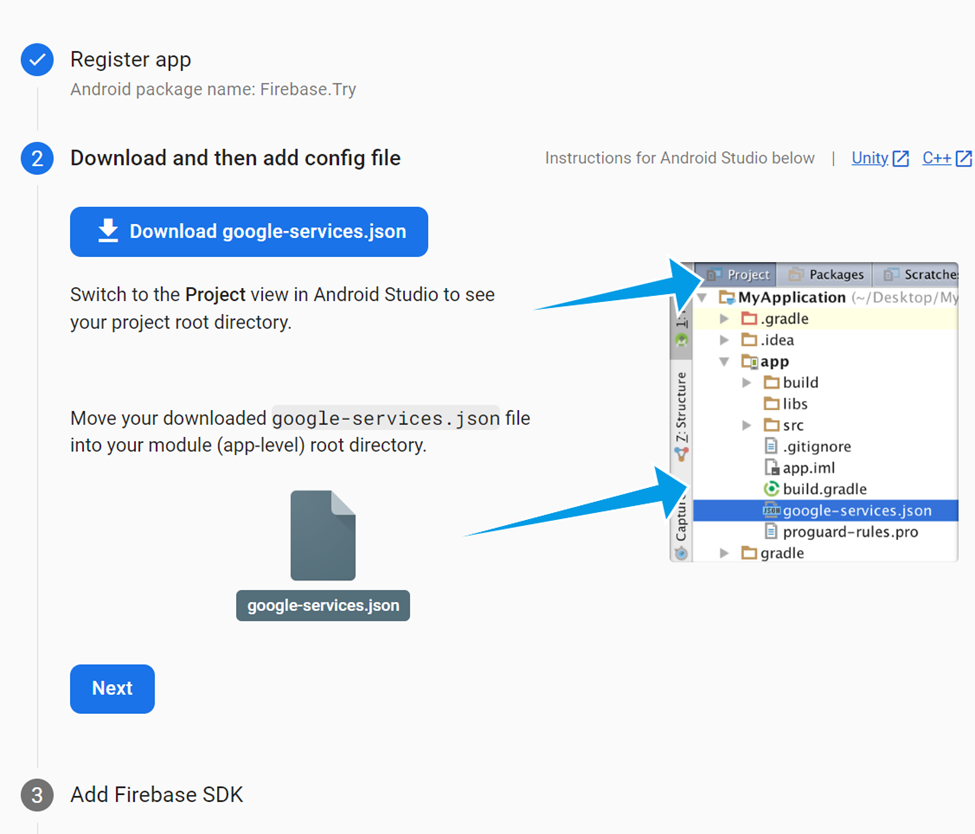
Download the provided file and open your Android Studio
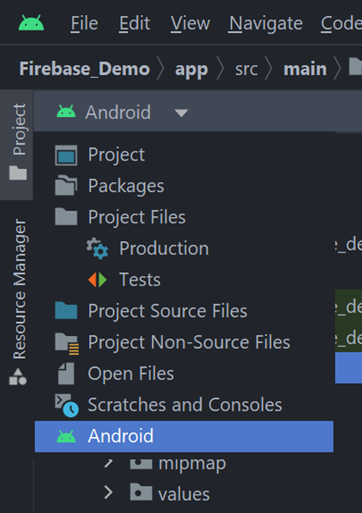
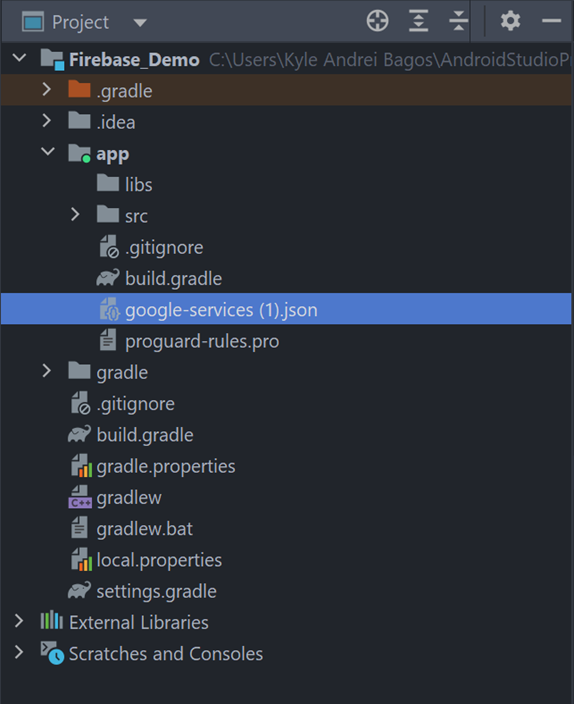
After going to project tab select the file downloaded and drag/paste it under the app file then revert the file back from project to Android
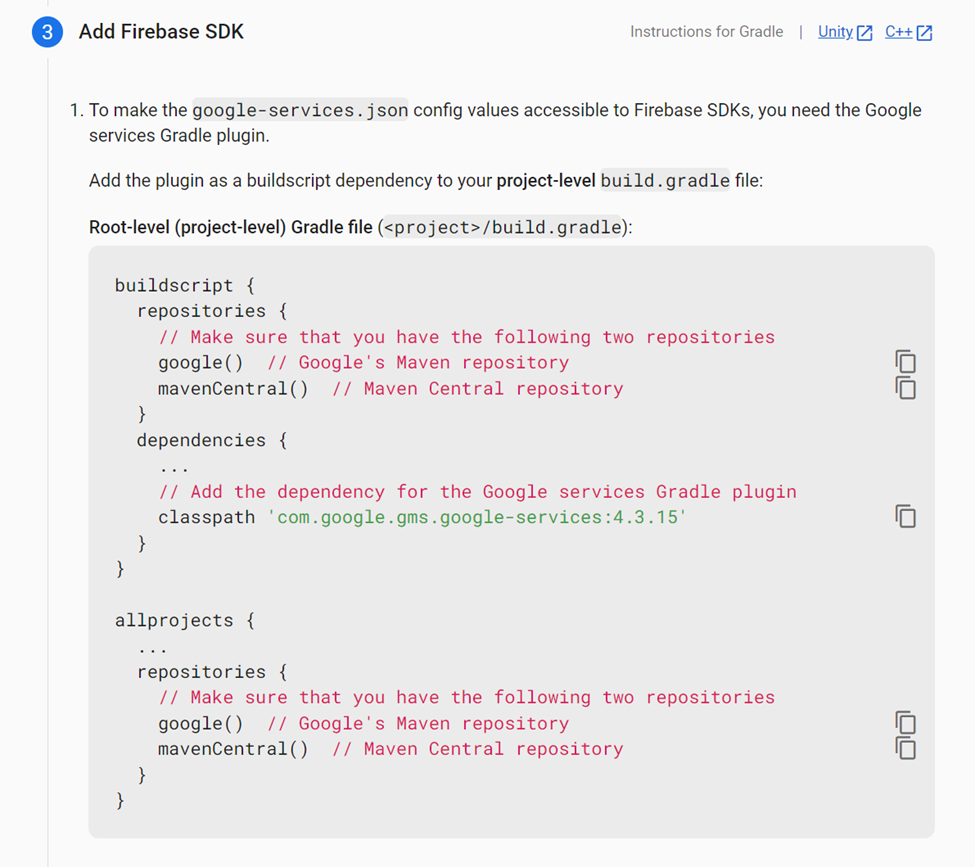
Step 3 (Adding Firebase SDK to Android Studio):
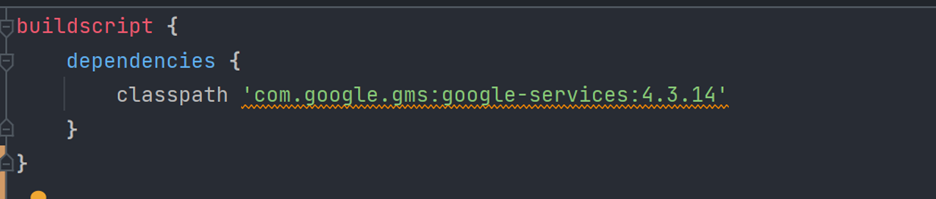
In you Android Studio (Android Tab) -> Gradle Scripts -> build.gradle (Project: *Project Name*) copy what is written in the firebase
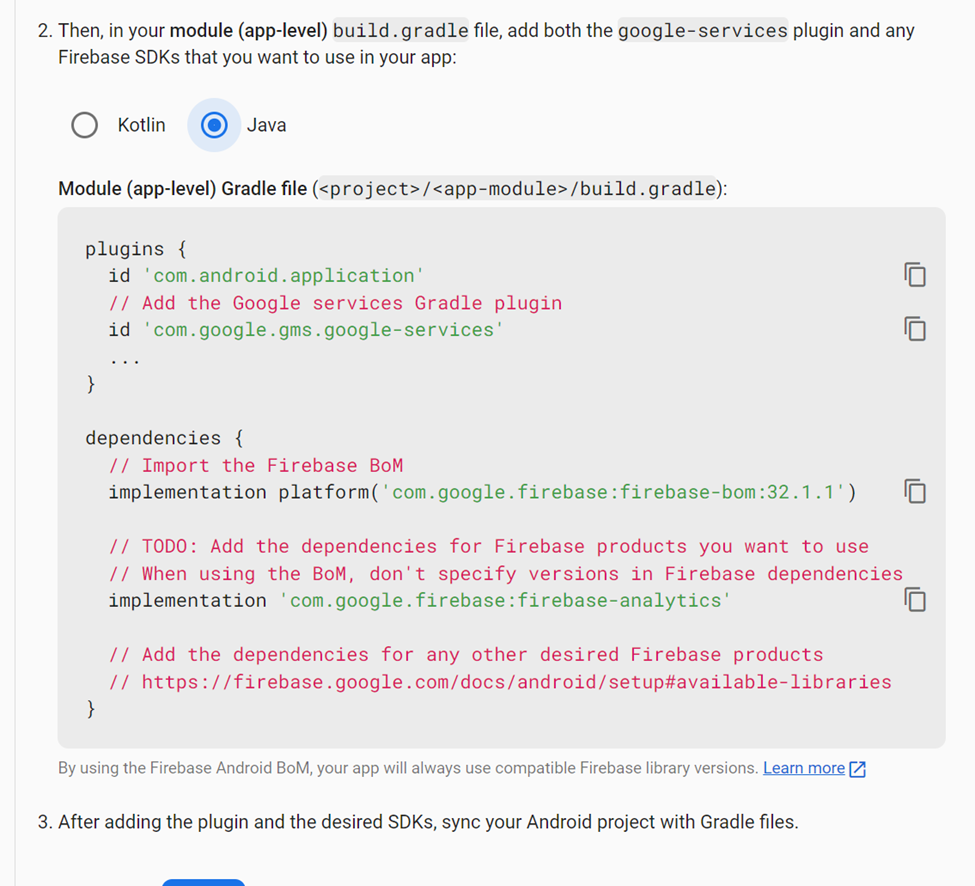
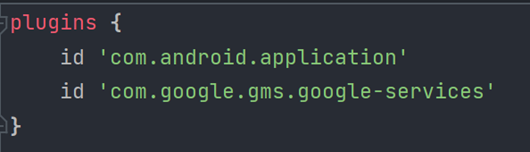
In you Android Studio (Android Tab) -> Gradle Scripts -> build.gradle (Module: App) copy what is written in the firebase

Then we are done with setting up firebase in both Visual Studio Code and Android Studio
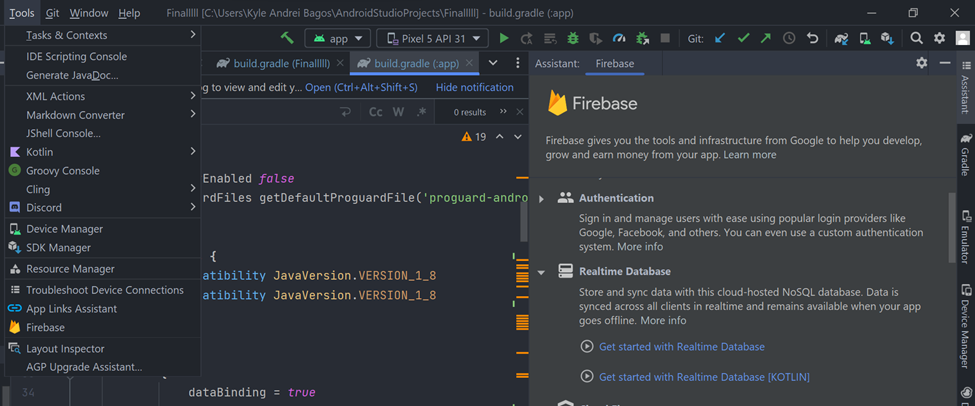
HOW TO USE FIREBASE IN ANDROID STUDIO
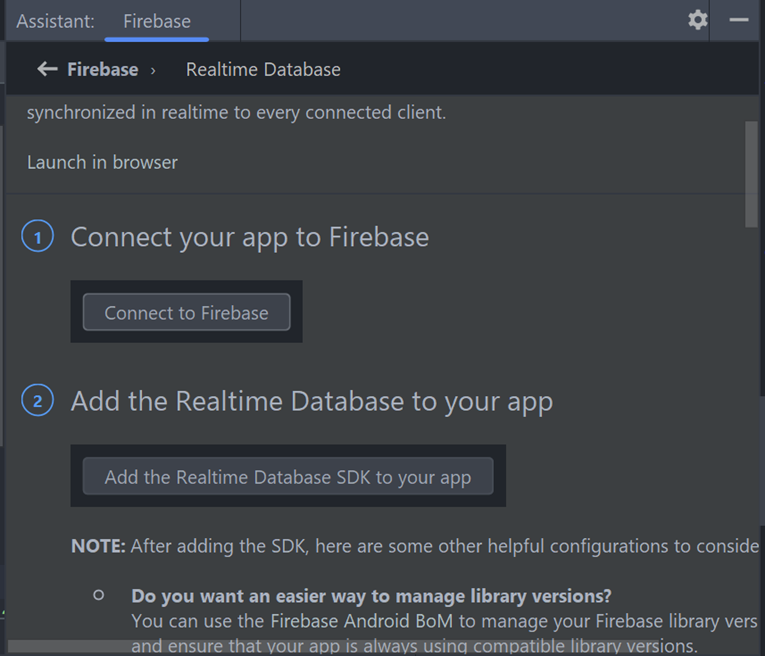
Go to Tools -> Firebase
After clicking get started with Realtime Database it will provide instructions on adding Realtime Database:
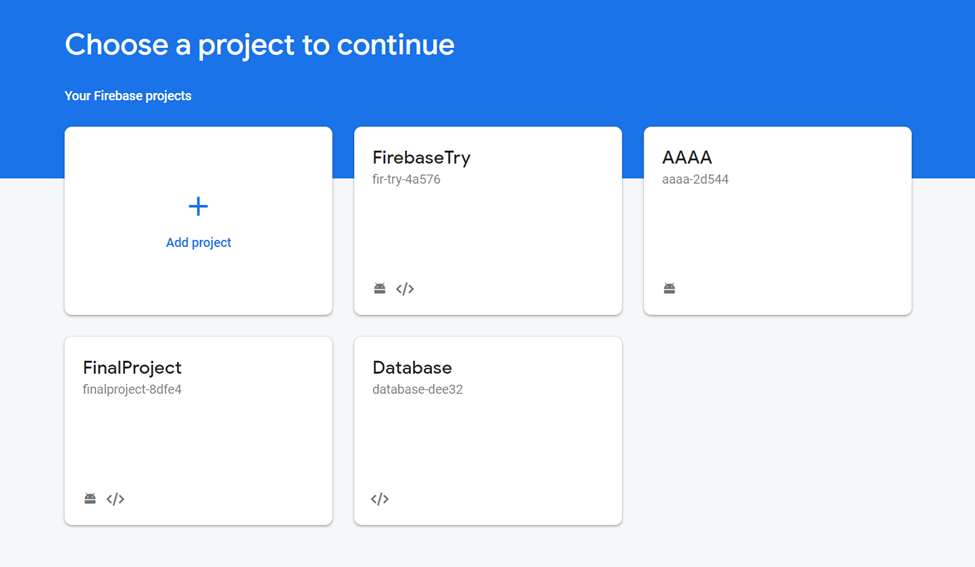
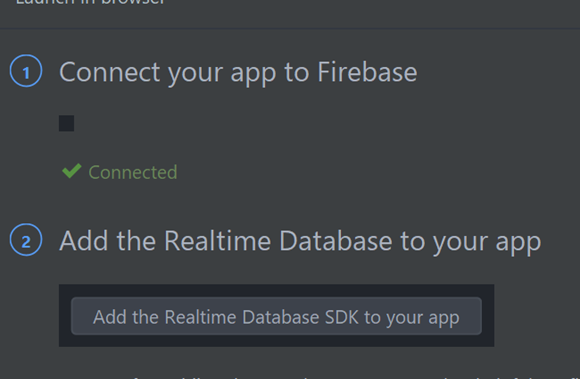
After selecting the database a window will pop-up which confirms that you are now connected to the database
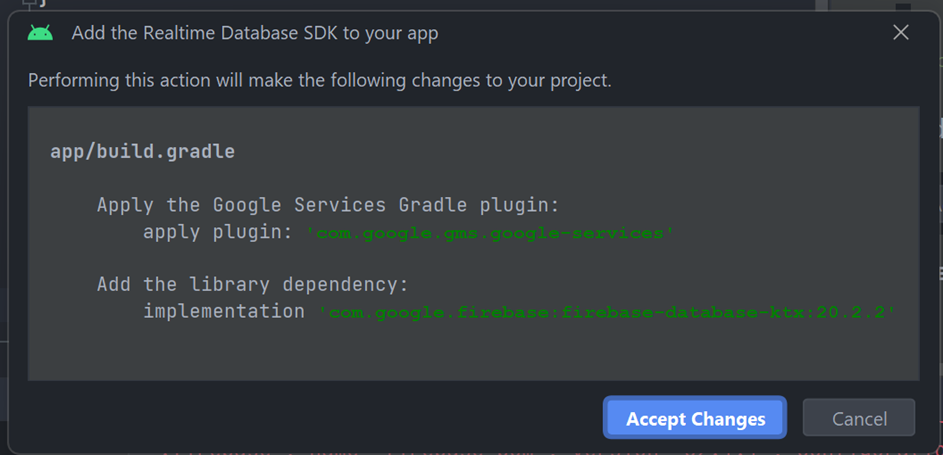
Next Step (Adding Realtime Database SDK):
And then Repeat it with the other Firebase serivces which is included in the Android Studio if needed
And there you have it, you have now created and connected the Firebase to the Android Studio and Visual Studio Code