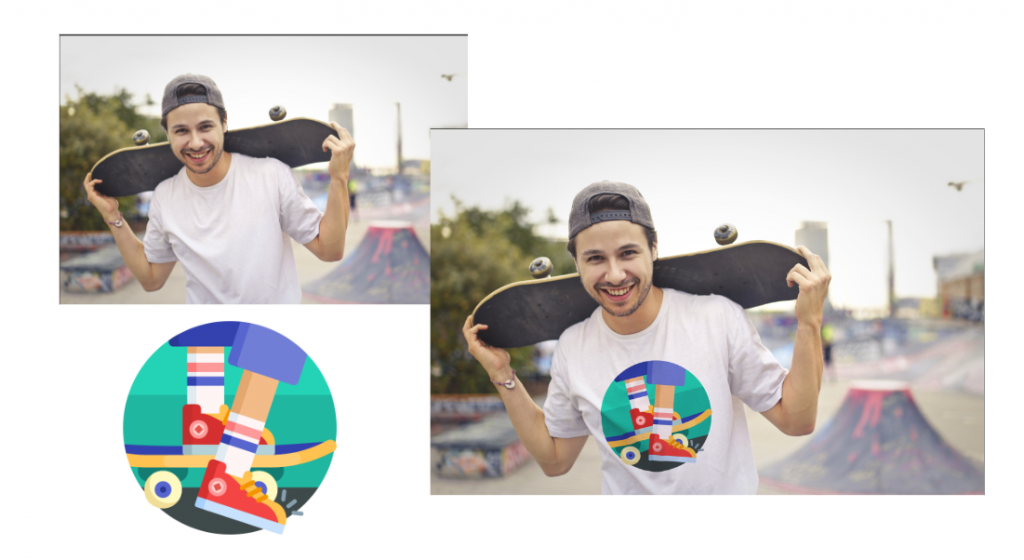
In this tutorial I will be showing how to incorporate a logo or nay design to a shirt. This can be use if you are trying to make a mockup for a shirt for your logo. Or maybe you are just exploring how to do it, I will show you how to do it instead of just putting right above the shirt.
In this tutorial I will be using a photo from Pexels by Andrea Piacquadio and a logo from Flaticon.
First things first open your photo in phootoshop, next make a selection of the shirt using quick selection tool.

Next duplicate the selection by pressing ctrl+J. You can hide hide the original picture for now and start preparing the new layer.
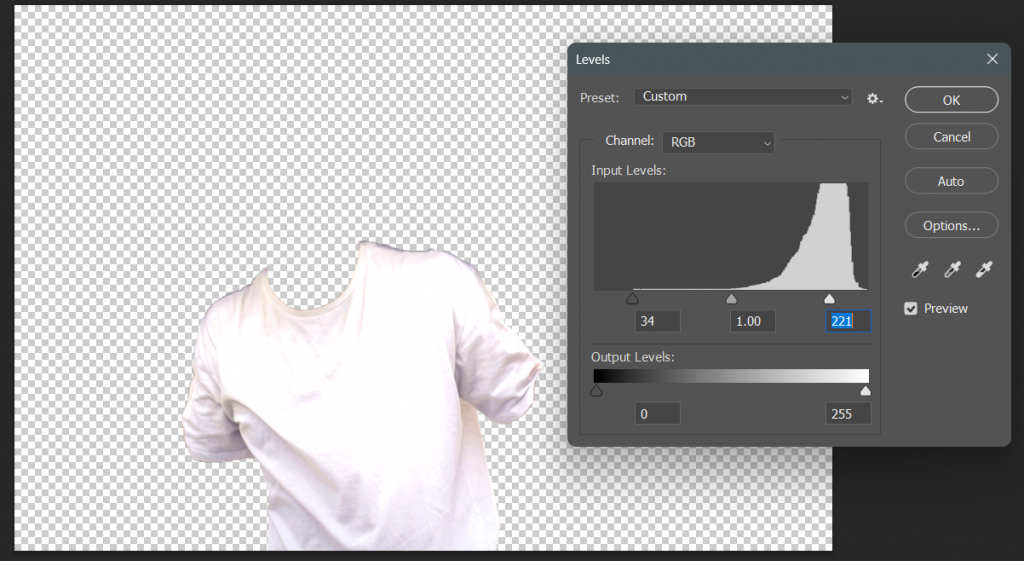
Adjust the Levels of the shirt by pressing ctrl_L or go to Image>Adjustment>Levels. You want to make the shirt a little bit lighter by sliding the black and white slider a little to the center.
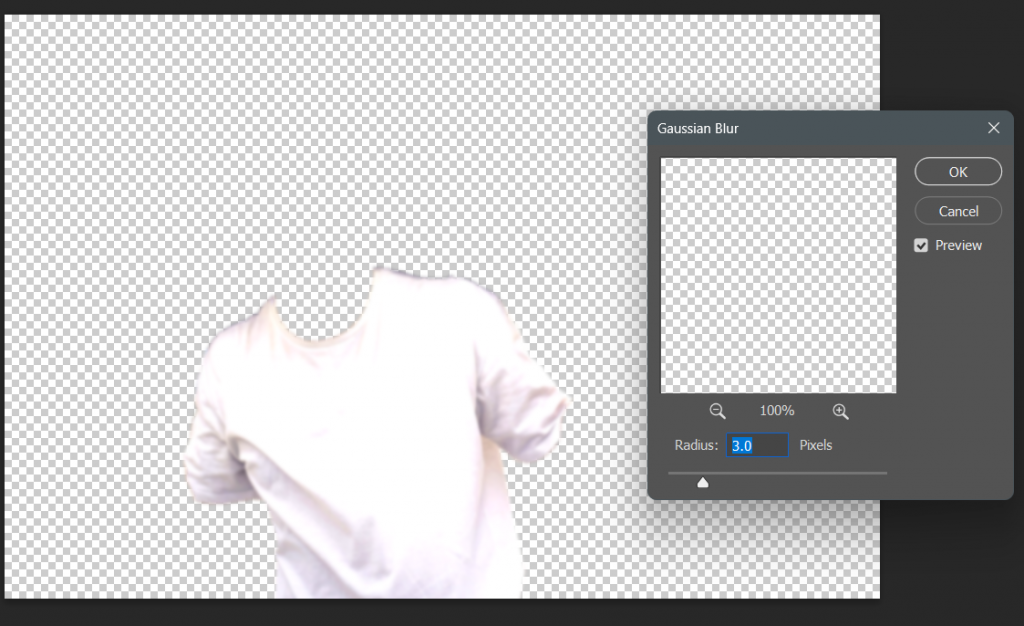
After adjusting the levels you will be adding a gaussian blur. Go to Filter>Blur>Gaussian Blur. Add a 3.0 percent blur to the layer.
Once done with adding the blur, save the file as psd and name it displacement. You will be needing that to use in the distort filter. File>Save As
Blending the Logo/Design on the shirt
After saving the displacement file you can now delete the shirt layer and import you logo or design in photoshop. Convert the logo as smart object by right clicking the logo layer and select Convert to Smart Object.
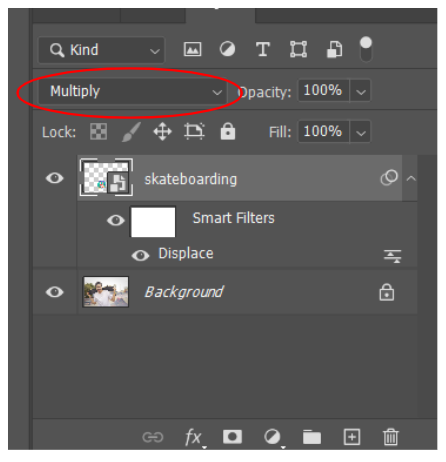
Once converted, go to Filter>Distort>Displace. Hit ok and select the displacement psd file that you created earlier. Change the blending mode of the logo layer to multiply.
Finally, right click the logo layer and select Blend Options. on the Underlying Layer hold alt and grab the second arrow for the white side of the spectrum and slide going to the left until desired blending is achieved.
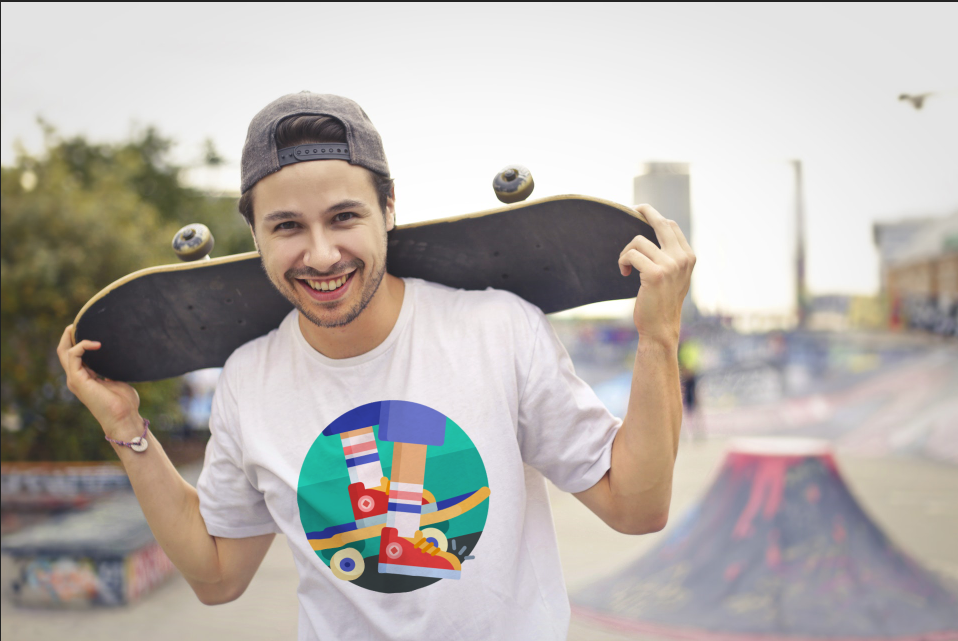
Great job! You successfully incorporated your logo/design to the shirt. You can now use this yo your future projects. Remember to keep learning and be creative.
