
Plugins are the best option if you want to improve the functionality of your WordPress website. Whether you’re new to WordPress or an experienced user, we’ll take you through the easy process of installing plugins with this article. Let’s get started and enhance the functionality of your website!
Here’s the guide on how to install a WordPress plugin:
1. You need to go to your WordPress development website.
Note: You cannot edit under WordPress.com
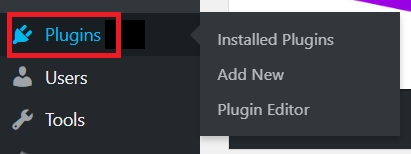
2. Go to Dashboard and click Plugins
3. Under Plugins, you will see “Installed Plugins“, “Add New”, and “Plugin Editor”. You will click “Add New”
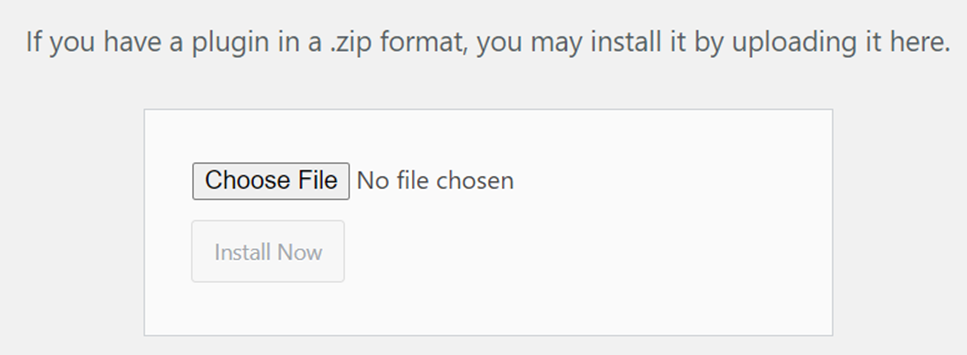
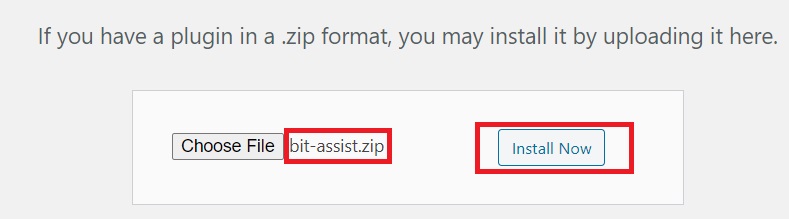
4. There are options, you can search plugins or upload the downloaded plugin file that you need.


5. the plugin will be uploaded from my computer in this blog. Click “ Upload Plugin”
6. Click “Choose File” and “Install”.
Note: The file must be .zip format.
7. You can see the uploaded plugin under Dashboard. In this case, the uploaded plugin is to create a widget for chat assistance on a website.

Lastly, You can now explore your uploaded plugin! I hope this tutorial has been useful to you in understanding how to set up WordPress plugins. You may improve your website’s functionality and appearance with the correct plugins, giving visitors a more interesting and easy-to-use experience. To maintain the security and functionality of your website, always select reliable plugins from reliable sources and make sure to update them on a regular basis. Enjoy installing your plugins!