
Introduction
When we want to release an application to our play store, we have to create some requirements before it gets published. One of the requirements is an AAB bundle. An AAB Bundle is your app’s compiled code and resources which is used by Google Play to generate APKs for each device configuration. This allows you to no longer build, sign, and manage multiple APKs for optimization in multiple devices. In this blog, I will be teaching you how to generate an AAB for your application.
Creating a Keystore
First, we have to create a keystore.
Note: If you already have an existing keystore, skip to the next step.
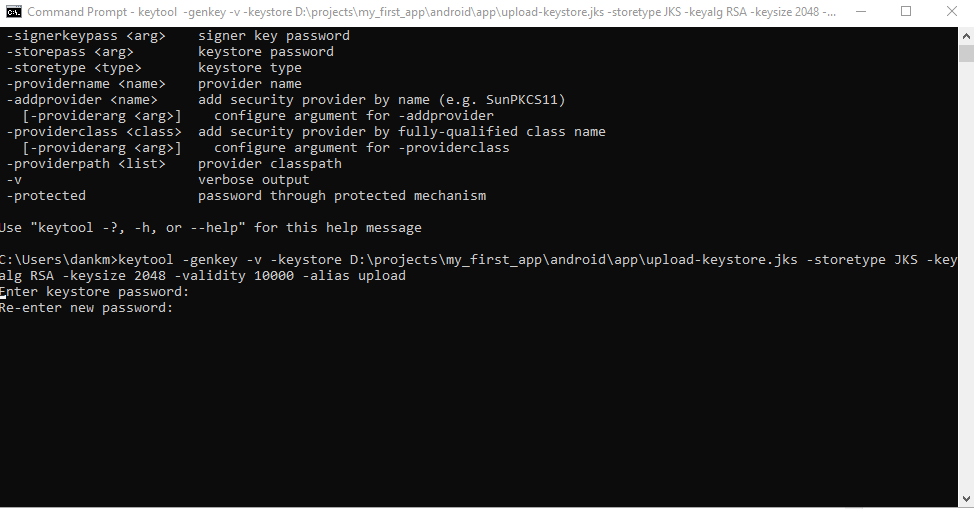
First, open the file location of your project and go to \android\app
Then, open your command line(cmd) and type this command:
keytool -genkey -v -keystore (location of your app folder)\upload-keystore.jks -storetype JKS -keyalg RSA -keysize 2048 -validity 10000 -alias upload
It will then ask you for a keystore password, enter something that you can remember:
Afterwards, it will ask you to enter additional details, you can leave it blank but for the last part, you have to type yes.
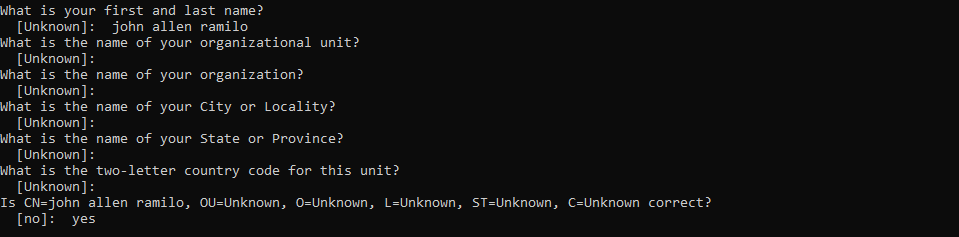
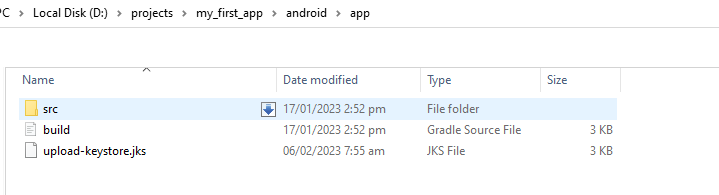
Then, it will ask you to re-enter your password twice. After you’re finished you will now see a keystore file in your app folder.
Referencing keystore from app
Open your project in Visual Studio Code and create key.properties file under the android folder. Then, paste the following code inside the file:
storePassword=(put your keystore password here)
keyPassword=(put your keystore password here)
keyAlias=upload
storeFile=../app/upload-keystore.jks>
Save the file once you are finished.
Configure signing in gradle
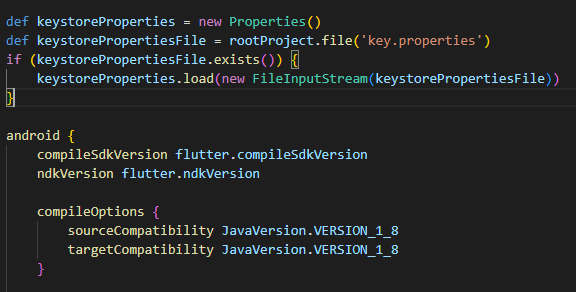
Open your build.gradle under android\app\build.gradle and paste this code right before android. This is your keystore information.
  def keystoreProperties = new Properties()
   def keystorePropertiesFile = rootProject.file('key.properties')
   if (keystorePropertiesFile.exists()) {
       keystoreProperties.load(new FileInputStream(keystorePropertiesFile))
   }
This is what it should look like
Find the buildTypes block and replace it with this code. This is your sign in configuration info.
   signingConfigs {
       release {
           keyAlias keystoreProperties['keyAlias']
           keyPassword keystoreProperties['keyPassword']
           storeFile keystoreProperties['storeFile'] ? file(keystoreProperties['storeFile']) : null
           storePassword keystoreProperties['storePassword']
       }
   }
   buildTypes {
       release {
           signingConfig signingConfigs.release
       }
   }
Generating the Bundle
Open the command line inside your Visual Studio Code and type flutter build appbundle. Wait for the process to be finished.
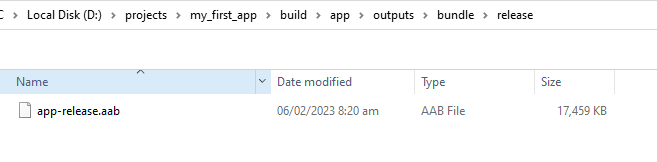
After the AAB file has been built, you can now see the AAB file in your project folder under \your project folder\build\app\outputs\bundle\release
You can now upload it to your Google Play Console and publish your app for review.
Conclusion
Creating your own application is fun and exciting. If you are reading this blog, I highly encourage you to create your own application. Having your own application uploaded to the play store is an accomplishment. It is also very exciting as your application has a chance to be recognized worldwide. If you liked this blog, feel free to share it to anyone.