

Prerequisites
- OpenSSH compatible SSH client
- Visual Studio Code
- Remote – SSH extension
How to Setup
Step 1
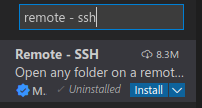
- In Visual Studio Code, go to Extensions and search and install Remote – SSH extension.
Step 2
Click the Open a Remote Window located in the bottom left corner

Step 3
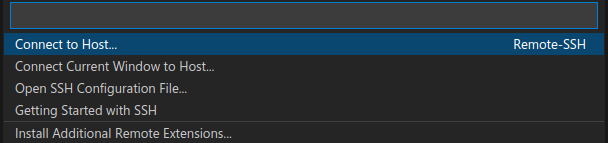
To add ssh connection, click “Connect to Host” and click “Add new SSH Host”

Step 4
Enter the ssh command to connect to your remote server. enter ssh <hostname>@<ipaddress>

Step 5
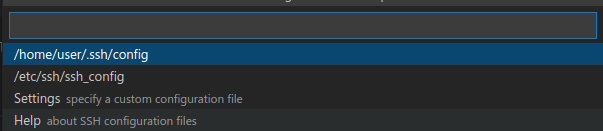
Choose the path to save the connection, in my case i choose /home/user/.ssh/config
Step 6
Now you save the ssh connection, repeat step 2 and step 3 but choose the ip address you enter. It will open a new window of vs code and try to connect to your remote server. It will require you to input your server password. Enter your password and you can now choose your project and start developing remotely


If you to change the ip address that shows when choosing a server, repeat the step 3 and choose Open SSH Configuration File and choose the path where you save your connection and it will open a config file.
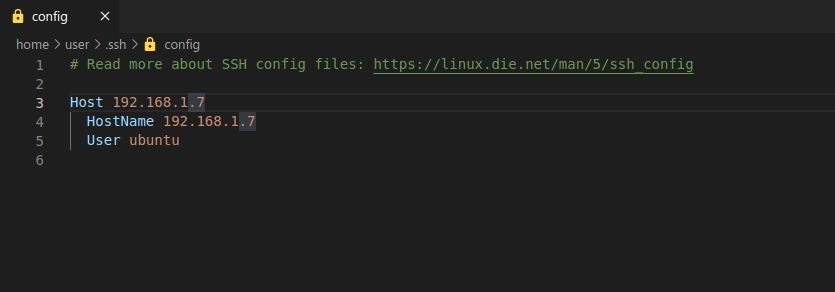
Just change the Host to your desired name and save.