
A “workspace” in Visual Studio Code is a collection of one or more folders that are open in a VS Code window (instance). In most cases, a single folder will be opened as the workspace, but depending on your development workflow, you can use an advanced configuration called Multi-root workspaces to include multiple folders.
The concept of a workspace allows VS Code to do the following:
- Set preferences that apply only to a specific folder and not to others.
- Task and debugger launch configurations that are only valid in that workspace are saved.
- UI state associated with that workspace is saved and restored (for example, the files that are opened).
- Only that workspace’s extensions can be enabled or disabled.
In VS Code documentation, issues, and community discussions, the terms “folder” and “workspace” are often used interchangeably. Consider a workspace to be the hub of a project with additional VS Code knowledge and capabilities.
We have a workspace named “keith.code-workspace” with three working folders: flutter-app, JavaScript, and FOSS, for example.
Set up a workspace
Now, let us see how to create a workspace in VS Code.
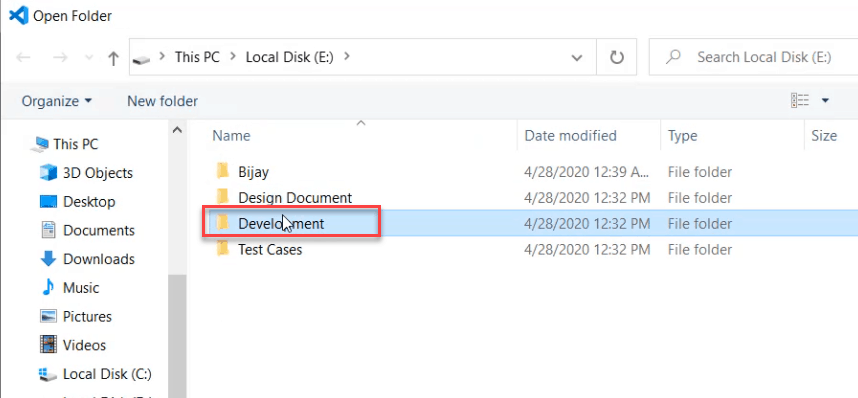
Here, first I have created a folder in my E drive. It looks like below:

Now Open Visual Studio Code, then go to File -> Open Folder.

Then select the Development folder like below:
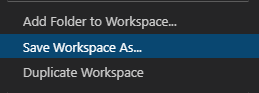
Now click on File -> Save Workspace As
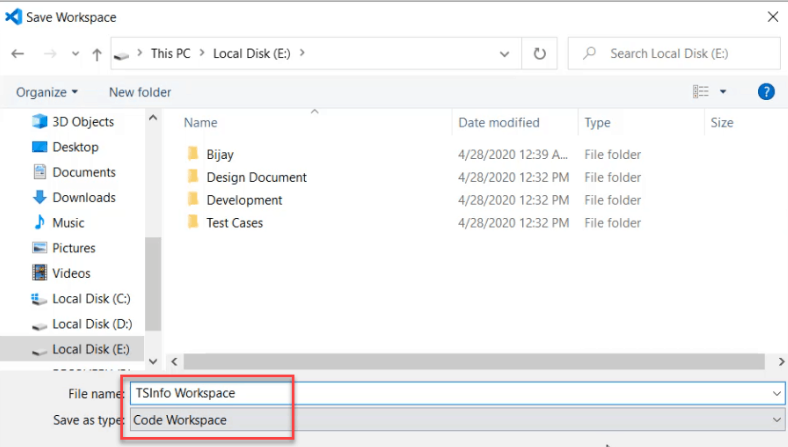
Then you can provide a name for the workspace like below, click on Save.
Now, you can see in the VS code, the workspace will reflect like below:
