
MBR or Master Boot Record disks user the standard BIOS partition table. On the other hand, the GPT or GUID Partition Table use UEFI or Unified Extensible Firmware Interface. The advantage of GPT disks is that you can have more than four partitions on each disk. It is also required for larger storage disks more than two terabytes (TB).
Check MBR or GPT partition style
Before modifying the system configuration, you want to check the current settings to see whether the system is set to MBR or GPT using these steps:
- Open Start.
- Search for Disk Management and click the top result to open the experience.
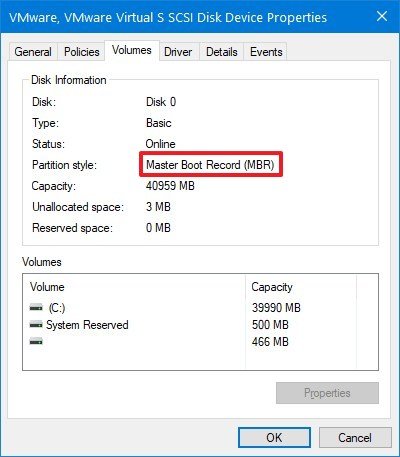
- Right-click the drive (where Windows OS is installed) and select the Properties option.
- Click on the Volumes tab.
- Under the “Partition style” field, if the field reads GUID Partition Table (GPT), the drive does not need conversion, but if you see the Master Boot Record (MBR) label, you can use the conversion tool to switch.
- Click Cancel button.

Once you complete the steps, you can proceed to change the partition style on the computer.
Also, if you need to change the partition, make sure to check your device manufacturer’s support website to find out whether the hardware includes support for UEFI before using these instructions.
Convert MBR to GPT partition style (offline)
To convert a drive using MBR to GPT on Windows 10, use these steps:
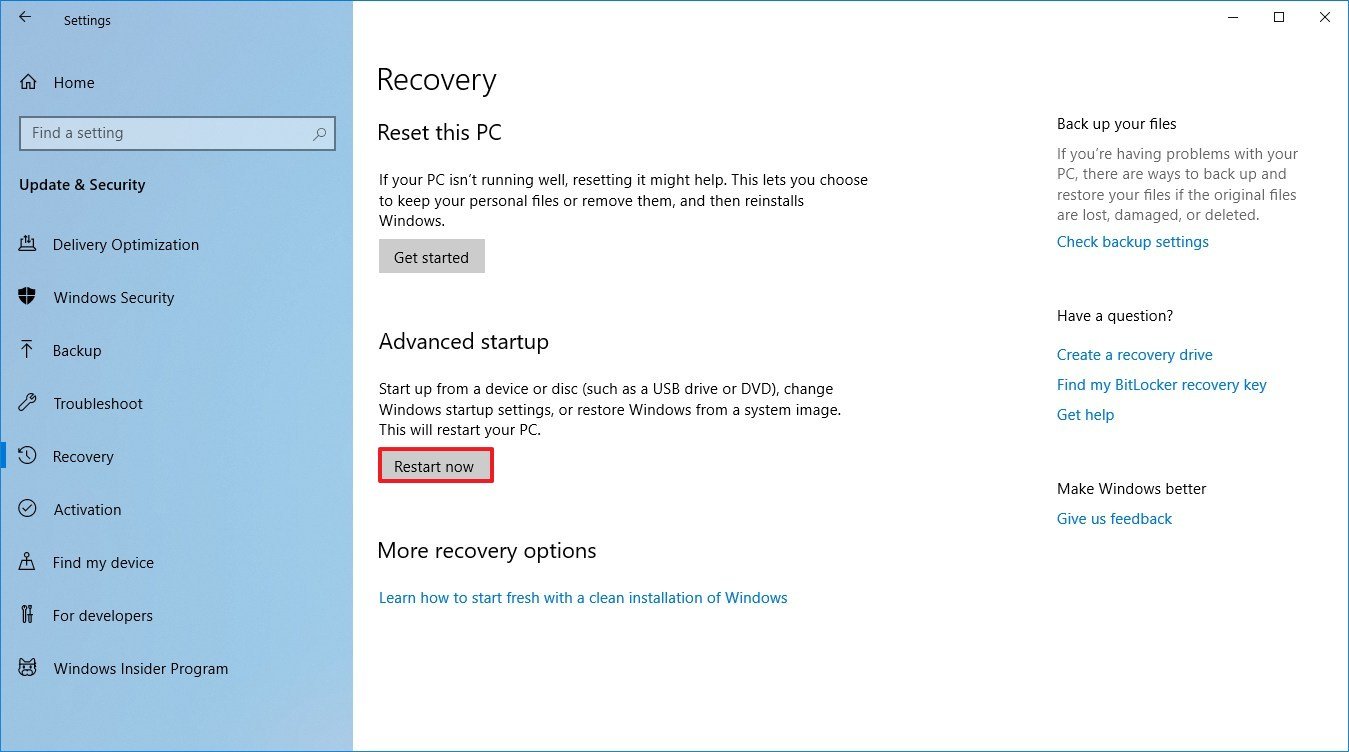
- Open Settings.
- Click on Update & Security.
- Click on Recovery.
- Under the “Advanced startup” section, click the Restart now button.
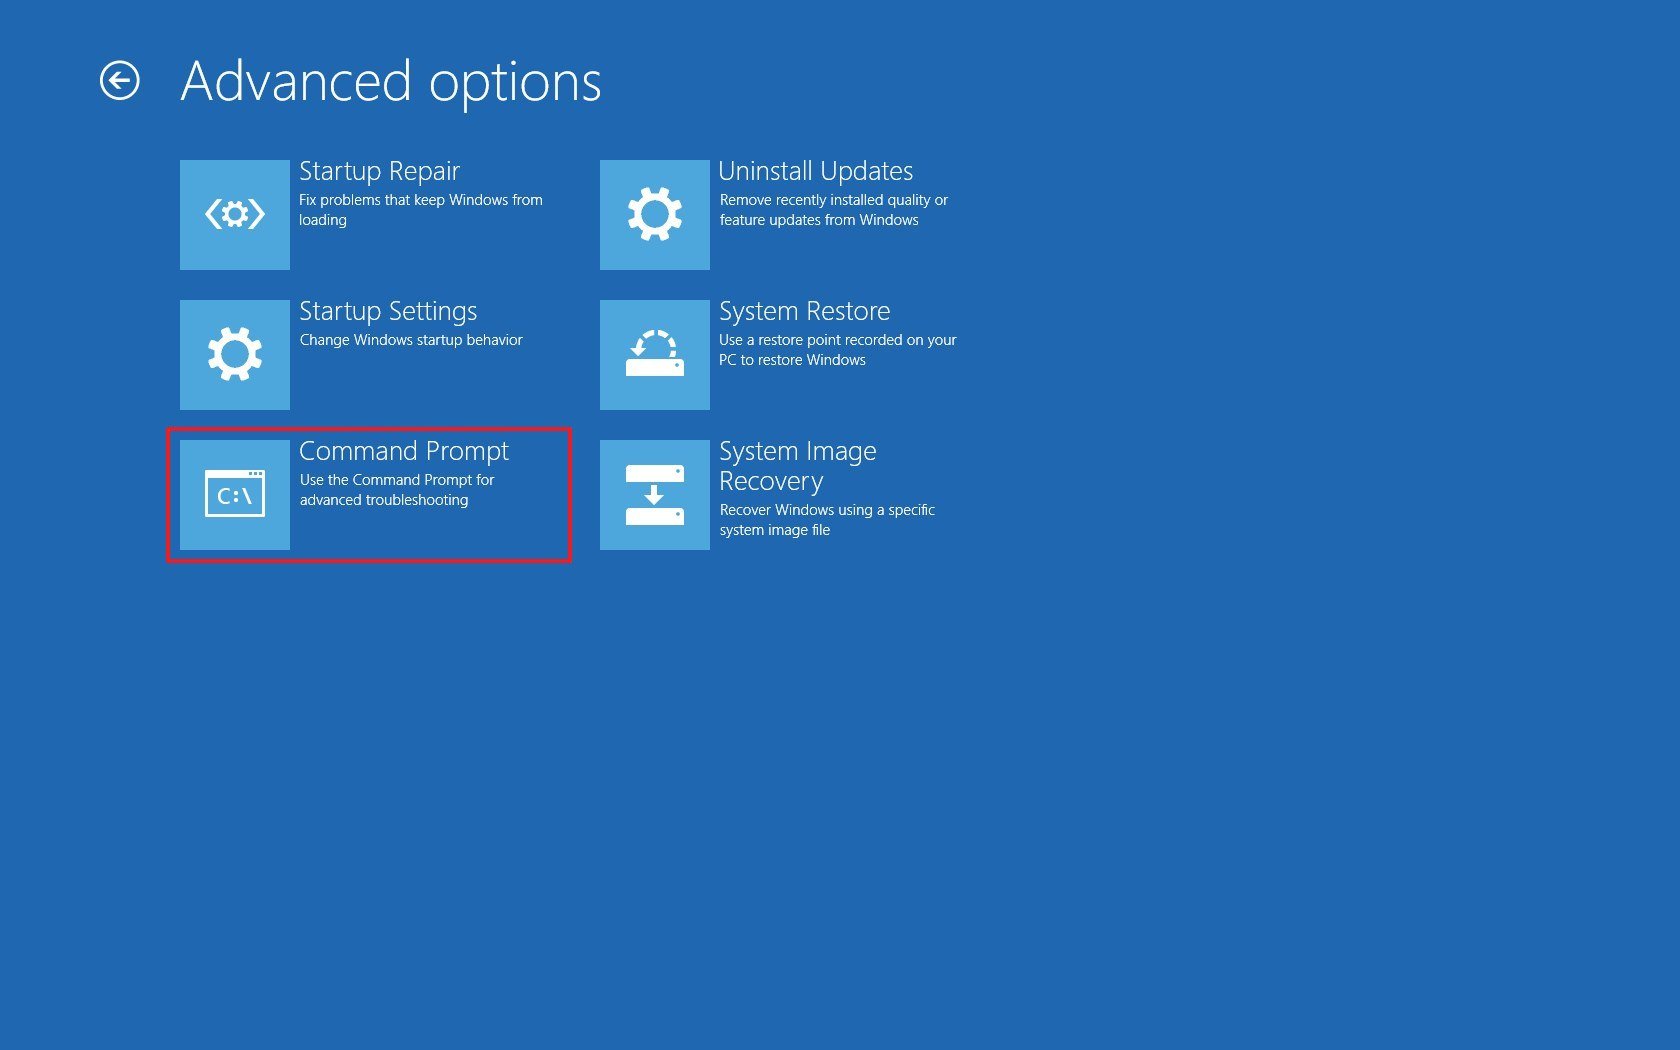
- Click the Troubleshoot option.
- Then click now the Advanced Options.
- After that, the Command Prompt option.
- Select your administrator account and sign in (if applicable).
- Select your administrator account and sign in (if applicable).


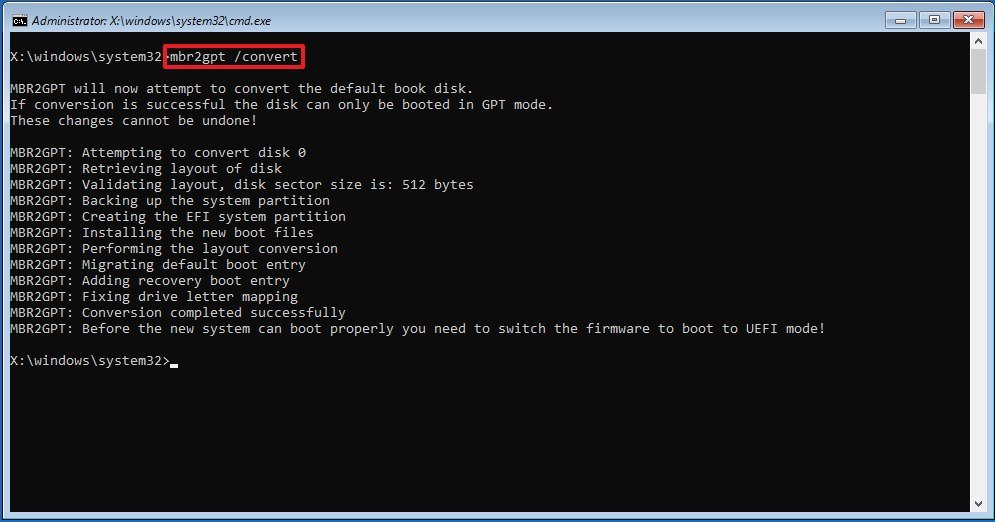
Type the following command to validate that the drive meets the requirements and press Enter: mbr2gpt /validate
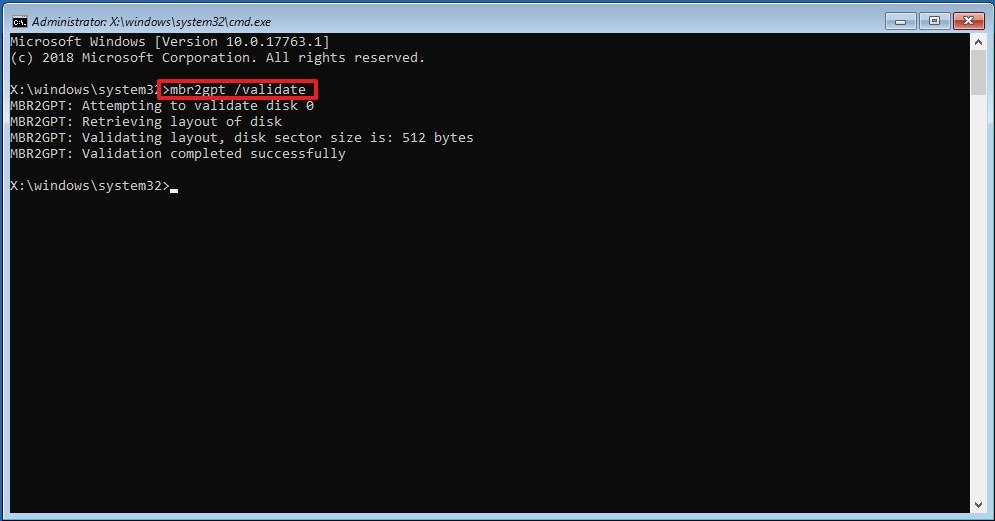
Type the following command to convert the drive from MBR to GPT and press Enter: mbr2gpt /convert
Click the Close button and the Turn Off PC option.
After you complete the steps, several actions will take place, including validating the drive and creating an EFI system partition (ESP). The UEFI boot files and GPT components will be added to the partition. The MBR2GPT tool will update the Boot Configuration Data (BCD), and the previous letter will be added to the drive.
Sources:
https://www.windowscentral.com/how-convert-mbr-disk-gpt-move-bios-uefi-windows-10
https://www.windowscentral.com/windows-10-help
https://docs.microsoft.com/en-us/windows-server/storage/disk-management/change-an-mbr-disk-into-a-gpt-disk