
To add the ListView inside Column in Flutter, there are mainly three ways:
- Using Expanded (Recommended)
- Using ShrinkWrap
- Using SizedBox
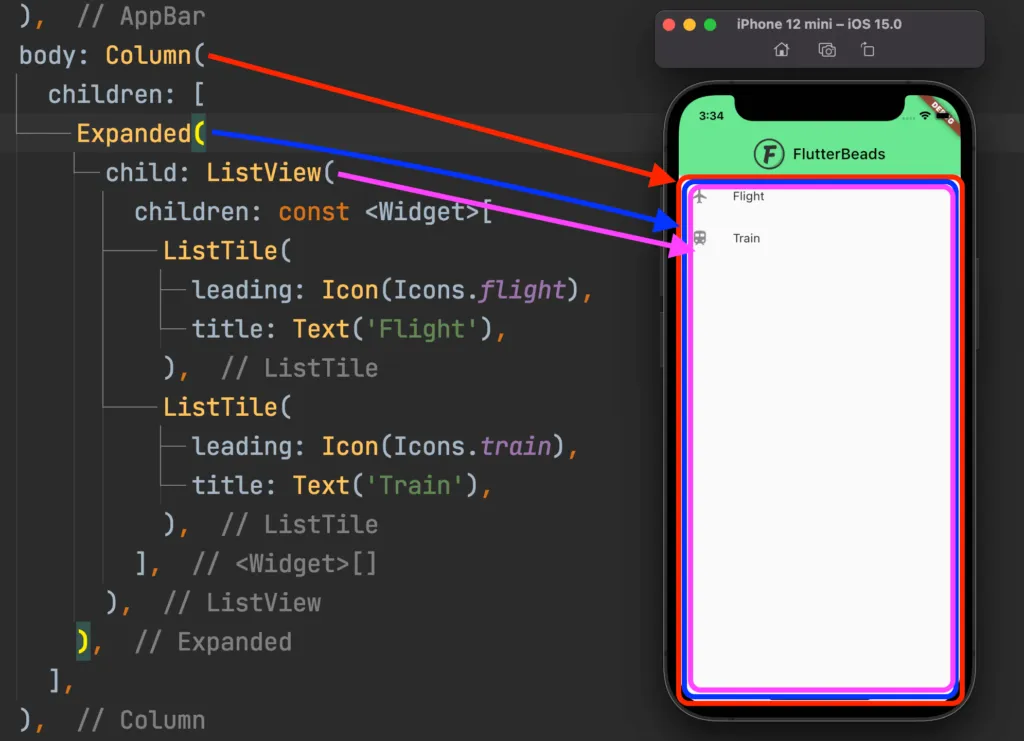
1. Using Expanded (Recommended)
You can wrap your ListView widget inside the Expanded widget and this will allow the ListView to take all the available as long as the Column allows.
Note: The main point here is to tell how much tall the ListView will be.
Code Example:
Column(
  children: [
    Expanded(
      child: ListView(
        children: const <Widget>[...],
      ),
    ),
  ],
)
Output:
2. Using shrinkWrap
Add the shrinkWrap property to the ListView and set it to True. This will make the ListView widget shrink down to its children’s size.
Code Example:
Column(
  children: [
    ListView(
      shrinkWrap: true,
      children: const <Widget>[...],
    ),
  ],
)
Output:

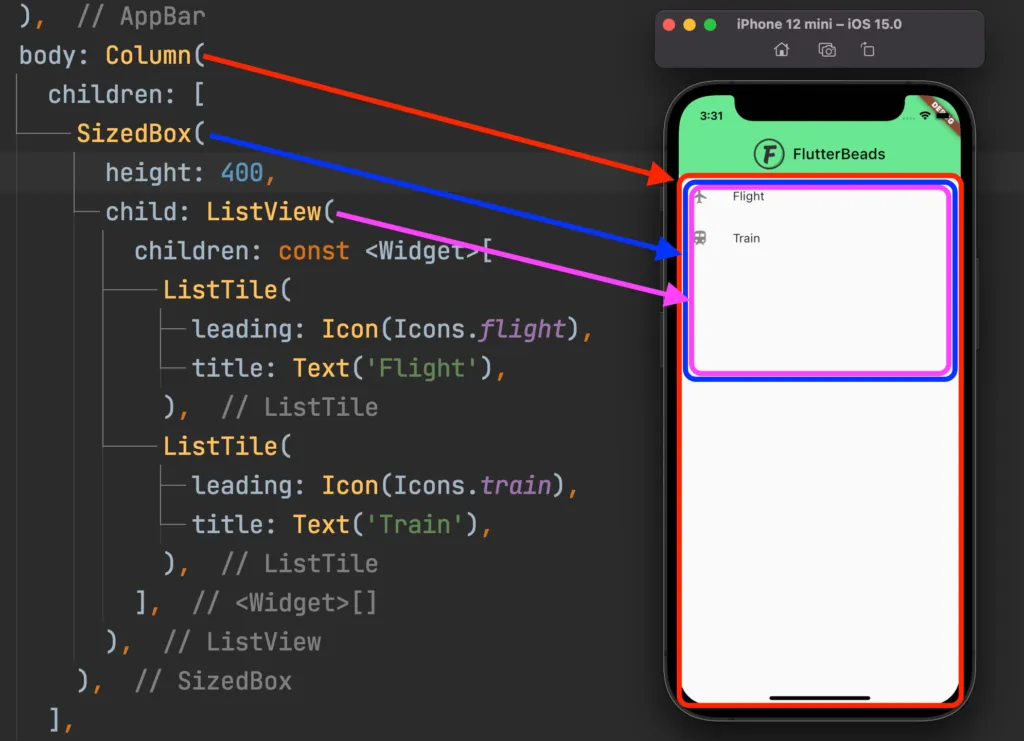
3. Using SizedBox
Wrapping your ListView inside the SizedBox widget will ensure that the ListView is displayed in a limited portion instead of infinite size.
Code Example:
Column(
  children: [
    SizedBox(
      height: 400,
      child: ListView(
        children: const <Widget>[...],
      ),
    ),
  ],
)
Output:
Conclusion
In this tutorial, we learned the top 3 ways to add the ListView inside Column in Flutter with practical examples. Basically, we can use the Widgets such as SizededBox or Expanded or simply the shrinkWrap property to include ListView inside Column. We also understood why did you get this error with a practical example.