
While GitHub has historically been the preferred choice for developers globally, the landscape of version control systems is evolving. With the increasing popularity of self-hosted options and the demand for more control over repositories, platforms such as Gitea have become attractive alternatives. If you’re contemplating transferring your GitHub repository to Gitea, this comprehensive guide will lead you through each step of the process, guaranteeing a smooth transition for your projects.
Step 1: Open Gitea and Start the Migration
Begin by accessing your Gitea instance and logging into your account. Once logged in, locate the option to add a new repository, usually denoted by a plus (+) icon.
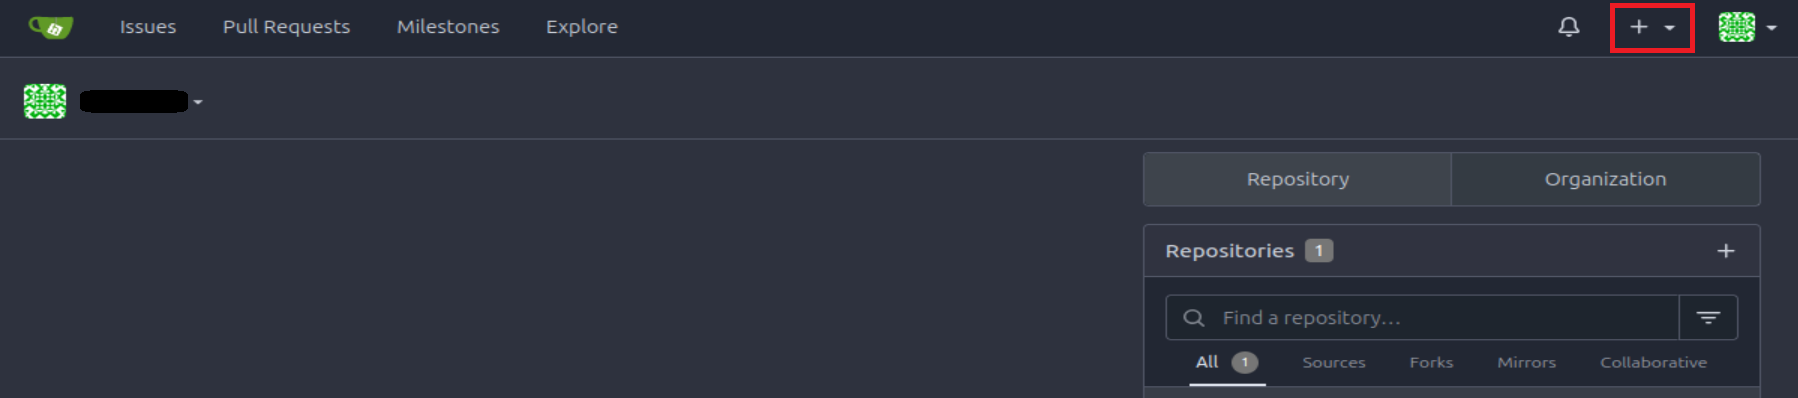
From the dropdown menu, select “New Migration” to initiate the migration process.

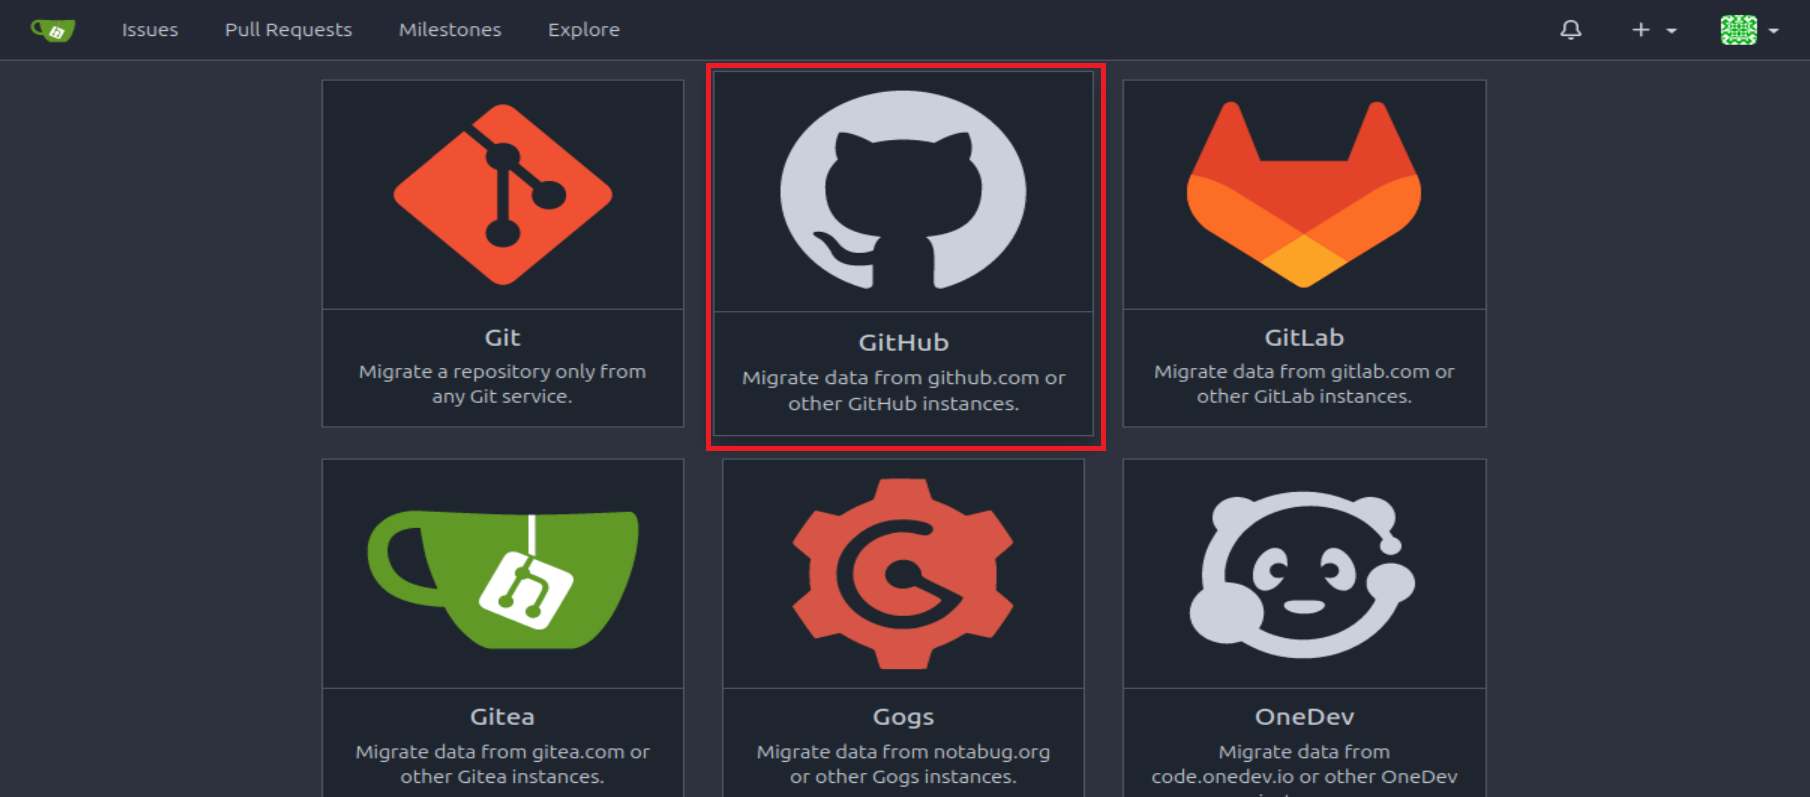
Step 2: Select GitHub as the Source
In the migration interface, choose GitHub as the source platform since we’re migrating from GitHub to Gitea. This ensures that the migration tool is configured to pull data from your GitHub repository.
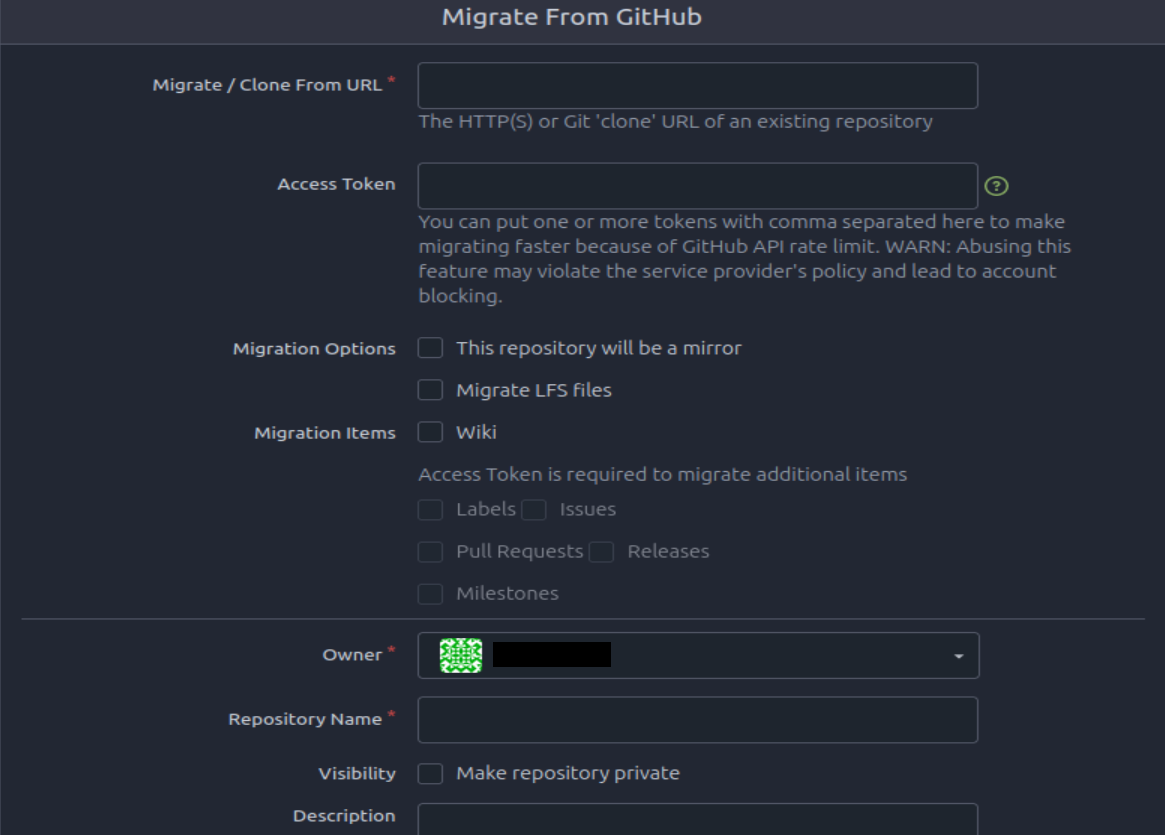
Step 3: Gather Required Information from GitHub
To proceed with the migration, you’ll need two essential pieces of information from your GitHub account: the repository URL and a personal access token.
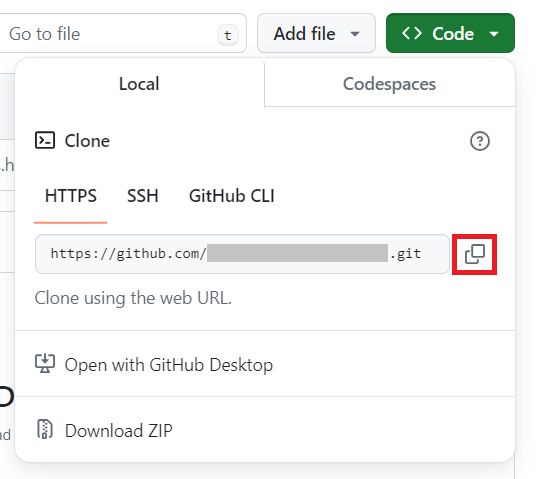
First, navigate to your GitHub repository and click on the “Code” button. From the dropdown menu, select “HTTPS” and copy the provided URL.

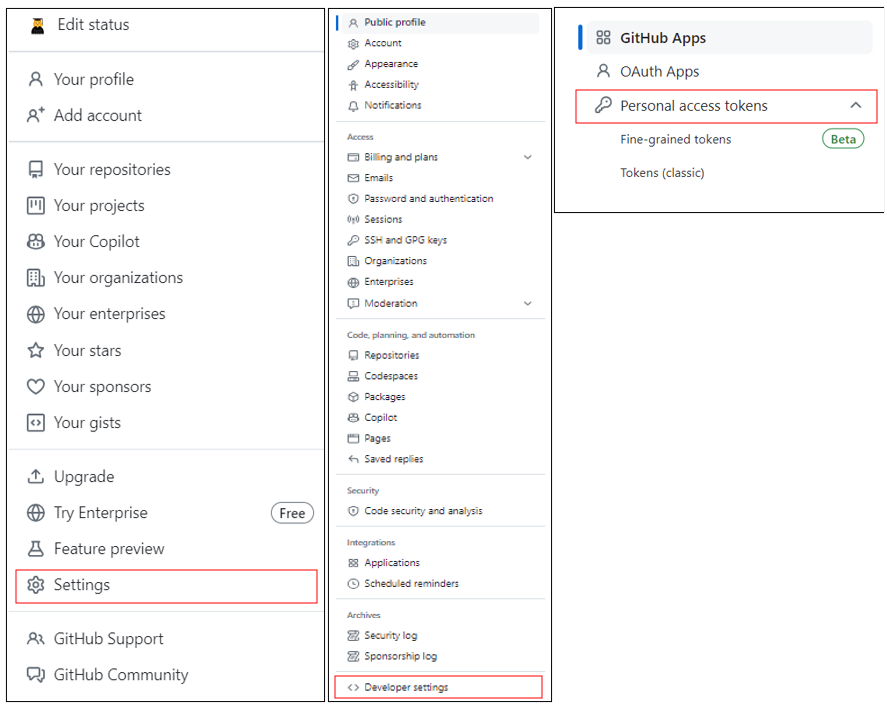
Next, obtain a personal access token from your GitHub account settings. Navigate to your profile, click on “Settings,” then select “Developer settings” followed by “Personal access tokens.” Generate a new token with the necessary permissions and copy it for later use.

Step 4: Configure Migration Options
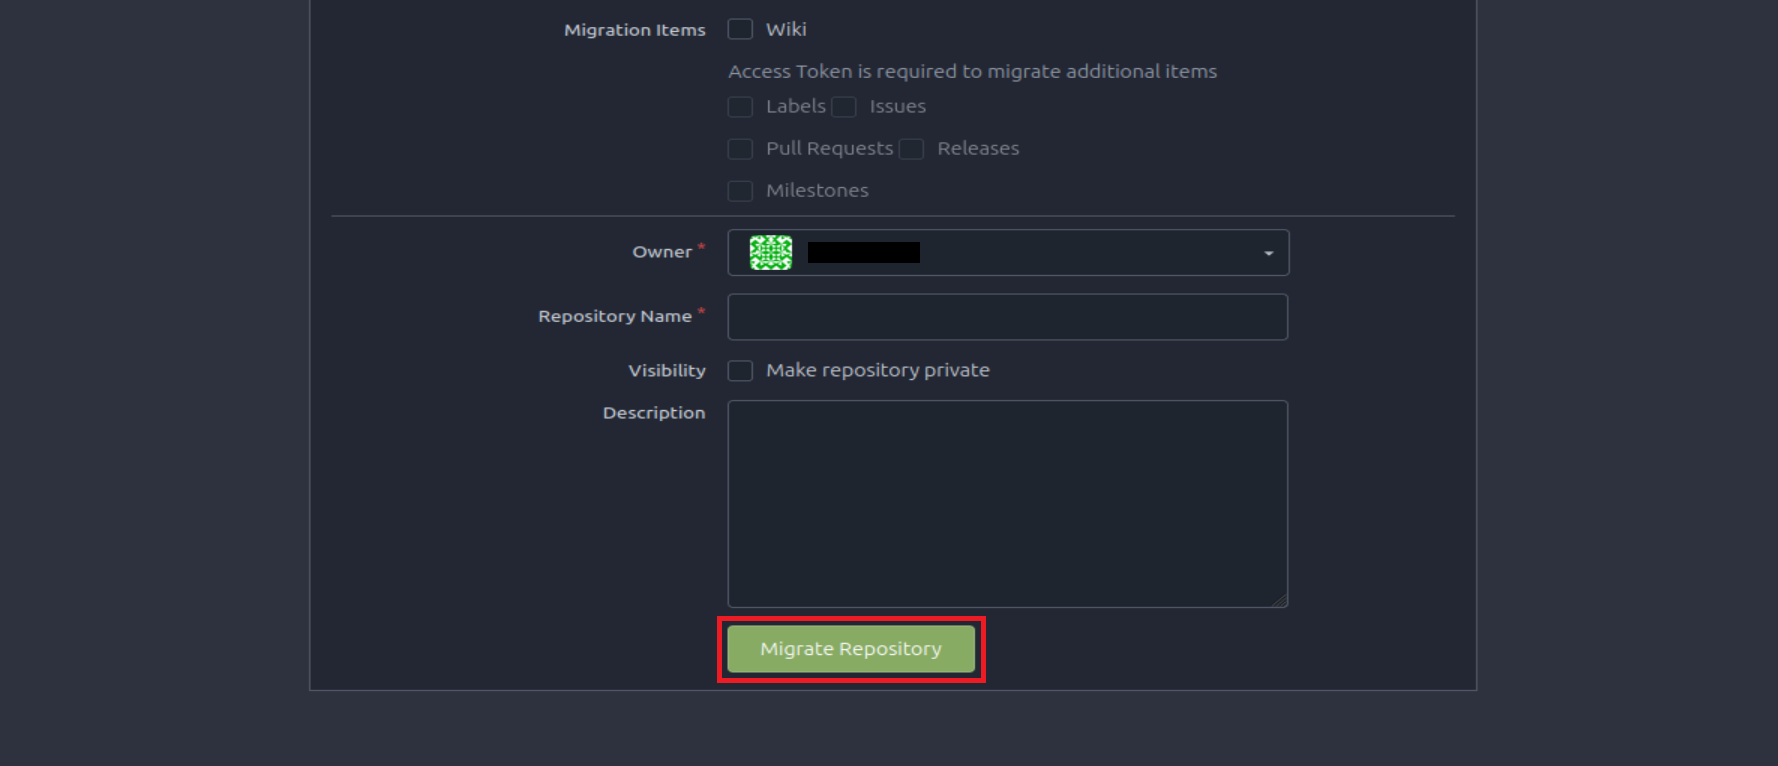
Before initiating the migration, review and configure the migration options according to your preferences. Ensure that all migration items are untoggled unless you have specific requirements that necessitate their inclusion.
Step 5: Specify Repository Details
With the migration settings in place, proceed to fill out the repository details for the migrated project. This includes specifying the repository name, adding a description if desired, and choosing the desired owner or organization.
Step 6: Initiate the Migration
Once all necessary information has been provided, double-check your settings, and click the “Migrate Repository” button to start the migration process. Sit back and relax as Gitea handles the heavy lifting of transferring your repository from GitHub.
Conclusion:
Congratulations! You’ve successfully migrated your repository from GitHub to Gitea, unlocking the benefits of self-hosting and the flexibility of Gitea’s feature-rich ecosystem. Whether you’re a solo developer or part of a larger team, Gitea offers a compelling alternative for managing your code repositories. Happy coding!