

Prerequisites
- A Computer with Visual Studio Code and Git Installed
- A GitHub account with a repository to work with.
Github Repository Cloning
A private repository called junecastillote/demo will be used in this example. However, you can use your repository. If you do not yet have a repository, please see the Creating a new repository doc on GitHub to learn how to set one up.
Follow the steps below to clone a GitHub repository in Visual Studio Code.
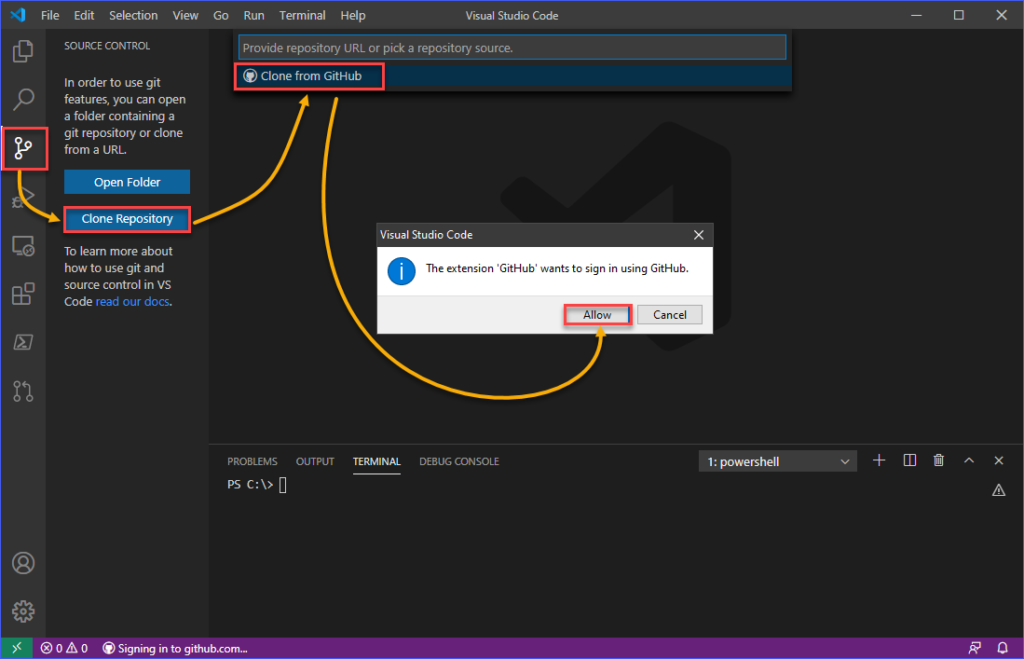
To begin, press the CTRL+SHIFT+G keyboard shortcut or click the Source Control view button. Then, select the Clone Repository option. Then, click Clone from GitHub, and you’ll be asked to authorize a sign-in attempt. Allow should be clicked.
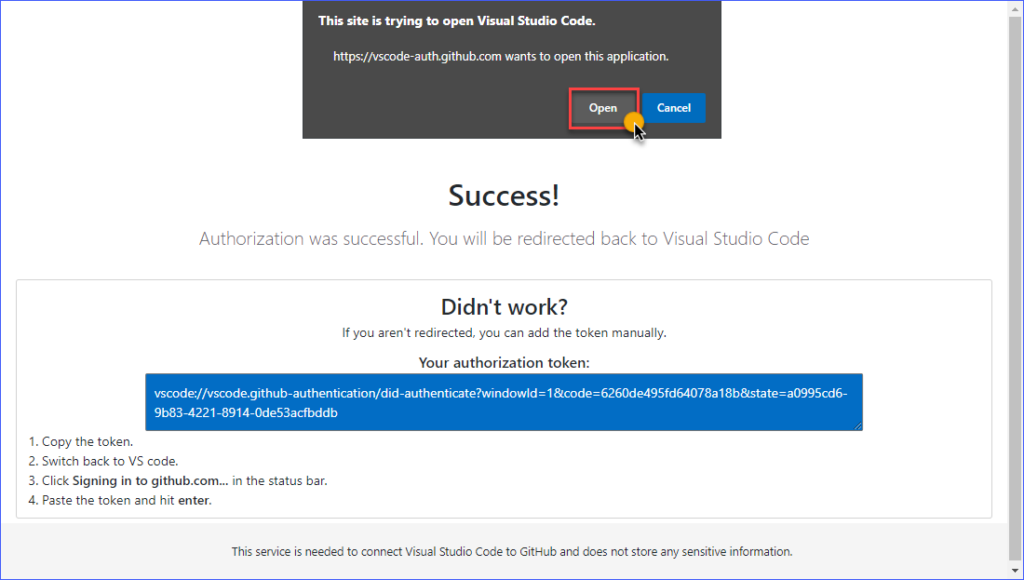
When authorization is complete, you will be presented with a status page similar to the one shown below. If you are prompted that the site is attempting to launch Visual Studio Code, click Open.
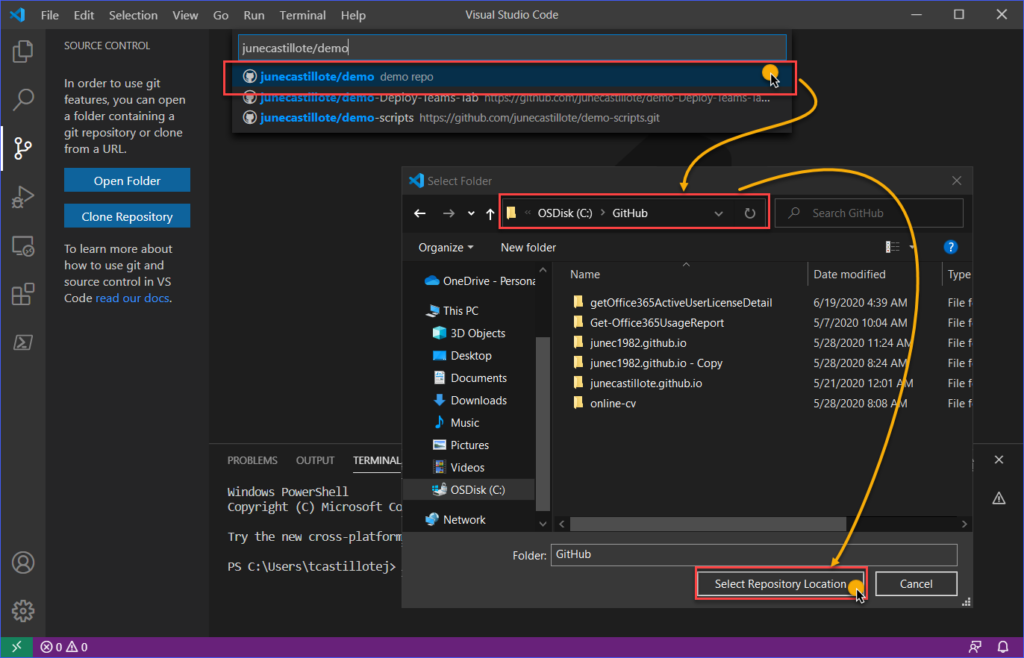
When you return to the VS Code window, you can either search for the repository name or select the repository name to clone. In the following example, the repository junecastillote/demo was searched for and then selected.
After selecting the repository to clone, you will be prompted to specify the location of the repository on your computer. Select Repository Location after specifying the destination folder.
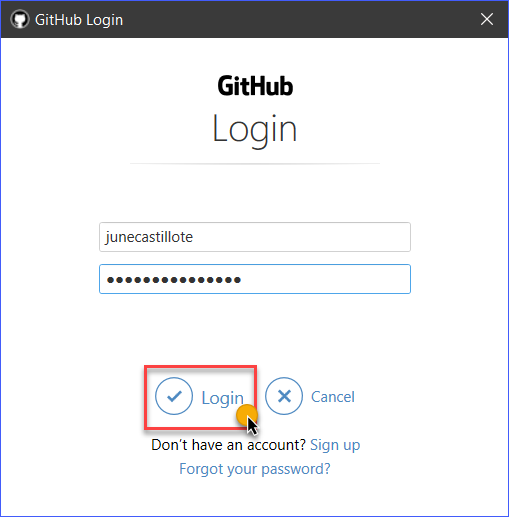
To log in, the GitHub Login window will appear, and you will need to enter your GitHub credentials.
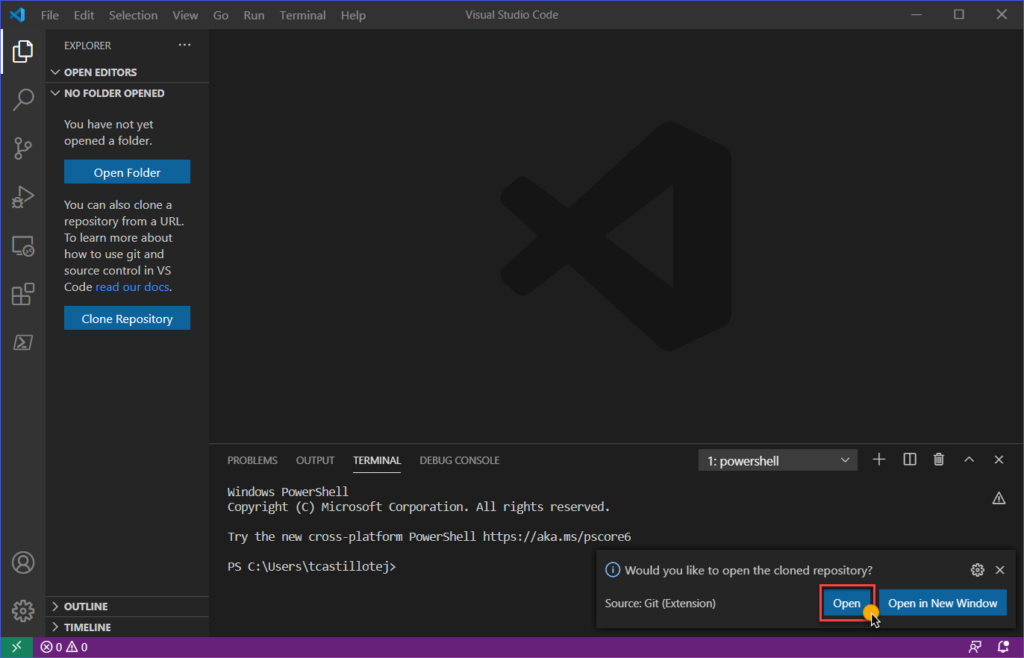
After you finish logging in, VS Code will clone the remote repository to your computer. As shown in the screenshot below, once the cloning is complete, you will receive a notification at the bottom right of the VS Code window. Depending on your preferences, you can now click either Open or Open in New Window.
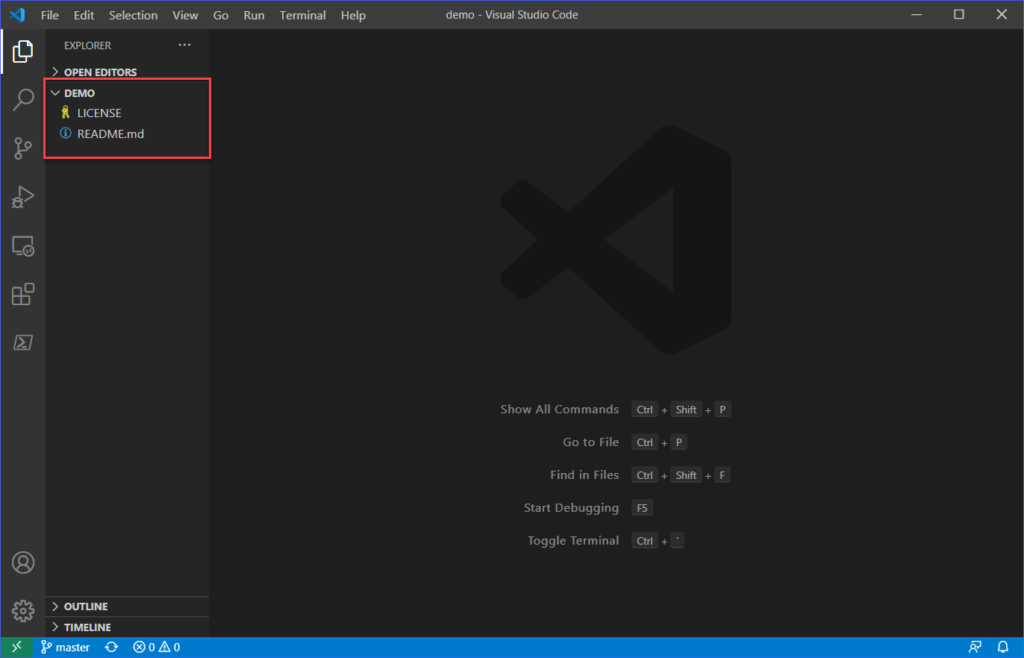
The contents of the cloned GitHub repository are now loaded in VS Code, as shown in the screenshot below. You can now begin making changes to your repository.
Staging, Committing and Pushing Changes to GitHub
Continuing with your Visual Studio Code GitHub setup, VS Code is already configured to use Git and work with your GitHub repository at this point. In addition, a repository was cloned in the previous section, indicating that everything is in working order. But you’re not done yet.
The next step is to see if the changes you made to your cloned repository can be successfully pushed to your remote GitHub repository.
Adding and Modifying Files
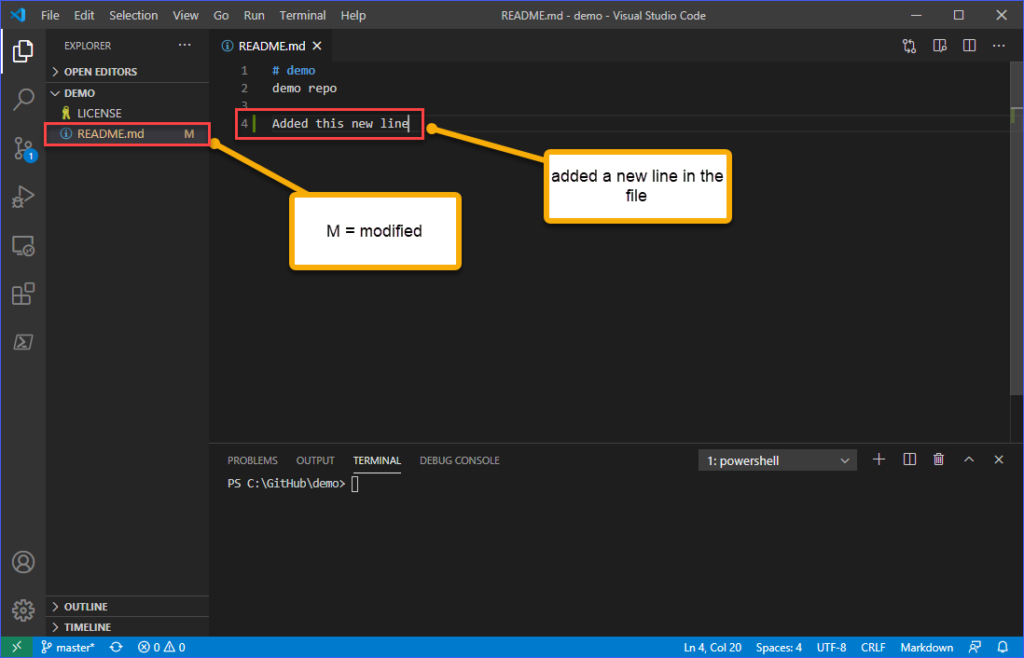
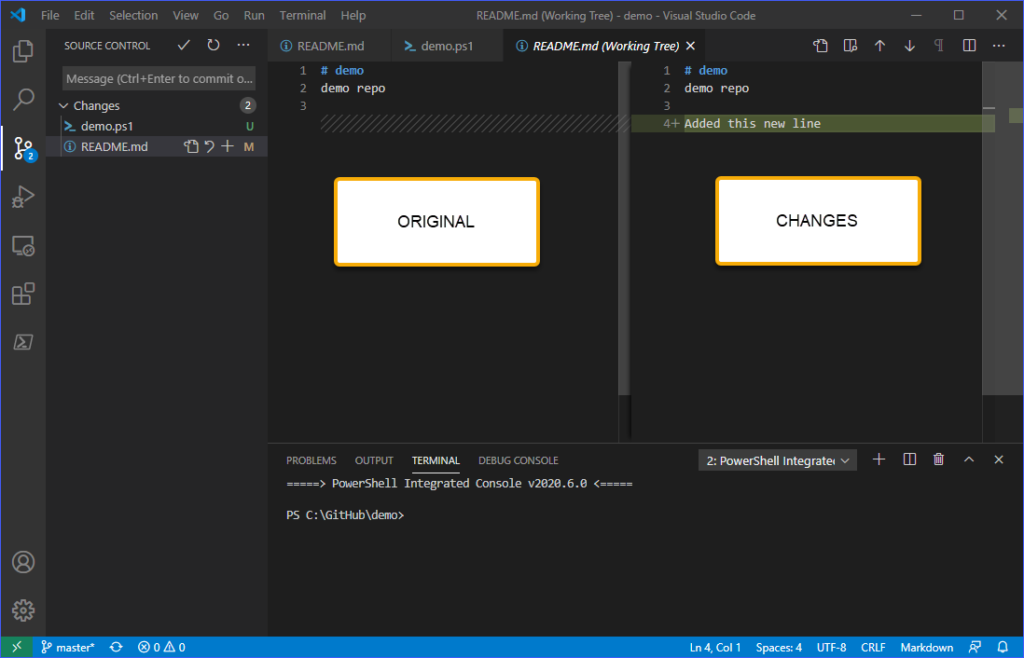
Using the cloned repository from the previous section, the file README.MD is edited to add a new line, as shown below.
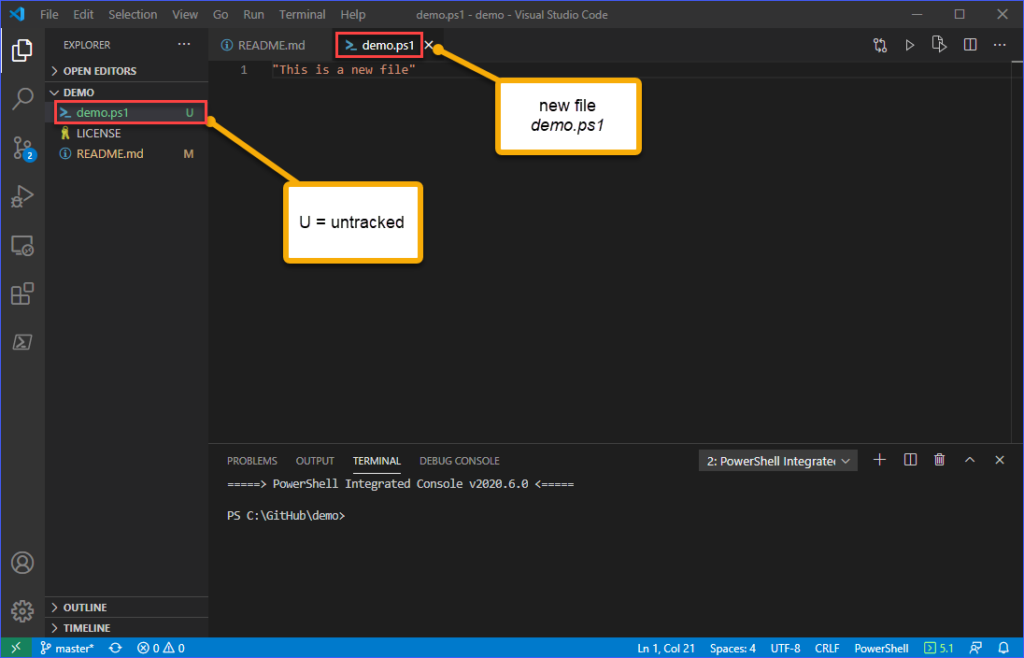
Next, press CTRL+N or go to File —> New File to add a new file to the workspace. The new file in this example is called demo.ps1. Save the file after editing it to add content.
The new file you created will be marked with a U, which stands for untracked. Take a look at the example screenshot below
Reviewing and Staging Changes
Go to the Source Control view to examine and review the changes. You should be able to see that the two changes must be reviewed. As shown in the image below, clicking on each of the changes opens a comparison of the file’s original contents and the proposed changes.
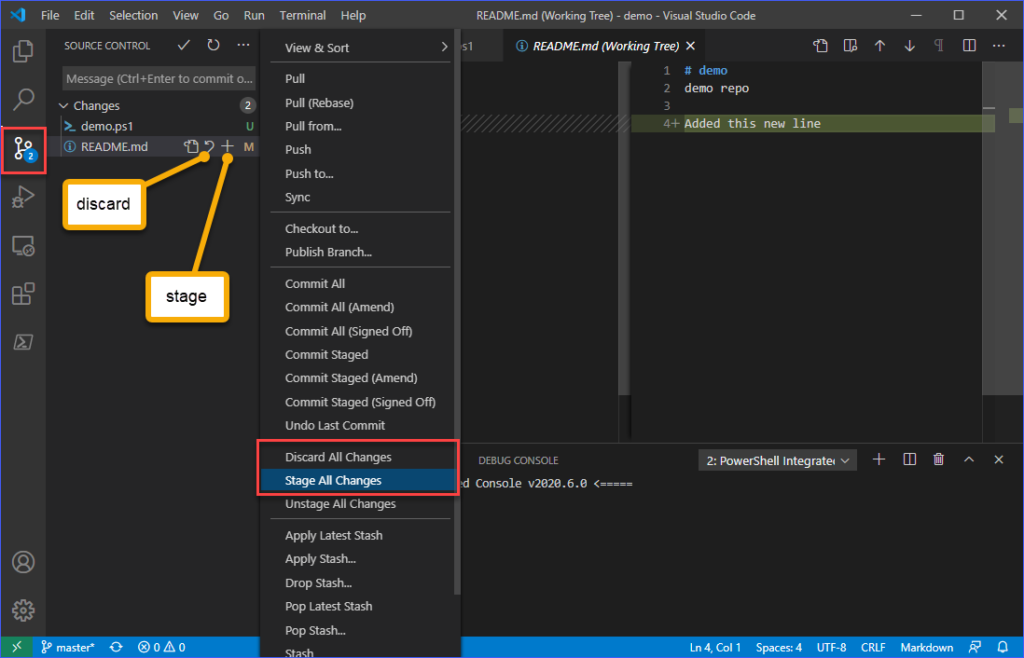
Following your review, you must either discard or stage the changes to the files.
You have the option of discarding or staging each file’s changes. By selecting the discard () or stage (+) icon next to the filename.
You can also stage or discard all changes at once by selecting the Stage All Changes or Discard All Changes menu items from the More actions (…) button. All changes in this example will be staged.
Committing Changes
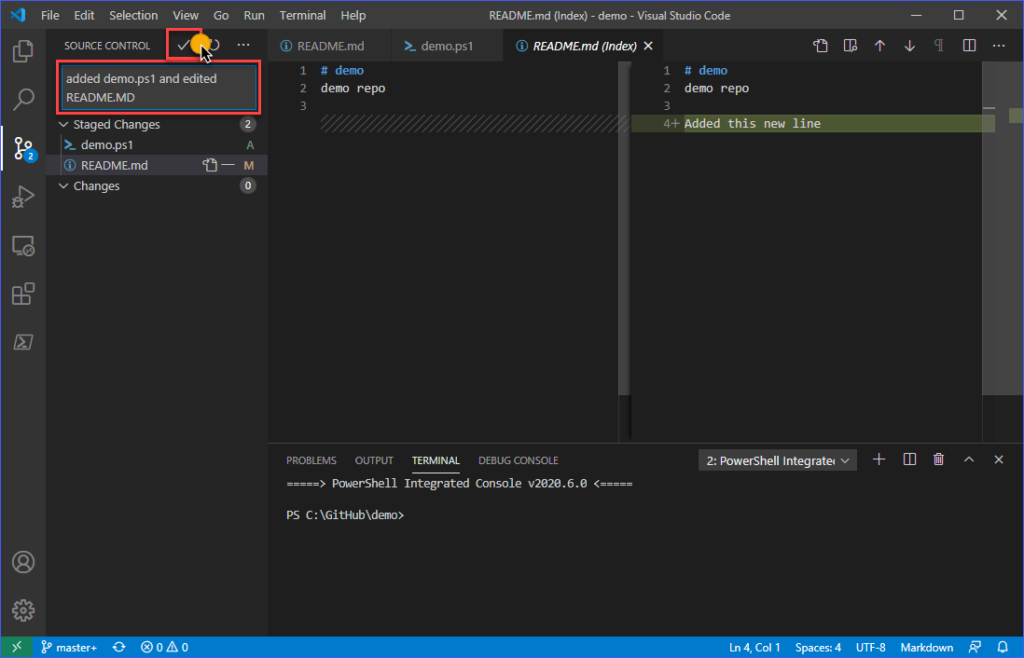
Following the staging of the changes, the next step is to commit the changes to the local repository. This is the final step before committing the changes to the remote GitHub repository.
You must include a meaningful message to the commit in order to commit the changes. Enter the message that you want to include in the commit, as shown in the example below. When you’re finished editing your message, press CTRL+ENTER or click the commit (✓) button to save the changes to your local repository.
Pushing Changes to GitHub
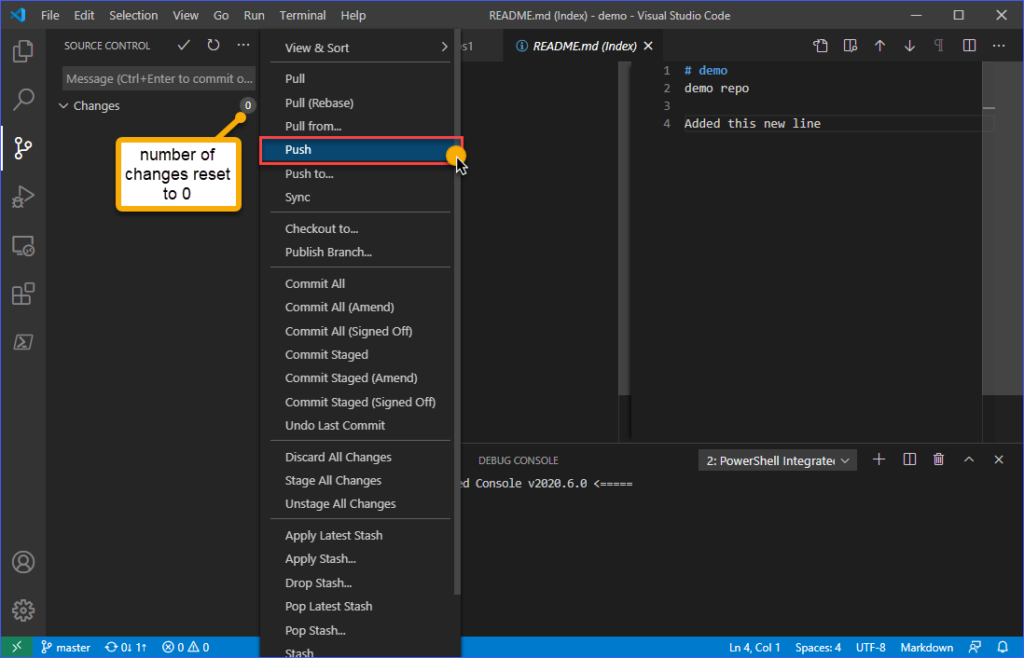
After saving the changes to the local repository, the Source Control view should show that the number of changes has been reset to zero (0).
Finally, click on the More actions (…) button and then on Push to push the changes from the local repository to the remote repository on GitHub.
Finally, if you want to double-check that the changes were pushed to GitHub, go to your GitHub repository and look for the last update details.
References:
https://i.ytimg.com/vi/qdec2M4NwT0/maxresdefault.jpg
https:// adamtheautomator.com/visual-studio-code-github-setup/#Staging_Committing_and_Pushing_Changes_to_GitHub