
In order to install WordPress in Ubuntu 20.04 with LAMP stack, you will need to complete the requirements before beginning to follow this steps.
Prerequisites:
- Initial server set up and ensure you have a non-root
sudouser. - Installed LAMP stack and phpMyAdmin
- Secure your site by TLS/SSL.
Step 1: Creating a MySQL Database and User for WordPress
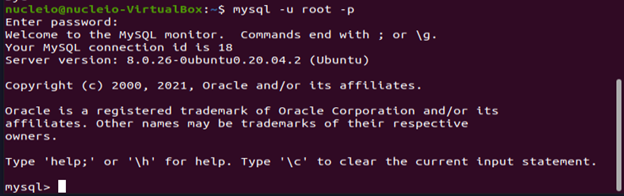
Log into the MySQL root (administrative) account.
$ mysql -u root -p
If you cannot access your MySQL database via root, as a sudo user you can update your root user’s password by logging into the database like so:
$ sudo mysql -u root
Replace password
mysql> ALTER USER 'root'@'localhost' IDENTIFIED WITH mysql_native_password BY 'new_password';
mysql>  EXIT
Log in again in MySQL by using the password you used
$ mysql -u root -p
Create the database for WordPress by typing the following. you can change the database name but in this guide, we will use “wordpress”
mysql> CREATE DATABASE wordpress DEFAULT CHARACTER SET utf8 COLLATE utf8_unicode_ci;
Create a separate MySQL user account that we will use exclusively to operate our new database which in our case, we will use “wordpressuser”
Let the database know that our wordpressuser should have complete access to the database we set up. You also need to change the password.
mysql> CREATE USER 'wordpressuser'@'%' IDENTIFIED WITH mysql_native_password BY 'password';
mysql> GRANT ALL ON wordpress.* TO 'wordpressuser'@'%';
mysql> FLUSH PRIVILEGES;
mysql> EXIT;
Step 2: Installing Additional PHP Extensions
We can download and install some of the most popular PHP extensions for use with WordPress by typing:
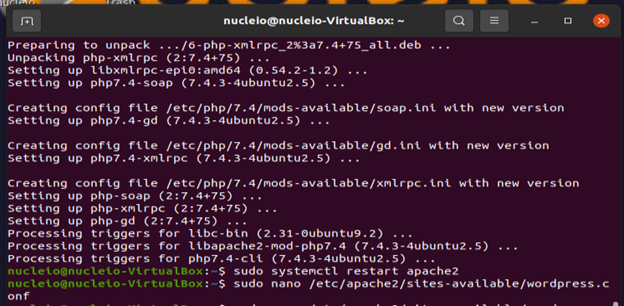
$ sudo apt update
$ sudo apt install php-curl php-gd php-mbstring php-xml php-xmlrpc php-soap php-intl php-zip

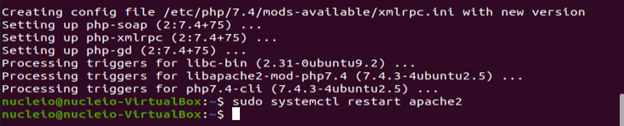
Type Y then restart Apache to load these new extensions
$ sudo systemctl restart apache2
Step 3: Adjusting Apache’s Configuration to Allow for .htaccess Overrides and Rewrites
We will use /var/www/html as the root directory of our WordPress install because we are using the 000-default.conf default configuration.
To enable .htaccess Overrides, open the Apache configuration file for your website
$ sudo nano /etc/apache2/sites-available/wordpress.conf
Add the following block of text inside the VirtualHost block in your configuration file, making sure to use the correct web root directory:
<Directory /var/www/html/>
    AllowOverride All
</Directory>
It should look like this
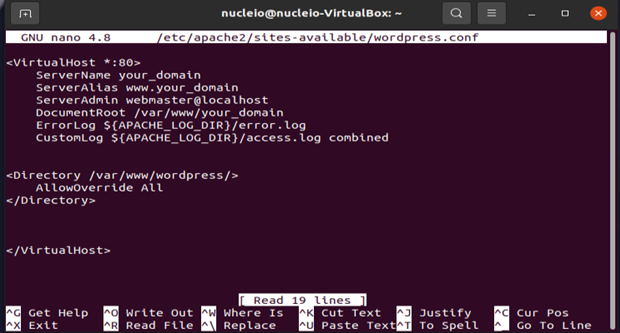
When you are finished, save and close the file. You can do this by pressing CTRL and X together, then Y, then ENTER.
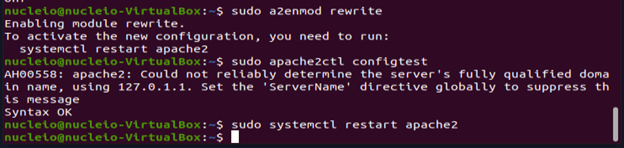
To enable the Rewrite Module and enabling the changes, type the following:
$ sudo a2enmod rewrite
$ sudo apache2ctl configtest
$ sudo systemctl restart apache2
Step 4: Downloading WordPress
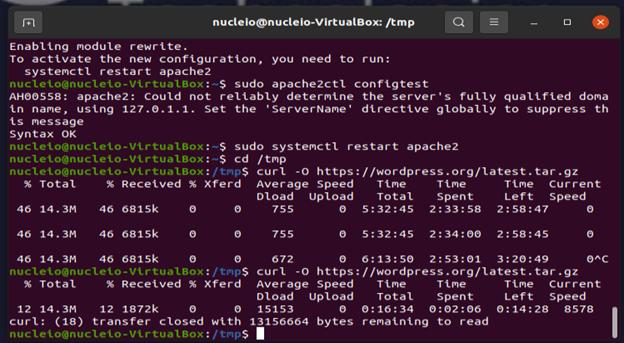
Change into a writable directory (we recommend a temporary one like /tmp) and download the compressed release.
 $  cd /tmp
 $  curl -O https://wordpress.org/latest.tar.gz
Wait until it reaches 100%. If it isn’t progressing, repeat the command.
Extract the compressed file to create the WordPress directory structure:
$ tar xzvf latest.tar.gz
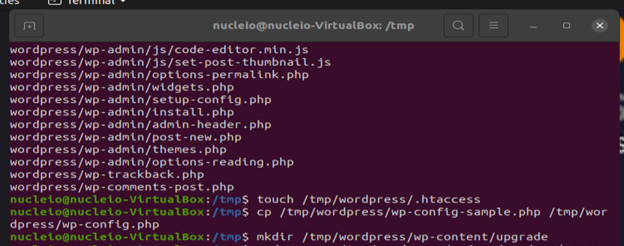
To move these files into our document root momentarily, we can add a dummy .htaccess file so that this will be available for WordPress to use later.
$  touch /tmp/wordpress/.htaccess
$  cp /tmp/wordpress/wp-config-sample.php /tmp/wordpress/wp-config.php
$  mkdir /tmp/wordpress/wp-content/upgrade
As it is stated in step 3, we will use /var/www/html because we are using the 000-default.conf default configuration.
$ sudo cp -a /tmp/wordpress/. /var/www/html
Step 5: Configuring the WordPress Directory
In Adjusting the Ownership and Permissions, update the ownership with the chown command which allows you to modify file ownership. Be sure to point to your server’s relevant directory which in our case, /var/www/html. We will also set the correct permissions on the WordPress directories and files using find command.
$  sudo chown -R www-data:www-data /var/www/html
$  sudo find /var/www/html/ -type d -exec chmod 750 {} \;
$  sudo find /var/www/html/ -type f -exec chmod 640 {} \;

To set up the WordPress Configuration file, need to make some changes to it. To generate your own secure values from the WordPress secret key generator, type the following and copy the whole generated results:
$ curl -s https://api.wordpress.org/secret-key/1.1/salt/

Open the WordPress configuration file
$ sudo nano /var/www/html/wordpress/wp-config.php
Find the section that contains the example values for those settings. Delete this section and replace it with the generated results you copied prior to this.
 define('AUTH_KEY',         'put your unique phrase here');
 define('SECURE_AUTH_KEY',  'put your unique phrase here');
 define('LOGGED_IN_KEY',    'put your unique phrase here');
 define('NONCE_KEY',        'put your unique phrase here');
 define('AUTH_SALT',        'put your unique phrase here');
 define('SECURE_AUTH_SALT', 'put your unique phrase here');
 define('LOGGED_IN_SALT',   'put your unique phrase here');
 define('NONCE_SALT',       'put your unique phrase here');
Once you paste the generated keys, modify some of the database connection settings at the beginning of the file. Make sure you add the last part define(‘FS_METHOD’, ‘direct’); .
. . .
 // ** MySQL settings - You can get this info from your web host ** //
 /** The name of the database for WordPress */
 define( 'DB_NAME', 'wordpress' );
 /** MySQL database username */
 define( 'DB_USER', 'wordpressuser' );
 /** MySQL database password */
 define( 'DB_PASSWORD', 'password' );
 /** MySQL hostname */
 define( 'DB_HOST', 'localhost' );
 /** Database Charset to use in creating database tables. */
 define( 'DB_CHARSET', 'utf8' );
 /** The Database Collate type. Don't change this if in doubt. */
 define( 'DB_COLLATE', '' );
 . . .
 define('FS_METHOD', 'direct');
Save and close the file when you are finished.
Step 6: Completing the Installation Through the Web Interface
In your web browser, navigate to your server’s domain name or public IP address:
https://server_domain_or_IP
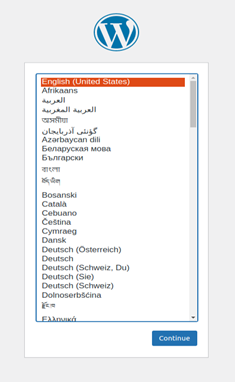
Select the language you would like to use and clock continue:
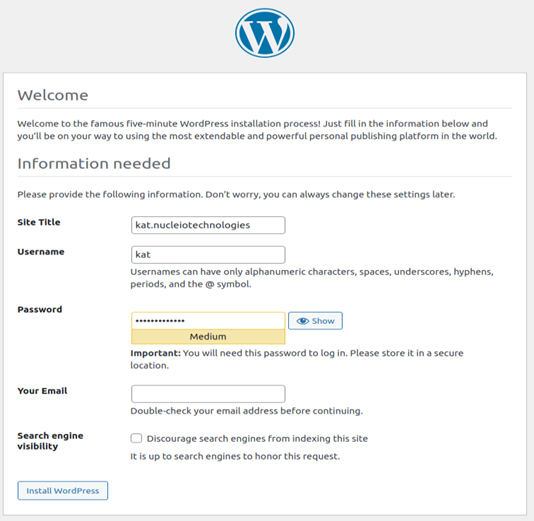
Select a name for your WordPress site and choose a username. It is recommended to choose something unique and avoid common usernames like “admin” for security purposes.
When you click ahead, you will be taken to a page that prompts you to log in:
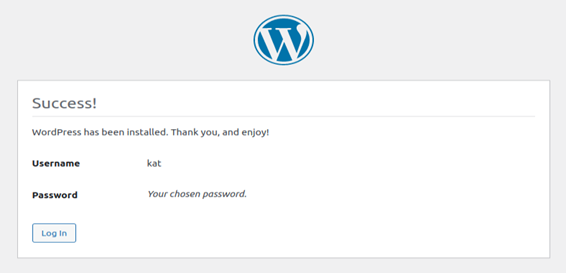
Log in and it will take you here:
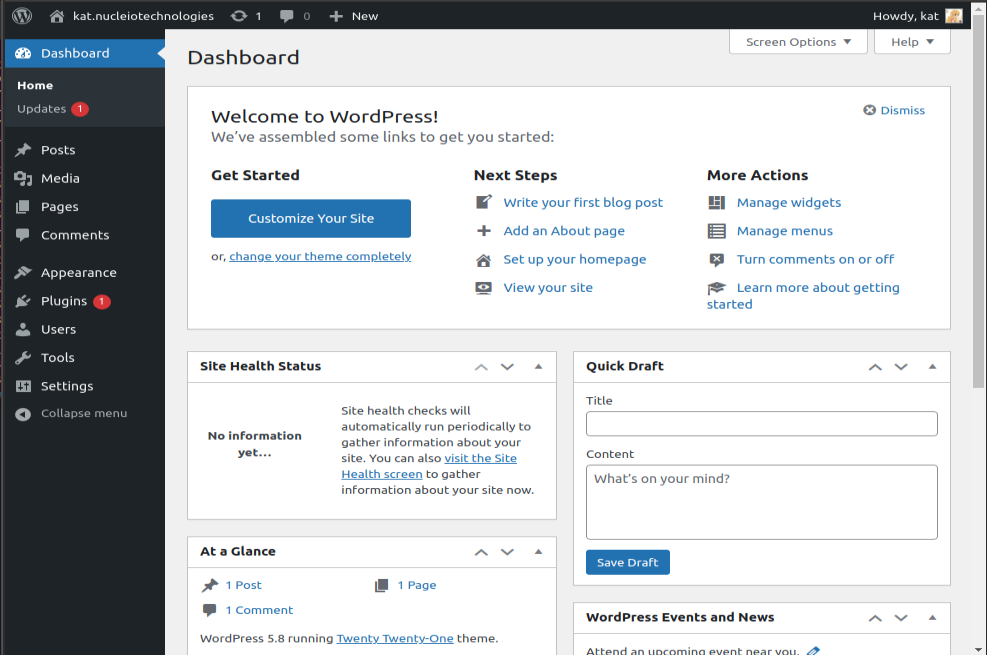
You can now explore the interface a bit to get acquainted with your new CMS and begin to design your WordPress website!